Skip to content
toastedrecipes.com
  • Home
  • Appetizers
  • Desserts
  • Salads
  • Breakfast
  • Dinner
  • Privacy Policy
  • Contact
  • About

Chef Theo

Asiago Chicken & Gnocchi Creamy Dinner Delight

June 18, 2025 by Chef Theo
- 1 lb boneless, skinless chicken breasts, cut into bite-sized pieces - 1 cup fresh or frozen gnocchi - 1 cup heavy cream - 1 cup grated Asiago cheese - 2 tablespoons olive oil - 3 cloves garlic, minced - 1 cup fresh spinach - 1 teaspoon Italian seasoning - Salt and black pepper to taste - Fresh basil leaves for garnish These ingredients make up the heart of the dish. Fresh ingredients bring out the best flavors. For example, using fresh spinach adds vibrant color and nutrition. The Asiago cheese offers a rich, nutty flavor that elevates your dish. To cook this dish, you will need a few key tools: - Large skillet - Sharp knife - Cutting board - Wooden spoon - Measuring cups These tools help you prepare the chicken and sauce with ease. A large skillet allows for even cooking. A sharp knife ensures clean cuts for the chicken. You might also find a garlic press handy for mincing the garlic quickly. Using the right tools makes cooking enjoyable and efficient. Enjoy your cooking process! To cook the chicken, heat olive oil in a large skillet over medium heat. Add the bite-sized chicken pieces, making sure they are seasoned well. Use salt, black pepper, and Italian seasoning for the best flavor. Cook the chicken for about 5 to 7 minutes until it turns golden brown and is fully cooked. Always check that the chicken reaches an internal temperature of 165°F to ensure safety. Once done, take the chicken out of the skillet and set it aside for later. For the creamy sauce, keep the skillet on medium heat. Start by adding minced garlic and sauté it for about one minute until it becomes fragrant. Then, pour in the heavy cream and let it come to a gentle simmer. Stir in the grated Asiago cheese next. Keep stirring until the cheese melts completely into the cream. This gives the sauce a smooth, rich texture that pairs perfectly with the chicken and gnocchi. When it comes to the gnocchi, you can choose between fresh or frozen. Fresh gnocchi cooks faster, usually around 2 to 3 minutes. If you're using frozen gnocchi, follow the package instructions for cooking time. Both types will add a delightful texture to your dish. Once the gnocchi is cooked, gently stir it into the creamy sauce. This will ensure that each piece is coated well. For the full recipe and detailed instructions, check the Full Recipe section. To get the right thickness in your sauce, adjust the cream. Start with one cup of heavy cream, as listed in the Full Recipe. If you want a thicker sauce, add more cheese or simmer the sauce longer. For a thinner sauce, add a splash of chicken broth or milk. Tasting during cooking is key. It helps you find the right balance of flavors. Keep tasting as you cook. This will guide you to adjust salt, pepper, or seasoning if needed. To boost flavors, consider adding more spices or herbs. Fresh thyme or rosemary can add depth. A pinch of red pepper flakes gives a nice kick. If you like lemon, a squeeze of juice brightens the dish. Pairing with wine can elevate your meal. A crisp white wine, like Sauvignon Blanc, works well. It complements the creaminess of the sauce. For sides, think about a simple green salad or roasted vegetables. These add freshness and contrast to the rich dish. {{image_2}} You can brighten up your Asiago chicken and gnocchi with extra veggies. Seasonal vegetables like zucchini, bell peppers, or cherry tomatoes work well. You can also use your favorites, like broccoli or peas. To add them, chop the veggies into bite-sized pieces. Sauté them in the skillet after cooking the chicken. This step adds color and flavor to your dish. Cook the veggies for about 3-5 minutes until they soften. Then, continue with the cream and cheese sauce. If you want to change the protein, consider these options. Shrimp, turkey, or even tofu can replace chicken. Each option brings its own flavor and texture. When using shrimp, cook for about 2-3 minutes until they turn pink. For turkey, use ground turkey and cook until no longer pink. If you opt for tofu, make sure to press it first and sauté until golden. Adjust cooking times based on the protein you choose to keep your dish tasty and safe. To store leftovers safely, let the dish cool down. Place it in an airtight container. This keeps the chicken and gnocchi fresh for up to three days. When reheating, use low heat on the stove. This helps maintain the creamy texture. Stir often to avoid sticking. You can also add a splash of cream if the sauce thickens too much. To freeze the dish effectively, let it cool completely first. Then, transfer it to a freezer-safe container. It can last for up to two months in the freezer. When you’re ready to enjoy it again, thaw it overnight in the fridge. Reheat slowly on the stove, adding a little cream for moisture. You might also use thawed leftovers in a soup or as a filling for a pasta bake. Asiago cheese is an Italian cheese made from cow's milk. It comes in two main types: fresh and aged. Fresh Asiago has a mild, creamy taste. Aged Asiago is sharper, with a rich, nutty flavor. Both types melt well, making them perfect for sauces. You will love how it adds depth to Asiago Chicken & Gnocchi. Yes, you can easily adapt this dish to be vegetarian. Simply omit the chicken and use extra vegetables. You might try mushrooms, zucchini, or bell peppers. Add these veggies to the skillet after the garlic. Cook until tender before adding the cream and Asiago cheese. This way, you still get that creamy goodness without meat. Pairing sides with Asiago Chicken & Gnocchi can elevate your meal. A fresh green salad with a light vinaigrette complements the rich flavors. Roasted vegetables, like asparagus or Brussels sprouts, add a nice crunch. Garlic bread is also a great choice; it helps soak up the creamy sauce. Enjoy experimenting with these side options! You learned how to create a delicious dish with chicken, gnocchi, and a creamy sauce. Fresh ingredients and the right tools make a difference. Remember to season well and adjust the cream for the right thickness. You can add veggies or swap out proteins for variety. Store leftovers safely, and don't forget to reheat gently. With these tips, you’ll impress everyone at the table. Enjoy the process and have fun cooking!

Are you ready to elevate your dinner game? In my latest post, Asiago Chicken & Gnocchi Creamy Dinner Delight, I’ll guide you through a rich and creamy dish that will …
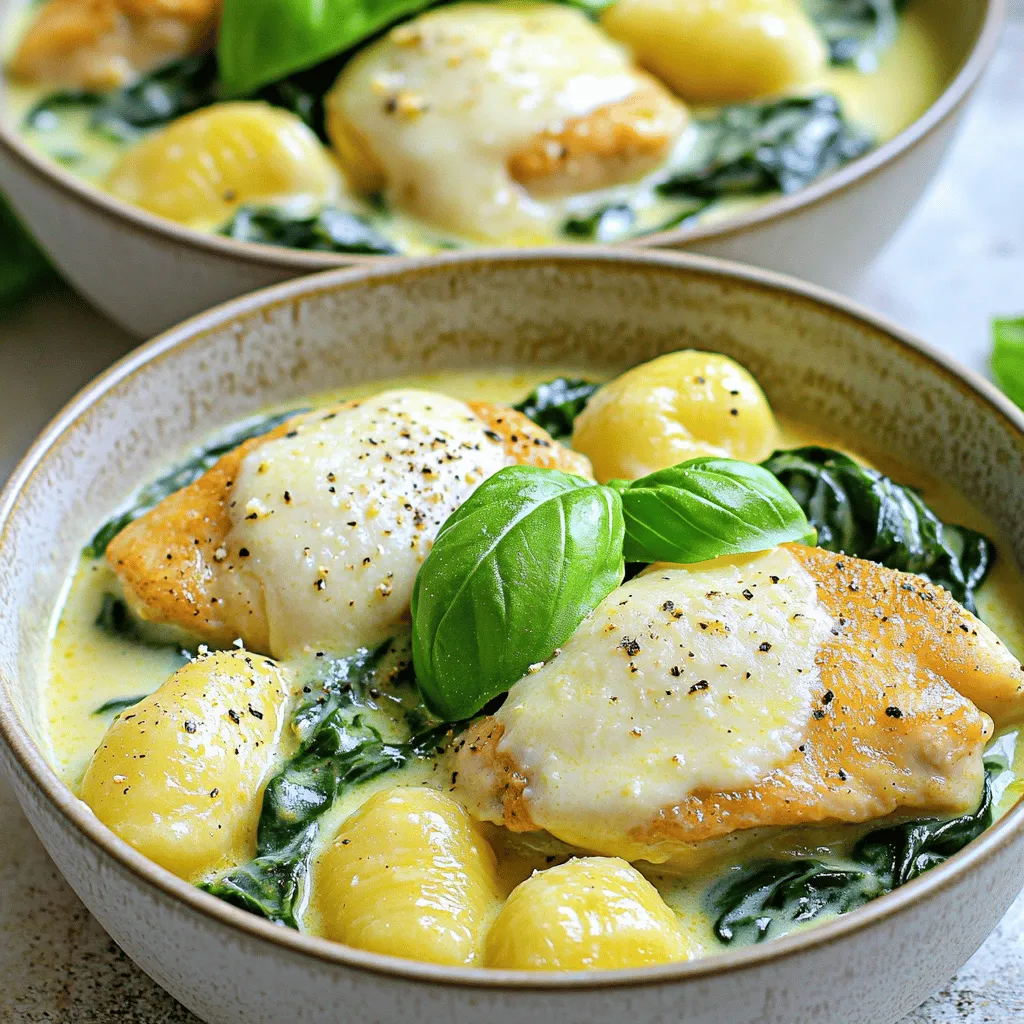
Read more

Categories Dinner

Easy Chicken Garlic Parmesan Pasta Delightful Recipe

June 18, 2025 by Chef Theo
- Chicken: 2 boneless, skinless chicken breasts, cut into bite-sized pieces - Pasta: 8 oz penne or fettuccine - Sauce Ingredients: 4 cloves garlic, minced, 1 cup heavy cream, 3/4 cup grated Parmesan cheese I love this dish because it uses simple, fresh ingredients that blend perfectly. The chicken adds protein and flavor, while the pasta gives it heartiness. Garlic brings a nice kick, and the cream and Parmesan make the sauce rich and creamy. - Olive oil, salt, pepper, and optional red pepper flakes - Fresh parsley for garnish I use olive oil to sauté the chicken and garlic. It adds a nice depth of flavor. Salt and pepper are key for seasoning. If you like heat, toss in some red pepper flakes. They give a nice warmth without overpowering the dish. Finally, sprinkle fresh parsley on top before serving. It adds color and freshness to the plate. This recipe is all about balance. You want the chicken to shine, but you also want the sauce to be rich. The Full Recipe gives you all the steps to make this dish a hit at your table. To start, fill a large pot with water and add salt. Bring the water to a boil. Then, add your pasta. I recommend penne or fettuccine for this dish. Cook the pasta based on the package instructions, usually about 8 to 10 minutes. Once cooked, reserve half a cup of pasta water. Drain the pasta and set it aside. Next, take a large skillet and heat two tablespoons of olive oil over medium-high heat. Add the cut chicken pieces to the skillet. Season them with salt and pepper. Cook for about 5 to 7 minutes until they turn golden brown and are cooked through. Once done, remove the chicken from the skillet and set it aside. In the same skillet, add the minced garlic and red pepper flakes, if you like some heat. Sauté these for about one minute until the garlic smells great. Then, pour in one cup of heavy cream. Bring it to a gentle simmer. This step will create a rich and creamy sauce. Now, it's time to make it creamy! Whisk in three-quarters of a cup of grated Parmesan cheese. Stir until the cheese melts and the sauce is smooth. Add the chicken and pasta back into the skillet. Toss everything together, and use the reserved pasta water to get your desired sauce thickness. Taste your dish and adjust the seasoning with more salt and pepper if needed. For a fresh touch, garnish with chopped parsley before serving. Your delicious Easy Chicken Garlic Parmesan Pasta is now ready to enjoy. For more details, check out the Full Recipe. For the best results, start with boiling salted water for your pasta. This enhances flavor. Cook your pasta just until al dente. This means it should still have a slight bite. Reserve about half a cup of pasta water before draining. This water helps adjust the sauce later. For the chicken, heat olive oil in a skillet over medium-high heat. Season the chicken with salt and pepper before cooking. Cook the chicken until it's browned, which takes about 5-7 minutes. Don’t overcook! This keeps the chicken juicy. To achieve a creamy sauce, add the heavy cream slowly. Stir it in well, allowing it to simmer gently. Then, whisk in the Parmesan cheese until it melts. This creates the creamy texture that everyone loves. If you want a lighter dish, you can use half-and-half instead of heavy cream. This keeps the creaminess but lowers the fat. For Parmesan cheese, try nutritional yeast for a dairy-free option. It adds a cheesy flavor without the milk. When it comes to pasta types, penne and fettuccine are great choices. You can also use spaghetti or rotini. They all hold onto the sauce well, making every bite flavorful. To boost flavor, consider adding fresh vegetables. Spinach or broccoli works well. Just toss them in during the last few minutes of cooking. Herbs like basil or thyme add freshness too. If you want some heat, adjust the spice levels by adding more or fewer red pepper flakes. For a milder dish, skip them altogether. For extra zing, a squeeze of lemon juice can brighten the flavors nicely. For the full recipe, check out the Easy Chicken Garlic Parmesan Pasta 🧄. {{image_2}} You can switch up the protein in this dish. If you want to change from chicken, try shrimp. Shrimp cooks fast and brings a sweet taste. Tofu is a great choice too. It soaks up flavors well, making it a tasty option for vegetarians. For veggie lovers, mushrooms or chickpeas can work wonders. Use mushrooms for a hearty bite. Chickpeas add a nice crunch and protein. Both options make this dish filling and fun. Looking to lighten things up? You can make a lighter sauce using milk or yogurt. This change keeps the creaminess but cuts down the fat. Adding lemon juice or fresh herbs can brighten it up, too. Herbs like basil or parsley add fresh flavors, making each bite more exciting. If you need gluten-free options, there are many pasta choices. Rice pasta or quinoa pasta is easy to find. Both can replace traditional pasta without losing taste. For a veggie twist, try zucchini noodles or cauliflower pasta. Zucchini noodles are low in carbs and add a fresh crunch. Cauliflower pasta is also great. It keeps the dish light and adds a unique flavor. Feel free to explore these variations to make the recipe your own! For the complete recipe, check out the [Full Recipe]. To store leftovers, place them in an airtight container. Make sure the pasta cools down before sealing. This way, it won’t steam inside. Properly stored, your Easy Chicken Garlic Parmesan Pasta lasts about 3 to 4 days in the fridge. Always check for signs of spoilage before enjoying your leftovers. If you want to freeze your pasta, follow these best practices. First, let the dish cool completely. Then, spoon it into freezer-safe bags or containers. Squeeze out the air before sealing to prevent freezer burn. This dish can stay fresh for about 2 to 3 months in the freezer. When you’re ready to eat, thaw it in the fridge overnight. Reheat it gently on the stove over low heat. Add a splash of water or cream to bring back the creaminess. Stir often to heat evenly and enjoy your meal just like when it was fresh! Making Easy Chicken Garlic Parmesan Pasta takes about 30 minutes. You spend around 10 minutes prepping ingredients. The cooking time is about 20 minutes. This quick recipe fits perfectly into a busy weeknight dinner. Yes, you can make this dish dairy-free. Use coconut cream instead of heavy cream. For cheese, try nutritional yeast or a dairy-free Parmesan. These swaps keep the creamy flavor while fitting your diet. You can serve this pasta with a fresh salad or garlic bread. A Caesar salad pairs well with the creamy pasta. Roasted veggies also complement the meal nicely. Try adding a side of steamed broccoli for extra nutrients. If your sauce is too thick, add a bit of reserved pasta water. Start with a few tablespoons and stir well. This helps loosen the sauce without losing flavor. You can also add a splash of broth or extra cream if needed. For the full recipe, check out the section above. In this post, we explored making Easy Chicken Garlic Parmesan Pasta. You learned about the main ingredients and their roles. We covered simple steps to cook pasta, sauté chicken, and create a creamy garlic sauce. I shared tips for cooking and flavor-enhancing options. You can even switch proteins or pasta types to suit your taste. Remember, this dish is flexible and easy to store or freeze. Enjoy crafting this delicious meal and share it with loved ones!

Looking for a quick, tasty meal that impresses? You’re in the right place! This Easy Chicken Garlic Parmesan Pasta combines tender chicken, creamy garlic sauce, and cheesy goodness. It’s perfect …

Read more

Categories Dinner

Garlic Parmesan Cheeseburger Bombs Irresistible Snack

June 18, 2025 by Chef Theo
- 1 lb ground beef - 1 cup shredded cheddar cheese - 1 cup shredded mozzarella cheese - 1/2 cup grated Parmesan cheese - 1 package refrigerated pizza dough - 1 teaspoon garlic powder - 1 teaspoon onion powder - 1/2 teaspoon salt - 1/4 teaspoon black pepper - 2 tablespoons fresh parsley, chopped - 1 tablespoon of minced garlic - Spicy ketchup or marinara sauce for dipping The main ingredients in Garlic Parmesan Cheeseburger Bombs create a rich and tasty treat. I like using 80/20 ground beef for a juicy burger. The mix of cheddar, mozzarella, and Parmesan cheese melts perfectly. The pizza dough gives it a soft, warm shell. Each bite bursts with flavor. For seasoning, I keep it simple but effective. Garlic powder adds depth. Onion powder enhances the taste. Salt and pepper bring out all the flavors. Fresh parsley adds a nice touch of color and freshness when you serve. You can add minced garlic for extra flavor. If you like a kick, spicy ketchup or marinara sauce makes great dips. These simple choices make your snack even more fun. For the full recipe, check out the link to see how to make these delicious bombs! - Preheat the oven and prepare baking sheet: Start by setting your oven to 375°F (190°C). Line a baking sheet with parchment paper to prevent sticking. This easy step makes clean-up a breeze. - Combine filling ingredients: In a large bowl, mix 1 lb ground beef, 1 cup shredded cheddar, 1 cup shredded mozzarella, and 1/2 cup grated Parmesan. Add 1 teaspoon garlic powder, 1 teaspoon onion powder, 1/2 teaspoon salt, and 1/4 teaspoon black pepper. If you want more flavor, toss in 1 tablespoon minced garlic. Mix well until everything is combined. - Roll out the pizza dough: Lightly flour your surface and unfold the refrigerated pizza dough. Roll it out slightly to make it thinner. This helps create a nice crust that cooks well. - Cut into squares and stuff the bomb: Cut the dough into 3-4 inch squares. Take a square and place about 2 tablespoons of the burger filling in the center. Fold the dough over the filling and pinch the seams to seal it. Make sure the meat is fully enclosed for the best bite. - Arrange on baking sheet and brush with olive oil: Place the stuffed dough balls seam side down on the prepared baking sheet. Brush the tops lightly with 1 tablespoon olive oil for a golden color when baked. - Bake until golden brown and cooked through: Bake in your preheated oven for 15-20 minutes. Look for a golden brown color, and make sure the filling reaches at least 160°F (71°C) inside. This ensures your bombs are not only tasty but safe to eat. These steps will lead you to delicious Garlic Parmesan Cheeseburger Bombs that are sure to impress! For the complete recipe, check out the Full Recipe. - Cook the meat until it reaches 160°F. This ensures it's safe to eat. - Every oven is different. Watch the bombs closely for a perfect bake. - Use cold pizza dough. It makes handling the dough much easier. - Let the filling cool before stuffing it into the dough. This keeps the dough from getting soggy. - Serve with tasty dipping sauces like marinara or spicy ketchup. - Garnish with fresh parsley and extra Parmesan for a beautiful look. {{image_2}} You can easily swap ground beef for ground turkey or chicken. This change makes the bombs lighter but still tasty. For cheese, try different blends like pepper jack or gouda. Each cheese adds a unique flavor twist that can surprise your taste buds. Want more kick? Add diced onions or jalapeños to your filling. This extra step brings a spicy and fresh taste. You can also sprinkle in Italian seasoning. This spice mix adds depth and a nice herbal note to your bombs. For a gluten-free version, use gluten-free pizza dough. This lets everyone enjoy the treat without worry. If you have vegetarians around, use meat substitutes like lentils or plant-based ground meat. Both options work well and keep the flavor strong. For the full recipe, check out the detailed instructions above. To store leftover Garlic Parmesan Cheeseburger Bombs, let them cool first. Place them in an airtight container. You can also use plastic wrap, if preferred. This method keeps them fresh for up to three days. Try to eat them within this time for the best taste. If you want to freeze pre-baked bombs, allow them to cool fully. Place them in a freezer bag, removing as much air as possible. You can freeze them for up to three months. For thawing, take them out and place them in the fridge overnight. To re-bake, preheat your oven to 375°F (190°C). Bake for about 10-15 minutes until warm and crispy. To keep your Garlic Parmesan Cheeseburger Bombs fresh, store them properly. Always check for signs of spoilage. If they smell off or look discolored, it’s time to toss them. Trust your senses; it's the best guide. Garlic Parmesan Cheeseburger Bombs can last up to three days in the fridge. Store them in an airtight container to keep them fresh. If you want to keep them longer, freeze the bombs. They can last up to three months in the freezer. Be sure to wrap them tightly in plastic wrap or foil. This helps prevent freezer burn. Yes! You can make the bombs ahead of time. Prepare the filling and stuff the bombs. Then, place them on a baking sheet and cover them tightly. Store them in the fridge for up to 24 hours before baking. This makes them great for gatherings. Just pop them in the oven when you’re ready to serve. You can serve these bombs with many tasty sides. Here are a few ideas: - Marinara sauce - Spicy ketchup - Fresh veggies with dip - Potato wedges - Salad These sides add fun flavors and textures. They also make your meal more complete. These Garlic Parmesan Cheeseburger Bombs are a fun and simple treat. We covered ingredients, cooking steps, and storage tips. Enjoying your creation is just the beginning. Remember, you can swap ingredients or add flavors for your taste. Store leftovers well for future snacks. These bombs will surely satisfy your cravings. Dive into your next cooking adventure with confidence!

Craving a snack that packs a punch? Try these Garlic Parmesan Cheeseburger Bombs! They combine juicy ground beef, rich cheeses, and a hint of garlic all wrapped in warm pizza …

Read more

Categories Appetizers

Cajun Potato Soup Flavorful Comfort in a Bowl

June 18, 2025 by Chef Theo
To make Cajun potato soup, you need the following ingredients: - 4 large potatoes, peeled and cubed - 1 medium onion, diced - 3 cloves garlic, minced - 1 bell pepper (any color), diced - 2 stalks celery, chopped - 4 cups vegetable broth - 1 cup whole milk (or coconut milk for a dairy-free option) - 1 tablespoon Cajun seasoning - 2 teaspoons paprika - 1 teaspoon thyme - Salt and pepper to taste - 3 tablespoons olive oil - 1 cup corn kernels (fresh or frozen) - ½ cup green onions, chopped (for garnish) - ½ cup shredded cheese (optional, for garnish) These ingredients come together to create a warm and rich soup that fills your belly with comfort. If you lack any ingredients, here are some easy swaps: - Potatoes: You can use sweet potatoes for a different flavor. - Vegetable broth: Chicken broth works well too. - Whole milk: Try almond or oat milk for a non-dairy option. - Corn: You can use peas if corn is not available. - Cajun seasoning: Make your own blend with paprika, cayenne, and oregano. These substitutions can help you create the soup with what you have on hand. Using fresh ingredients makes your soup taste better and adds nutrients. Fresh veggies bring a crisp flavor and bright color. They also provide vitamins and minerals that are great for your health. You can feel good knowing that your soup is not just tasty but good for you too. Plus, fresh ingredients often have a stronger flavor, making every bite delightful. Enjoying a bowl of Cajun potato soup means savoring comfort in its best form. Check out the Full Recipe for more details on how to make this comforting dish. To make Cajun potato soup, follow these easy steps. First, grab a large pot. Heat three tablespoons of olive oil over medium heat. Next, add one diced onion, one diced bell pepper, and two chopped celery stalks. Cook for about five to seven minutes, until they soften. Then, add three minced garlic cloves and stir for one more minute. This step adds great flavor. Now, toss in four cubed potatoes, one cup of corn, and four cups of vegetable broth. Also, mix in one tablespoon of Cajun seasoning, two teaspoons of paprika, one teaspoon of thyme, and salt and pepper to taste. Bring everything to a boil. Once boiling, lower the heat and cover the pot. Let it simmer for about 20 minutes. This makes the potatoes tender. After that, use an immersion blender to puree the soup. If you prefer some texture, leave a few chunks. If you don’t have an immersion blender, carefully transfer the soup to a regular blender in batches. When done blending, pour the soup back into the pot if you used a regular blender. Stir in one cup of whole milk or coconut milk. Adjust seasoning if needed and heat on low for five more minutes. Your soup is ready to serve! - When sautéing, stir the veggies often to avoid burning. - Use fresh garlic for the best taste. - For a thicker soup, blend longer or add more potatoes. - Always taste and adjust the seasoning at the end. - If you want a creamier soup, add more milk or cream. - Don’t skip the sauté step; it builds flavor. - Avoid overcooking the potatoes; they should be tender but not mushy. - If using a regular blender, let the soup cool slightly to avoid splatters. - Don’t forget to garnish! Green onions and cheese make a big difference. - Be careful with the Cajun seasoning; it can be spicy. Start small and adjust to your taste. By following these steps, you will create a delicious and comforting Cajun potato soup. For the complete recipe, check out the Full Recipe. To boost the flavor of your Cajun potato soup, use fresh herbs. Fresh thyme or parsley adds brightness. You can also try adding a splash of hot sauce for some heat. A squeeze of lemon juice at the end brings out all the flavors. If you want a deeper taste, try roasting your potatoes first. This adds a lovely, rich flavor. Texture is key in this soup. I like to leave some potato chunks for a hearty bite. Use an immersion blender to blend half the soup while keeping some pieces intact. This gives a nice balance of smooth and chunky. If you want a creamier soup, add more milk slowly until you reach your desired creaminess. Serve this soup hot for the best taste. I love pairing it with crusty bread or cornbread. A simple salad on the side adds freshness. You can garnish the soup with green onions and cheese for extra flavor. For a fun twist, top it with crispy bacon bits or a dollop of sour cream. Enjoy this comforting bowl of goodness with your favorite people! For the complete instruction, check out the Full Recipe. {{image_2}} To make this soup dairy-free, swap whole milk with coconut milk. Coconut milk adds creaminess and a hint of sweetness. You can also add a splash of lemon juice for zing. This option keeps the comforting feel of the soup without dairy. If you crave more heat, try adding diced jalapeños or crushed red pepper flakes. These spices enhance the Cajun flavor. You can also stir in hot sauce to taste. I love using Tabasco for its sharp kick. Feel free to mix in other veggies. Carrots and parsnips work great for added sweetness. You can also use sweet potatoes for a different twist. If you want extra protein, add cooked sausage or beans. This soup is flexible and fun to customize. For the full recipe, check out the details above! After enjoying your Cajun potato soup, let it cool down first. Once cooled, pour the soup into an airtight container. This helps keep the flavors fresh. Store it in the fridge for up to three days. If you think you will eat it later, freezing is a great option too. When you are ready to enjoy your soup again, heat it on the stove. Pour the desired amount into a pot. Warm it over medium heat, stirring often. This helps it heat evenly. If you prefer the microwave, transfer the soup to a microwave-safe bowl. Heat in short intervals, stirring in between. This prevents hot spots. To freeze your Cajun potato soup, use freezer-safe containers. Leave some space at the top, as the soup will expand when frozen. It is best to freeze it within a day or two of making it for the best taste. When you want to enjoy it again, move it to the fridge overnight to thaw. Then, reheat it on the stove or in the microwave. This soup can last up to three months in the freezer. For the full recipe, visit my Cajun potato soup guide. Cajun cuisine comes from Louisiana. It blends French, Spanish, and African flavors. It uses lots of herbs and spices. Cajun dishes often feature meats, seafood, and rice. This style of cooking focuses on bold flavors and hearty meals. Cajun potato soup is a great example. It’s rich, warm, and full of spice. Yes, you can use various potatoes. Russet potatoes work well for a creamy texture. Yukon Gold potatoes add a buttery flavor. Red potatoes hold their shape better but are still soft. Each type brings a unique taste to the soup. Feel free to mix and match for fun flavors. To spice up the soup, add more Cajun seasoning. You can also mix in hot sauce for heat. Try diced jalapeños or crushed red pepper flakes. Each of these can boost the spice level. Adjust to suit your taste. Enjoy the warmth that comes from the heat! For the full recipe, check out the detailed section above. Using fresh ingredients is key for great flavor. We explored the essential components and substitutions you can make. I shared step-by-step cooking tips to avoid common mistakes. Remember, small tweaks can change outcomes, enhancing both texture and taste. For dietary needs, I suggested tasty variations, including dairy-free options. Proper storage can keep your leftovers fresh. With these insights, you can enjoy delicious meals while impressing your family. Cooking can be fun and rewarding with the right tools and knowledge.

Welcome to the cozy world of Cajun Potato Soup—where every bowl offers warmth and flavor you can’t resist. With rich spices and hearty potatoes, this soup is comfort food at …

Read more

Categories Dinner

Savory Spaghetti & Spinach with Sun-Dried Tomato Cream Sauce

June 18, 2025 by Chef Theo
- 8 oz spaghetti - 2 cups fresh spinach, washed and chopped - 1 cup sun-dried tomatoes, chopped - 1 cup heavy cream - 1 tablespoon olive oil - 2 cloves garlic, minced - 1/2 cup grated Parmesan cheese - 1/4 teaspoon red pepper flakes (optional) - Salt and pepper to taste - Fresh basil leaves, for garnish When I make this dish, I start with the main ingredients. The spaghetti forms the base. I love using fresh spinach for its bright color and nutrients. Sun-dried tomatoes add a rich, tangy flavor that pairs well with the cream. Heavy cream brings all the flavors together and makes the sauce luscious. Next, I move on to the seasonings. Garlic is a must for that aromatic kick. Parmesan cheese gives depth and a salty touch. If you like heat, add red pepper flakes. I always season with salt and pepper to bring out the tastes. This dish is not just easy to prepare, but it also looks vibrant on the plate. The green spinach, red tomatoes, and creamy sauce create a feast for the eyes. You can find the full recipe to guide your cooking adventure. First, bring a pot of salted water to a boil. Use enough water to allow the spaghetti to move freely. Add 8 ounces of spaghetti to the boiling water. Cook it according to the package instructions until it reaches al dente. This usually takes about 8 to 10 minutes. When done, drain the spaghetti, but save about 1/2 cup of the pasta water for later. Next, take a large skillet and heat 1 tablespoon of olive oil over medium heat. Once the oil is warm, add 2 minced garlic cloves. Sauté the garlic for about 1 minute until it gives off a nice aroma. Now, stir in 1 cup of chopped sun-dried tomatoes. Cook these for another 2 to 3 minutes. This step allows the tomatoes to soak up the garlic flavor. Now it’s time to make the sauce creamy. Pour in 1 cup of heavy cream and stir well. Bring this mixture to a gentle simmer. Add in 1/2 cup of grated Parmesan cheese. Stir until the cheese melts and blends into the sauce. Then, toss in the 2 cups of chopped spinach. Cook until it wilts, about 2 to 3 minutes. If the sauce feels too thick, add a little reserved pasta water until it reaches your desired consistency. Finally, mix in the cooked spaghetti, tossing it until every strand is coated. Season with salt, pepper, and red pepper flakes if you want some heat. Enjoy your savory spaghetti with spinach and sun-dried tomato cream sauce! For a complete guide, check the Full Recipe. To make great spaghetti, start by using a large pot. Fill it with water and add salt. Salt helps the pasta gain flavor as it cooks. Bring the water to a boil before adding the spaghetti. Cook it until it is al dente, which means it should still have a slight bite. This texture is key! After cooking, drain the spaghetti but save some pasta water. You will use it later to adjust your sauce. For a creamy sauce, use heavy cream. Heat it gently to avoid boiling. Stir in the grated Parmesan cheese until it melts into the cream. This step is what makes the sauce rich and smooth. If the sauce becomes too thick, add a splash of the reserved pasta water. This will help to loosen it up and make it easier to coat the spaghetti. When plating your dish, don’t forget the basil. Fresh basil adds color and a lovely aroma. Tear a few leaves and sprinkle them on top right before serving. For cheese, consider using extra Parmesan or even a sprinkle of feta for a twist. The cheese not only adds flavor but also makes the dish look more appealing. Serve it hot for the best taste! {{image_2}} You can add protein to this dish easily. Grilled chicken or shrimp makes it heartier. Simply cook your protein of choice before adding it to the spaghetti. You can also try vegetarian options like beans or tofu. Both add protein and blend well with the flavors. To boost flavor, consider incorporating fresh herbs. Basil, parsley, or thyme work great. You can also experiment with different cheeses. While Parmesan is classic, try feta or goat cheese for a tangy twist. These options add depth and richness to your dish. If you need a dairy-free version, use coconut cream or a nut-based cream. This keeps the sauce creamy without dairy. For those avoiding gluten, try gluten-free spaghetti made from rice or lentils. These alternatives ensure everyone can enjoy this tasty meal. To keep your spaghetti and spinach with sun-dried tomato cream sauce fresh, use an airtight container. Make sure to let the dish cool down first. Store it in the fridge for up to three days. If you want to keep it longer, consider freezing. This dish can last up to three months in the freezer. Just remember to label the container with the date. When you're ready to enjoy your leftovers, reheat them gently. I recommend using a skillet over low heat. This method warms the dish evenly while keeping the flavor intact. If the sauce looks thick, add a splash of milk or reserved pasta water. This helps bring back the creamy texture. Stir often to ensure even heating and to prevent sticking. Enjoy your meal just as much the second time around! Yes, you can use dried spinach. However, the texture and flavor will change. Dried spinach lacks the bright, fresh taste of its fresh counterpart. It also loses the tender bite when cooked. If you choose dried spinach, soak it in water first. This will help soften it. You’ll need less dried spinach than fresh. Use about one-quarter of the amount. To spice up your sauce, add red pepper flakes. Start with a pinch and taste. You can always add more. If you like heat, consider using chili powder or cayenne pepper. Another option is to mix in diced jalapeños. For a unique twist, try adding hot sauce. This will give you control over the heat level. Yes, you can prep this dish ahead. Cook the spaghetti and sauce, then store them separately. Keep the sauce in the fridge and the pasta in an airtight container. This will help keep the pasta from getting soggy. When you’re ready to eat, reheat the sauce on low heat. Add a splash of water if it’s too thick. Toss in the spaghetti when the sauce is warm. This dish pairs well with a fresh salad. A simple mixed greens salad with a light vinaigrette works great. You can also serve garlic bread on the side. It adds a nice crunch and complements the creamy sauce. For a heartier meal, roasted vegetables or grilled chicken make tasty options. Enjoy the full recipe for more ideas! This blog post covered how to create a delightful spaghetti dish with spinach and sun-dried tomatoes. You learned about the key ingredients, step-by-step cooking instructions, and helpful tips for the best results. Also, I shared ways to customize the dish for different diets. Remember, cooking is about creativity and enjoying the process. So, experiment with flavors and make this dish your own. Happy cooking!

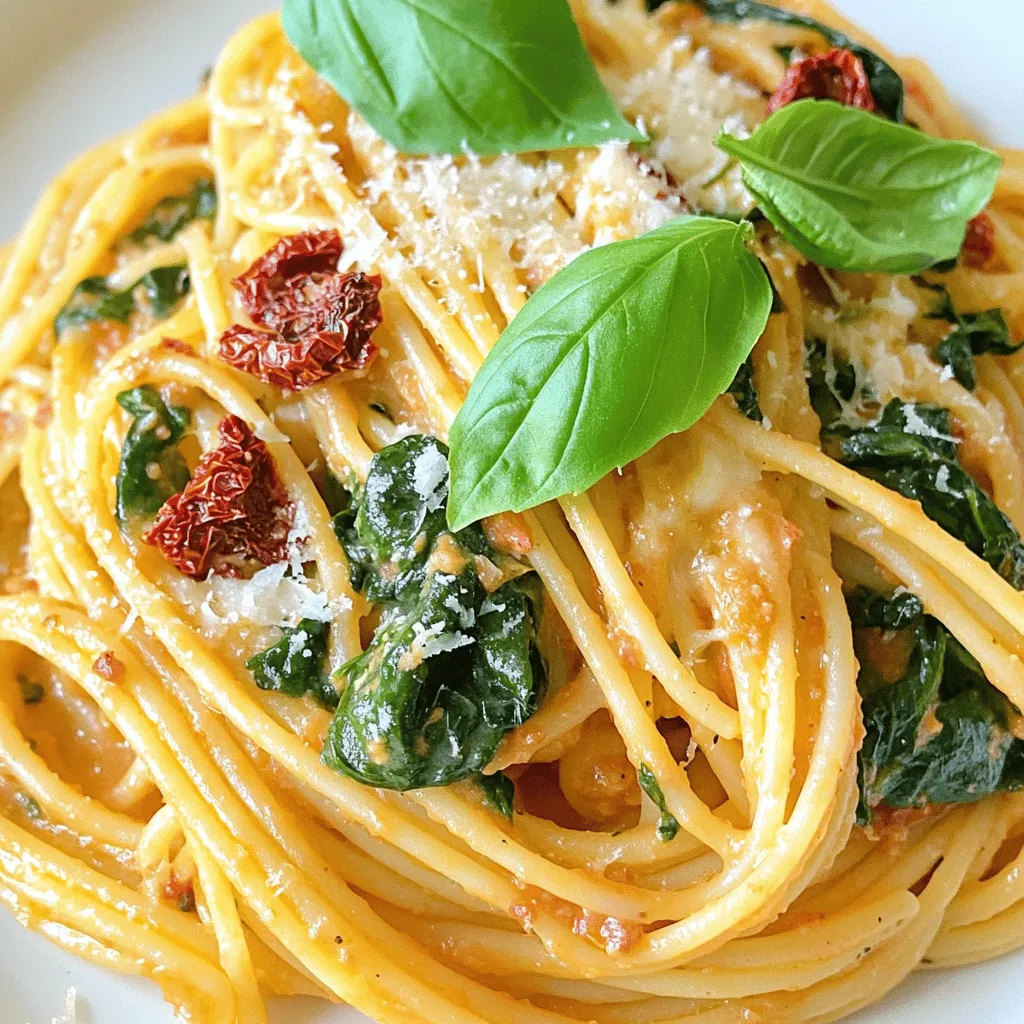
Are you ready to elevate your pasta game? In this blog post, I’ll show you how to make Savory Spaghetti & Spinach with Sun-Dried Tomato Cream Sauce. This dish blends …
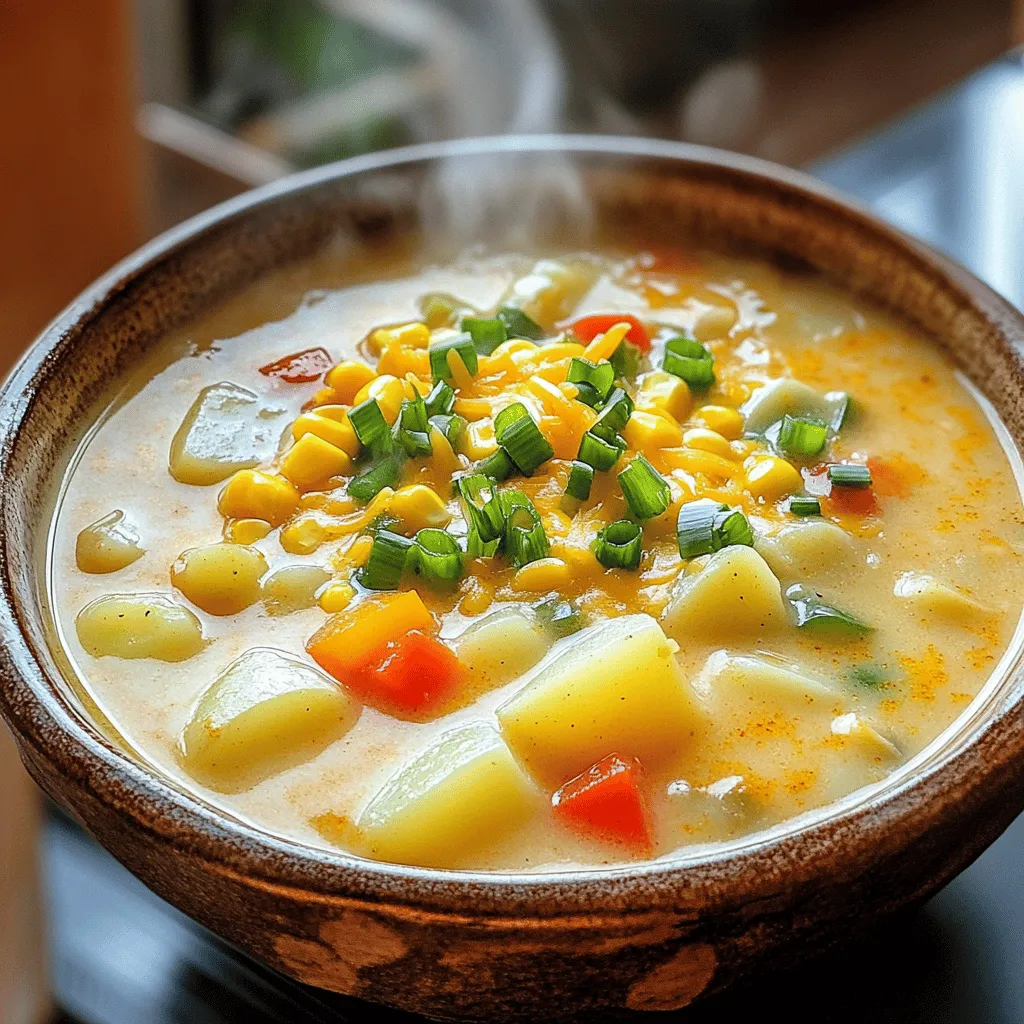
Read more

Categories Dinner

Crock Pot Creamy Cajun Chicken Pasta Simple Delight

June 18, 2025 by Chef Theo
- 1 lb boneless, skinless chicken breasts - 8 oz penne pasta - 1 cup heavy cream - 1 cup chicken broth - 2 tablespoons Cajun seasoning - 1 medium onion, finely chopped - 2 cloves garlic, minced - 1 teaspoon dried oregano - Salt and pepper to taste - 1 cup shredded Parmesan cheese - Fresh parsley, chopped The main ingredients in this dish are simple yet flavorful. You begin with chicken breasts, which bring protein and moisture. The penne pasta acts as the perfect vehicle for the creamy sauce. Heavy cream adds richness, while chicken broth deepens the flavor. Next, we have our seasonings and aromatics. Cajun seasoning gives this dish its kick. The onion and garlic add depth and aroma. Oregano adds a herby touch, while salt and pepper balance the flavors. For garnishes, shredded Parmesan cheese melts into the dish, enhancing its creaminess. Fresh parsley adds a pop of color and freshness. Each ingredient plays a key role in making this dish a creamy, Cajun delight. If you want the full recipe, check it out for step-by-step details! Start by seasoning the chicken. Place the chicken breasts in the bottom of your crock pot. Use Cajun seasoning, oregano, salt, and pepper. Make sure to coat the chicken well. This adds flavor that seeps into every bite. Next, layer the chopped onion and minced garlic over the chicken. This adds depth to your dish. The heat will soften the onions and garlic, creating a rich aroma. Top it off with the diced tomatoes. Spread them evenly for balanced flavor. Now, pour in the chicken broth and heavy cream. This mixture makes the sauce creamy and rich. Carefully ensure everything is well covered. The liquid helps cook the chicken and makes it tender. Cover the crock pot with the lid. Set it to cook on low for 4-5 hours or on high for 2-3 hours. Cooking on low gives the best taste. The chicken should be tender and easy to shred when done. About 30 minutes before serving, cook the penne pasta. Follow the package instructions until it is al dente. Drain the pasta and set it aside. This timing ensures the pasta stays firm and does not become mushy. Once the chicken is cooked, shred it directly in the crock pot using two forks. Stir it well to mix with the sauce. This step enhances the dish's texture and flavor. Add the cooked pasta to the crock pot, stirring everything to combine. If the sauce feels too thick, add a splash of chicken broth. This helps reach the perfect creamy consistency. Finally, stir in the shredded Parmesan cheese until it melts into the sauce. This adds richness and depth to the dish. Serve it in deep bowls, garnished with fresh parsley. For an extra treat, enjoy it with crusty garlic bread. For the full recipe, check out [Full Recipe]. To bring out the best in your dish, adjust the seasoning levels. Start with the Cajun seasoning. Taste the dish before serving. If it needs more kick, add a bit more. You can also add a splash of lemon juice. This small step brightens the flavors and adds a fresh touch. For a creamy consistency, stir well after adding the cheese. If it seems too thick, add a little chicken broth to loosen it up. Using fresh herbs instead of dried can also elevate your dish. Fresh parsley adds a vibrant taste and color. Dried herbs work, but fresh gives a better flavor. For slow cooker settings, cooking on low for 4-5 hours works best. If you're short on time, high for 2-3 hours is fine too. To ensure the chicken is tender, check that it shreds easily with a fork. If it’s tough, it likely needs more cooking time. {{image_2}} You can change the protein in this dish. Shrimp works great in place of chicken. Just add it during the last hour of cooking. The shrimp will cook fast and soak up the flavors. You can also use sausage. Slice it and add it with the chicken. If you want a veggie option, try mushrooms or tofu. Sauté chopped mushrooms or cubed tofu before adding them to the pot. Both will add a nice texture and flavor. Pasta is key to this recipe, but you can switch it up. Fettuccine is a nice choice if you want broader noodles. Gluten-free pasta is also an option for those with dietary needs. You can cook pasta separately for a firmer bite. Just follow the package instructions. Then mix it in with the sauce before serving. Cooking it in the crockpot can make it softer, so choose what you prefer. Want more heat? Just add more Cajun seasoning! Start with a little and taste as you go. You can also use fresh herbs like basil or thyme instead of dried oregano. This change can add a fresh flavor. If you love garlic, toss in more minced cloves for a kick. Each of these tweaks can make this dish your own. After you finish cooking your Crock Pot creamy Cajun chicken pasta, let it cool down. Place the dish in a shallow container. This helps it cool faster and keeps it fresh. Use airtight containers to keep the flavors locked in. Glass or plastic containers with lids work best. This will help you keep your dish tasty and safe. To freeze this creamy pasta, let it cool completely first. Then, scoop it into freezer-safe bags or containers. Make sure to remove as much air as possible. This prevents freezer burn. You can freeze it for up to three months. When you want to eat it, thaw it in the fridge overnight. Heat it gently on the stove or in the microwave. Stir in a splash of chicken broth if it seems dry. In the fridge, your creamy Cajun chicken pasta lasts for about three to four days. Make sure to keep it covered. Always check for signs of spoilage. If it smells off or has mold, throw it away. Trust your senses; they are your best friends in the kitchen. You can use several options if you want to swap heavy cream. Here are a few: - Milk and Butter: Mix 3/4 cup milk with 1/4 cup melted butter. - Greek Yogurt: Use plain Greek yogurt for a thick texture. - Coconut Milk: This adds a nice flavor and is dairy-free. For non-dairy substitutes, try these: - Almond Milk: A lighter option that works well. - Cashew Cream: Blend soaked cashews with water for a creamy texture. - Silken Tofu: Blend it until smooth for a creamy base. These alternatives can help you enjoy the dish without heavy cream. To check if your chicken is done, look for these signs: - Internal Temperature: The chicken should reach 165°F (75°C). - Juices: Clear juices run when you cut into it. - Texture: Chicken should be tender and shred easily. For perfect texture, follow these tips: - Avoid Overcooking: Check the chicken a bit early to prevent dryness. - Use a Thermometer: This tool gives you the best reading. These checks will ensure your chicken is tasty and safe to eat. Yes, you can prepare this dish in advance. Here are some meal prep strategies: - Prep Ingredients: Chop veggies and season chicken the night before. - Cook in Advance: Make the dish and store it in the fridge. For optimal reheating, consider these tips: - Reheat Slowly: Use low heat in a pot or microwave to warm it. - Add Liquid: If the pasta is dry, add a splash of broth or cream. These steps help keep your dish fresh and delicious when served later. This dish combines simple ingredients for bold flavor. You learned how to cook chicken, pasta, and creamy sauce step by step. With tips to adjust spice and texture, everyone can enjoy it. Feel free to swap proteins or pasta types to fit your taste. Remember to store leftovers properly to enjoy them later. Make this meal your own and have fun experimenting in the kitchen. Happy cooking!

Get ready to spice up your dinner with my Crock Pot Creamy Cajun Chicken Pasta! This dish brings bold Cajun flavors right to your table with just a few simple …

Read more

Categories Dinner

Ultimate Taco Meat Recipe Packed with Flavor

June 17, 2025 by Chef Theo
- 1 lb ground beef (or ground turkey for a lighter option) - 1 tablespoon olive oil - 1 small onion, finely chopped - 3 cloves garlic, minced - 1 bell pepper, diced (any color) - 1 teaspoon chili powder - 1 teaspoon cumin - 1 teaspoon smoked paprika - ½ teaspoon oregano - ½ teaspoon cayenne pepper (adjust to taste) - Salt and pepper to taste - 1 cup beef broth (or vegetable broth) - 1 tablespoon tomato paste - Fresh cilantro, chopped (for garnish) - Lemon or lime wedges (for serving) This recipe gives you all the flavors you crave in a taco. You can choose ground beef or turkey for your base. Both options work well. I love using beef, as it adds a rich taste. The olive oil helps to sauté the vegetables and brings everything together. Chopping onions and bell peppers adds crunch and sweetness. The garlic gives depth to the dish. The right mix of spices is key for flavor. Chili powder, cumin, and smoked paprika create warmth. Oregano adds earthiness, while cayenne brings a kick. Adjust the cayenne for your spice level. Broth adds moisture and richness, making the meat juicy. Tomato paste thickens the sauce and enhances the color. Fresh cilantro on top adds brightness. Serving with lemon or lime wedges gives you a zesty finish. Gather all these ingredients for the ultimate taco meat. Follow the full recipe for easy cooking steps and enjoy a tasty meal! 1. Heat the oil: Start by heating 1 tablespoon of olive oil in a large skillet over medium heat. This step is key. It helps cook the onions and peppers evenly. 2. Sauté the veggies: Add the chopped onion and bell pepper to the skillet. Cook them for about 5 minutes. You want them to soften. Stir occasionally to prevent burning. 3. Add garlic: Next, stir in 3 minced garlic cloves and cook for 1 minute. Garlic adds a great aroma and flavor. 4. Brown the meat: Now, add 1 pound of ground beef or turkey. Break it up with a spatula. Cook for 6 to 8 minutes until it’s browned. If there’s extra fat, drain it. This keeps your taco meat leaner. 5. Season the meat: Sprinkle in the spices: 1 teaspoon each of chili powder, cumin, and smoked paprika, plus ½ teaspoon each of oregano and cayenne pepper. Add salt and pepper to taste. Stir well so the meat is coated in spices. 6. Add broth and tomato paste: Pour in 1 cup of beef broth and 1 tablespoon of tomato paste. Stir to mix everything. Bring the mixture to a boil, then reduce the heat to low. 7. Simmer for flavor: Let it simmer for 10 to 15 minutes. This step helps the flavors blend and the sauce thicken. Stir occasionally to keep it from sticking. 8. Taste and adjust: After simmering, taste your taco meat. If you want more heat, add more cayenne pepper. Don’t be shy about adjusting the seasonings! 9. Rest the meat: Remove the skillet from heat. Let it sit for a few minutes. This resting time allows the flavors to meld together nicely. 10. Serve it up: Enjoy your taco meat in warm taco shells or tortillas. Garnish with fresh cilantro and serve with lemon or lime wedges for a tasty twist. Following these steps will give you taco meat that’s full of flavor. For the complete details, check out the Full Recipe. Enjoy cooking! To boost the flavor of your taco meat, spice adjustments can make a big difference. If you like heat, add more cayenne pepper. If you want depth, try adding some chili flakes or chipotle powder. These spices pack a punch and enhance the taste. You can also mix in extra ingredients for variety. For example, add corn for sweetness or black beans for protein. Diced tomatoes can add freshness, while a splash of lime juice brightens the flavor. You can even toss in some jalapeños if you enjoy spicy food. When cooking taco meat, avoid common pitfalls. One mistake is not browning the meat well. Good browning adds depth to the flavor. Also, be careful not to overcook the garlic. It can turn bitter quickly. Lastly, remember to taste as you go. Adjust the seasoning to suit your palate. For the full recipe, check out the Ultimate Taco Meat Fiesta. {{image_2}} You can switch up the meat in your taco recipe. Use shredded chicken or ground turkey for a lighter meal. Both options taste great and keep the dish fresh. If you want more plant-based options, try using lentils or black beans. They add great flavor and nutrition. Beans and lentils also make the tacos hearty without the meat. Taco shells come in many styles. You can use soft tortillas or crunchy shells based on your taste. Serve the taco meat with fresh toppings like lettuce, tomatoes, or cheese. You can also add avocado or salsa for extra flavor. If you have leftovers, mix the taco meat into a salad or a burrito bowl. You can also use it to make nachos. Just layer chips, cheese, and the taco meat, then bake until hot. This way, you can enjoy your taco meat in different ways! To keep your taco meat fresh, store it in an airtight container. This helps prevent moisture loss and keeps flavors intact. Let the meat cool down before sealing it up. Place it in the fridge if you plan to eat it within three to four days. If you want to save it for later, freezing is a great option. Divide the meat into portions. Use freezer-safe bags or containers. Press out any air before sealing. Label them with the date. You can freeze taco meat for up to three months. When it’s time to enjoy your leftovers, reheating properly is key. The best method is to use a skillet. Heat over medium-low heat. Add a splash of water or broth to keep it moist. Stir occasionally until heated through. This keeps your taco meat juicy and full of flavor. You can also use the microwave. Place the meat in a microwave-safe dish. Cover it with a damp paper towel to trap steam. Heat in short bursts, stirring in between, until warm. This method is quick and easy, but it might not keep the meat as juicy as the skillet method. You can use ground turkey or chicken. Both provide a lighter option. You can also try crumbled tofu or tempeh for a plant-based choice. These options still give you great flavor and texture. To adjust spice levels, add more or less cayenne pepper. For mild flavor, reduce it to ¼ teaspoon. If you like heat, add a bit more. You can also include fresh jalapeños or hot sauce to kick it up a notch. Yes! You can make this taco meat ahead of time. Cook it and let it cool. Store it in an airtight container in the fridge for up to three days. You can also freeze it for up to three months. When ready, just reheat before serving. Great toppings enhance your taco experience! Try fresh cilantro, diced tomatoes, or sliced avocados. Shredded cheese and sour cream are also popular. Don't forget lime wedges for a zesty touch. For extra crunch, add lettuce or tortilla strips. You can mix and match based on your taste! For the full recipe, check out the Ultimate Taco Meat Fiesta. This post laid out how to make tasty taco meat. We covered key ingredients, step-by-step methods, and helpful tips. You learned how to enhance flavors and switch up proteins for variety. Plus, we discussed storing and reheating leftovers for another meal. Remember, the magic is in fresh ingredients and the right spices. Use this guide to impress at your next meal. Get cooking and enjoy your flavorful dish!

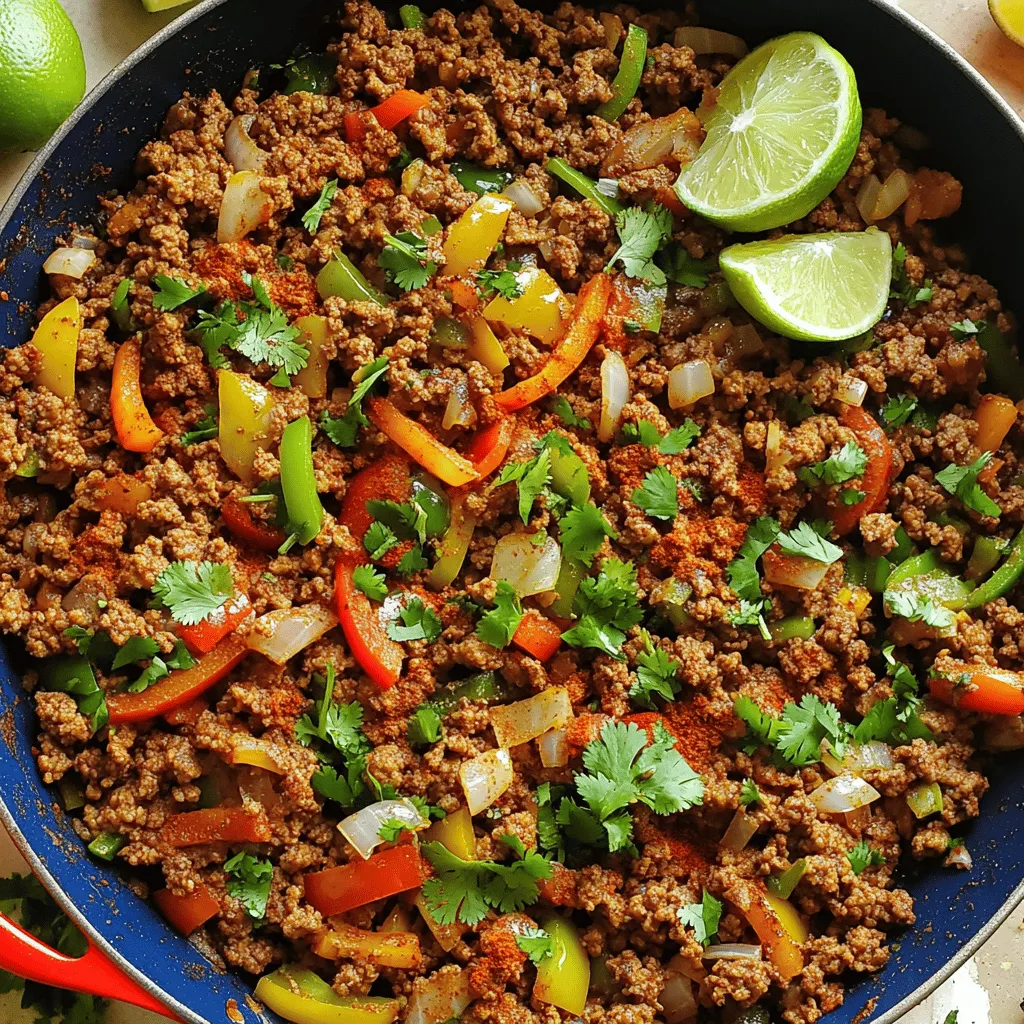
Are you ready to elevate your taco night? I’ve crafted the ultimate taco meat recipe that bursts with flavor. Packed with spices, veggies, and your choice of protein, this dish …

Read more

Categories Dinner

Pan-Fried Chicken Dumplings Easy and Flavorful Recipe

June 17, 2025 by Chef Theo
- 1 lb ground chicken - 1 cup finely chopped cabbage - 1/4 cup grated carrots - 3 green onions, finely chopped - 2 cloves garlic, minced - 1-inch piece of ginger, grated - 2 tablespoons soy sauce (low-sodium) - 1 tablespoon sesame oil - Salt and pepper to taste - 30 round dumpling wrappers - 1/4 cup flour (for dusting) - 1/4 cup water (for steaming) - Cooking oil (for frying) The main ingredients in this recipe give your dumplings a great taste. Ground chicken is the star, adding a juicy flavor. Cabbage and carrots bring crunch and nutrition. Green onions, garlic, and ginger add depth that makes each bite exciting. For the additional ingredients, dumpling wrappers hold it all together. Dusting flour helps prevent sticking. Water is essential for steaming, while cooking oil ensures a golden crisp. Salt and pepper finish off the flavor balance perfectly. You will find that these ingredients are simple to get. They create an easy yet delightful dish. If you want to dive deeper, check out the Full Recipe to explore cooking tips and tricks. To make the filling, start with ground chicken. In a large bowl, add 1 pound of ground chicken. Next, finely chop 1 cup of cabbage and add it to the bowl. Then, grate 1/4 cup of carrots and toss them in. For flavor, include 3 chopped green onions, 2 minced garlic cloves, and a 1-inch piece of grated ginger. Add 2 tablespoons of low-sodium soy sauce and 1 tablespoon of sesame oil. Now, season with salt and pepper to taste. Mix everything well using your hands or a spoon. This will help the flavors blend nicely. Aim for a filling that is sticky but not too wet. Next, let's wrap the dumplings. Dust a clean surface with a little flour to prevent sticking. Take a dumpling wrapper and place it on the floured surface. Spoon about 1 tablespoon of the filling into the center of the wrapper. Moisten the edges with a tiny bit of water. This helps the wrapper seal. Fold the wrapper over to create a half-moon shape. Press the edges firmly to seal the dumpling. Make sure there are no gaps, or the filling may leak. Repeat this with the rest of the wrappers and filling. Now, it's time to cook the dumplings. Heat a large skillet over medium-high heat and add 1 tablespoon of cooking oil. Once the oil is hot, add a few dumplings without overcrowding them. Fry them for about 2-3 minutes until the bottoms turn golden brown. Next, carefully add 1/4 cup of water to the skillet. Cover the pan right away to trap the steam. Let the dumplings steam for about 5-6 minutes, or until the water evaporates. Remove the cover and let the dumplings cook for another 1-2 minutes. This will crisp them up again. Transfer the dumplings to a plate and repeat with the rest. Enjoy your golden crisp chicken dumplings! For details on ingredients and more, check the Full Recipe. To get the best dumplings, you want a crispy outside and a tender inside. Start by frying the dumplings in hot oil. This helps them get that nice golden crust. After frying, add a bit of water to steam them. This makes the filling juicy and soft. The oil should be hot, but not smoking. If the oil is too cool, the dumplings will soak up too much oil. If it's too hot, they might burn. A good test is to drop a small piece of dough into the oil. If it sizzles right away, you're ready to fry. Dumplings taste great with dipping sauces. Soy sauce is a classic choice. You can also mix in some chili oil for a kick. Try adding chopped green onions to the soy sauce for extra flavor. For side dishes, consider serving your dumplings with a fresh salad. A simple cucumber salad or pickled vegetables can add a nice crunch. You can also serve some steamed rice or stir-fried veggies to make a complete meal. Enjoy your dumplings with these tasty sides! {{image_2}} You can easily switch up the filling for your dumplings. If you want a different meat, try ground pork. It adds a nice richness. For a vegetarian option, use tofu. Crumble it and mix it with your veggies. You can even try a mix of mushrooms for a meaty texture. You can also play with the vegetables. Instead of cabbage, try spinach or bok choy. You can add finely chopped mushrooms or bell peppers for more flavor. Each vegetable brings its own taste and texture. To give your dumplings a kick, add some spices. Chili flakes can heat things up. For a warm, aromatic profile, sprinkle in five-spice powder. This spice mix adds depth and complexity to the dish. Fresh herbs can brighten your dumplings. Adding cilantro or basil can uplift the flavors. Just chop them finely and mix them into your filling. These herbs enhance the fresh taste of your dumplings. For the full recipe, don’t forget to check the section above! To keep your uncooked dumplings fresh, freezing is your best bet. First, arrange them on a baking sheet in a single layer. Make sure they don't touch each other. This prevents them from sticking. Once frozen, transfer the dumplings to a zip-top bag. They can last in the freezer for up to three months. This makes meal prep easy and fun! After cooking, let the dumplings cool down on a plate. This helps keep their shape. Once cool, place them in an airtight container. Store them in the fridge for up to three days. When you want to eat them again, reheat in a pan. Add a splash of water to keep them moist. Cover the pan to steam them for a few minutes. This helps maintain their texture. Enjoy your delicious dumplings! You can tell when dumplings are done by checking a few signs. First, look for a golden brown color on the bottom. This means they are crispy. Second, steam should escape when you remove the cover. Finally, the filling should be hot. When you cut one open, the chicken should no longer be pink. Yes, you can make the filling ahead of time. Mix the ground chicken and veggies as directed in the recipe. Then, store the filling in an airtight container in the fridge. It will stay fresh for up to two days. If you want to keep it longer, freeze it. Make sure to use it within three months for the best taste. The best dipping sauce can depend on your taste. A simple soy sauce mixed with chopped scallions is classic. You can also try a spicy chili oil for a kick. For something creamy, mix soy sauce with a bit of sesame oil and a dash of rice vinegar. If you want to be adventurous, make a homemade sauce with soy sauce, minced garlic, and a splash of lime juice. In this post, we explored how to make delicious chicken dumplings. We covered the main and additional ingredients needed, plus detailed steps for preparation, wrapping, and cooking. I shared tips for perfecting texture and offered serving ideas. You can also try variations and learn about storage options. Making dumplings is fun and rewarding. With practice, you'll impress everyone with your skills. Enjoy creating your own tasty dumplings at home!

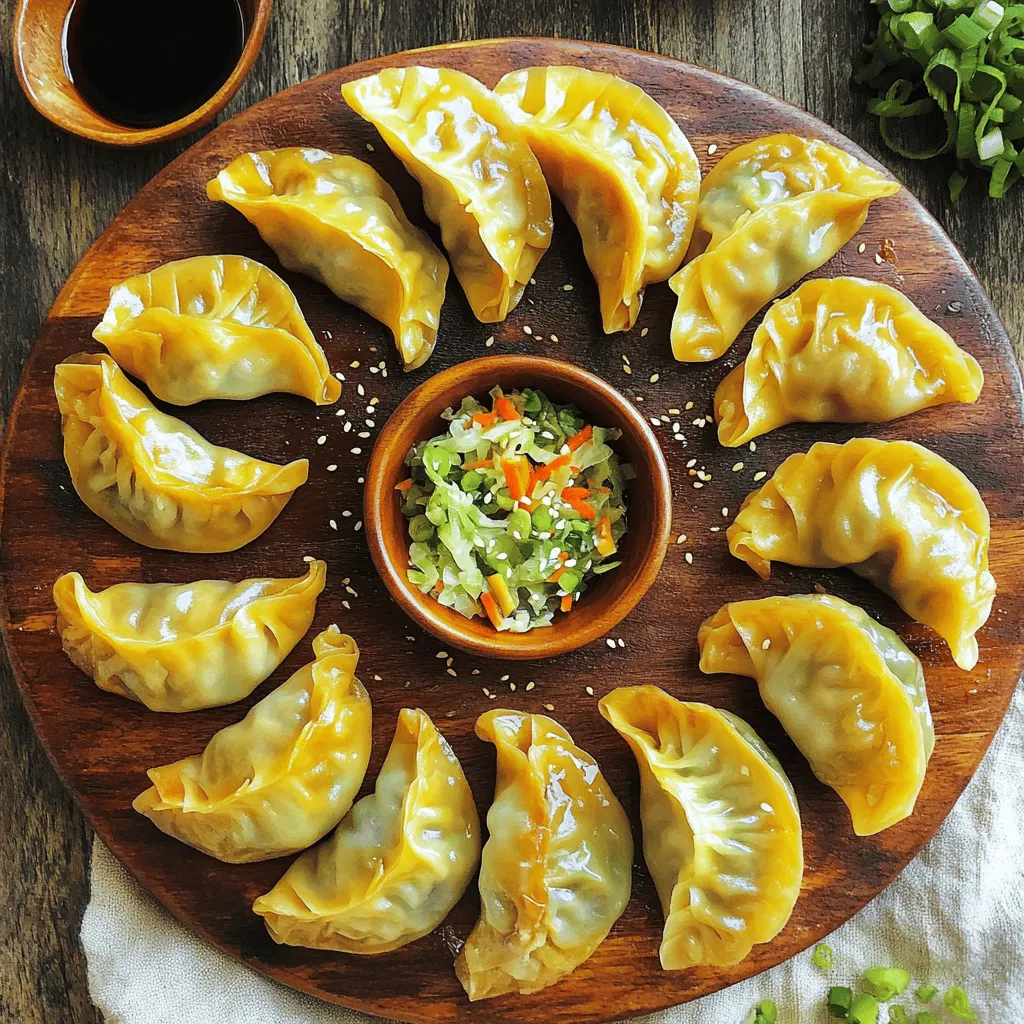
Are you ready to elevate your dinner game with a dish that’s both easy and delicious? In this article, I’ll show you how to make pan-fried chicken dumplings that are …

Read more

Categories Appetizers

Chocolate Zucchini Bread Rich and Flavorful Delight

June 17, 2025 by Chef Theo
To make delicious chocolate zucchini bread, you need some simple ingredients. Each one plays a key role in flavor and texture. - Grated Zucchini: Use 1 ½ cups of grated zucchini. Squeeze out excess moisture. This helps keep the bread from being too wet. - Flour and Cocoa Powder: You will need 1 cup of all-purpose flour and ½ cup of unsweetened cocoa powder. These give the bread its structure and rich chocolate flavor. - Sugar Types: Combine ½ cup of granulated sugar with ½ cup of packed brown sugar. This mix adds sweetness and depth to the taste. - Eggs and Oil: Use 2 large eggs and ½ cup of vegetable oil. The eggs help bind everything, while the oil keeps the bread moist. - Optional Add-ins: You can add ½ cup of chocolate chips for more chocolatey goodness. Chopped nuts, like walnuts or pecans, also work well. These add a nice crunch and flavor. For the full recipe, check out the details above. Each ingredient matters, so choose fresh and high-quality options for the best results. 1. Preheat and Prepare the Pan Start by preheating your oven to 350°F (175°C). Take a 9x5-inch loaf pan and grease it well. You can also line it with parchment paper for easy removal later. 2. Mix Dry Ingredients In a medium bowl, whisk together the flour, cocoa powder, baking soda, baking powder, salt, and cinnamon. Mix until all dry ingredients are well combined. Set this bowl aside for now. 3. Combine Wet Ingredients In a large mixing bowl, add the granulated sugar, brown sugar, and eggs. Whisk them together until smooth and creamy. Then, pour in the vegetable oil and add the vanilla extract. Mix until everything is fully blended. 4. Incorporate Zucchini Now, take your grated zucchini and fold it into the wet mixture. Make sure it is evenly mixed. This adds moisture and flavor to your bread. 5. Combine Mixtures Gradually add the dry ingredients to the zucchini mixture. Stir gently until just combined. Avoid overmixing. This keeps your bread light and fluffy. 6. Add Chocolate and Nuts Gently fold in the chocolate chips and nuts, if you choose to use them. This step adds delightful bits of chocolate and crunch to every slice. 7. Baking Process Pour the batter into your prepared loaf pan. Smooth the top with a spatula. Bake in the preheated oven for 50 to 60 minutes. Check if it's done by inserting a toothpick into the center. It should come out clean or with a few moist crumbs. 8. Cooling Once baked, remove the pan from the oven. Let the bread cool in the pan for about 10 minutes. Then transfer it to a wire rack to cool completely. For the full recipe, check out the section above. Enjoy your baking! Avoiding Excess Moisture To keep your bread from being soggy, remove extra water from the zucchini. Grate it and squeeze it in a clean cloth. You want the zucchini dry but still fluffy. Key Baking Tips Always measure your flour and cocoa powder correctly. Too much can make the bread dense. Mix the dry and wet ingredients gently. This helps keep the bread light and airy. Ensuring Optimal Flavor and Texture Use fresh ingredients for the best taste. The sugars add sweetness, while the cocoa brings a rich flavor. Adding chocolate chips boosts the chocolate taste. Let the bread cool before slicing; it helps the texture set. For a full guide on making this delicious treat, check out the Full Recipe. {{image_2}} When it comes to Chocolate Zucchini Bread, there are many ways to change it up. You can add spices, use different sweeteners, or make it nut-free. Each option brings its own unique twist to this tasty treat. Adding Spices You can enhance the flavor by adding spices. Try a pinch of nutmeg or ginger. These spices can add warmth and depth to the bread. A little cayenne pepper can even bring a surprising kick. Just remember to start small; you can always add more if you like. Alternative Sweeteners If you're looking for a healthier option, consider using alternative sweeteners. Honey or maple syrup can work well. They will change the texture slightly, so adjust the liquid in the recipe. You might also try coconut sugar for a lower glycemic index. Nut-Free Options For those with nut allergies, making the bread nut-free is easy. Simply skip the nuts altogether or replace them with seeds like sunflower or pumpkin seeds. These will still add a nice crunch without the worry of allergens. For the full recipe, check out the details above. Room Temperature Storage You can store your chocolate zucchini bread at room temperature. Wrap it tightly in plastic wrap or place it in an airtight container. It will stay fresh for 2 to 3 days. This method helps keep the bread moist. Refrigeration Tips If you want to keep it longer, put it in the fridge. Wrap it in plastic wrap and place it in a container. The bread will last up to a week in the fridge. Just remember, cold can change the texture a bit. Freezing Instructions Freezing is a great option if you want to save some for later. Slice the bread and wrap each piece in plastic wrap. Then place the slices in a freezer bag. This way, you can grab one slice at a time. It will stay good for up to 3 months in the freezer. To enjoy, just thaw it overnight in the fridge or pop it in the microwave for a few seconds. For the full recipe, check out the complete instructions above. Can I use frozen zucchini? Yes, you can use frozen zucchini. Just thaw it first and squeeze out the water. This helps keep your bread from getting too wet. Is it possible to make this recipe gluten-free? Absolutely! You can swap the all-purpose flour with a gluten-free blend. Just check that the blend has a good mix of starches and proteins for the best texture. How can I make it more chocolatey? To boost the chocolate flavor, add more cocoa powder or throw in extra chocolate chips. You could even swirl in some melted chocolate for a rich touch. What’s the best way to know when it’s done baking? Stick a toothpick into the center of the bread. If it comes out clean or with a few moist crumbs, it’s done. Keep an eye on it as baking times can vary! For the full recipe, check the section above! This blog post covered how to make chocolate zucchini bread. We looked at key ingredients, from grated zucchini to flour and sugar types. Next, I shared step-by-step instructions to guide you through the baking process. We also explored handy tips for the best texture and flavor, plus tasty variations and storage advice. Making this recipe is easy and fun. You'll enjoy a sweet treat packed with nutrients. So gather your ingredients, follow the steps, and create a delicious loaf you'll love sharing. Happy baking!

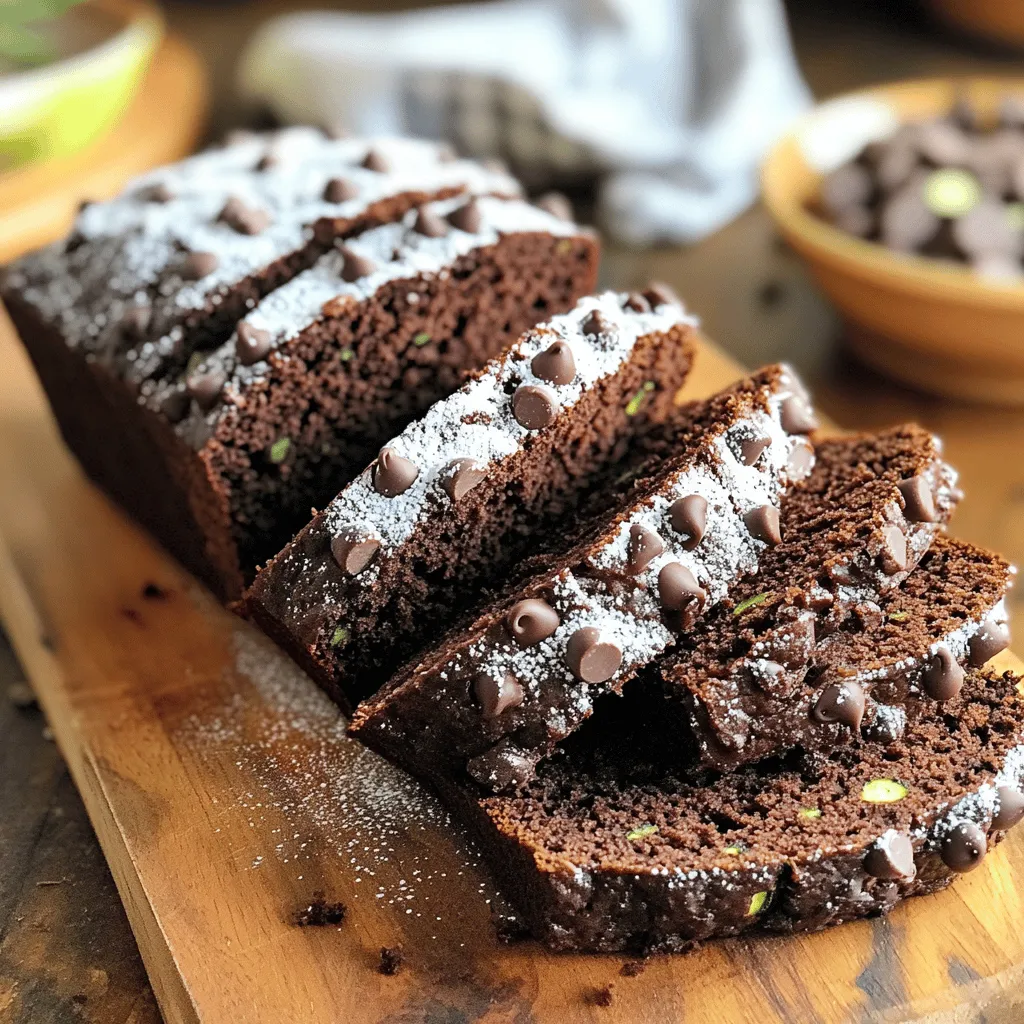
Chocolate Zucchini Bread is a rich and flavorful treat that surprises everyone! You might wonder how zucchini fits into a sweet loaf, but trust me, it adds moisture and texture …

Read more

Categories Desserts

Garlic Butter Chicken Bites with Creamy Pasta Delight

June 17, 2025 by Chef Theo
- 1 lb boneless, skinless chicken breasts, cut into bite-sized pieces - 4 tablespoons unsalted butter - 4 cloves garlic, minced - 1 cup heavy cream - 8 oz fettuccine or pasta of choice - 1 teaspoon dried Italian herbs (oregano, basil, thyme) - 1 cup chicken broth - ½ cup grated Parmesan cheese - Salt and pepper to taste In this dish, chicken shines as the main star. I love using boneless, skinless chicken breasts for their tender texture and quick cooking time. Garlic adds a punch of flavor that makes the dish sing. Fresh garlic gives the best taste, but jarred works in a pinch. The creamy sauce comes together with heavy cream. It brings richness and smoothness to the pasta, tying everything together. I usually choose fettuccine, but any pasta will work. Butter is key in this recipe. It adds a lovely richness and helps cook the chicken. I recommend unsalted butter, as it gives you more control over the saltiness. Italian herbs bring warmth and earthiness. You can mix and match your favorites, but dried herbs are easy to use and give great flavor. Chicken broth adds depth. It helps the sauce come together and gives a savory base. Parmesan cheese adds a salty, nutty flavor that finishes the dish perfectly. Use freshly grated cheese for the best taste. This recipe is simple, yet packed with flavor. You can find the full recipe to guide you through every step. Boiling Water Start by filling a large pot with water. Add a good amount of salt to the water. This helps flavor the pasta. Bring the water to a boil over high heat. Cooking Time Once the water is boiling, add the fettuccine. Cook it according to the package instructions until it is al dente. This usually takes about 8 to 10 minutes. Reserve ½ cup of pasta water before draining the rest. Set the pasta aside. Sautéing Techniques In a large skillet, melt 2 tablespoons of butter over medium-high heat. Add the bite-sized chicken pieces. Make sure they are in a single layer for even cooking. Seasoning Recommendations Sprinkle salt, pepper, and dried Italian herbs over the chicken. I often use oregano, basil, and thyme. This adds great flavor. Cook the chicken for about 5 to 7 minutes. It should turn golden brown and be cooked through. Adding Garlic and Broth Lower the heat to medium-low. Add the minced garlic to the skillet with the chicken. Sauté for 1 to 2 minutes until it smells good. Then pour in the chicken broth. Bring it to a simmer and let it reduce for about 3 to 4 minutes. Incorporating Cream and Cheese Next, stir in the heavy cream. Bring it to a gentle boil. Add the remaining 2 tablespoons of butter and the grated Parmesan cheese. Stir until the cheese melts and the sauce gets creamy. Combining Pasta and Sauce Add the cooked pasta to the skillet. Toss it well to coat in the creamy garlic sauce. If the sauce is too thick, add a little reserved pasta water until it reaches your desired thickness. Garnishing Tips Remove the skillet from the heat. Sprinkle fresh parsley on top for a pop of color. Give it one last toss before serving. This step makes your dish look and taste great. For the complete recipe, check out [Full Recipe]. To make your garlic butter chicken bites shine, consider adding fresh herbs. Fresh basil or thyme can boost flavor. You can also use rosemary for a strong taste. If you want a little heat, try crushed red pepper flakes. They add a nice kick without being too spicy. For more depth, try adding lemon zest. It gives a fresh taste that brightens the dish. You can also sprinkle a bit of smoked paprika for a rich flavor. Mix and match these ideas to find your perfect blend. To keep chicken tender, avoid overcooking. Sauté the chicken pieces until they are golden brown. This usually takes about 5-7 minutes. Use medium-high heat for a nice sear. You want them juicy, not dry. When cooking pasta, always use a large pot of boiling, salted water. This helps the pasta cook evenly. Don't forget to reserve some pasta water. It helps adjust your sauce later if needed. Cook the pasta until it is al dente for the best texture. For serving, pile the creamy pasta in the center of a plate. Then, arrange the garlic butter chicken bites on top. This creates a beautiful and inviting look. Garnish with freshly chopped parsley for color. You can also add a sprinkle of Parmesan cheese for extra flavor. If you want a fancy touch, drizzle a bit of olive oil on top. It makes the dish look gourmet. For more details on this recipe, check out the Full Recipe. {{image_2}} Chicken Alternatives If you want a change, try using turkey or shrimp instead of chicken. Both work great with the creamy sauce. You can also use tofu for a plant-based option. Just make sure to adjust cooking times. Dairy-Free Options For a dairy-free meal, use coconut milk or cashew cream in place of heavy cream. Nutritional yeast can replace Parmesan cheese. This keeps the flavor rich without the dairy. Adding Vegetables You can boost nutrition by adding vegetables. Spinach, bell peppers, or broccoli add color and taste. Just sauté them with the chicken or toss them into the sauce. Spicy Options Want some heat? Add red pepper flakes or a dash of hot sauce. This gives the dish a nice kick. Adjust the amount to match your spice level. Pairings with Sides Garlic Butter Chicken Bites go well with a simple salad or garlic bread. These sides balance the creamy pasta. You can also serve it with steamed vegetables for extra crunch. Leftover Use Ideas If you have leftovers, use them in a wrap or sandwich. The flavors meld together nicely. You can also toss them into a soup for a quick meal. For the complete recipe, check out the [Full Recipe]. After enjoying Garlic Butter Chicken Bites with Creamy Pasta, you might have some tasty leftovers. - Refrigeration Guidelines: Store leftovers in an airtight container. They can stay fresh in the fridge for up to 3 days. Make sure to cool the dish to room temperature before sealing it. This helps keep the flavors intact. - Freezing Instructions: If you want to save it longer, freeze the dish. Place it in a freezer-safe container. It keeps well for about 2 months. When freezing, leave some space in the container for expansion. To enjoy your leftovers, reheating is key. - Best Methods for Reheating: The best way to reheat is on the stove over low heat. Stir often to heat evenly. You can also use the microwave. Just cover the dish and heat in short bursts, stirring in between. - Maintaining Creaminess: To keep the creamy sauce smooth, add a splash of milk or broth when reheating. This helps revive the creaminess that may fade when stored. Stir well after adding to ensure it blends nicely. Making Garlic Butter Chicken Bites with Creamy Pasta takes about 30 minutes. You spend 10 minutes prepping the ingredients. The cooking time is around 20 minutes. This quick dish is perfect for busy nights. Yes, you can make this recipe ahead of time. Store the cooked chicken and pasta separately in airtight containers. Keep them in the fridge for up to three days. Reheat them in a skillet with a splash of broth for a quick meal. If you want a lighter option, use half-and-half instead of heavy cream. For a dairy-free choice, coconut cream works well. You can also blend silken tofu with a bit of broth for a creamy texture. This post covered the ingredients, steps, and tips for making Garlic Butter Chicken Bites with Creamy Pasta. You learned about the main ingredients, from chicken to pasta, and how to enhance flavors with herbs. I shared storage tips and variations to make the dish your own. Cooking is about fun and creativity. Try new flavors and enjoy your cooking journey. Each meal is a chance to discover something delicious!

If you’re craving a meal that’s packed with flavor and comfort, you’ll love these Garlic Butter Chicken Bites with Creamy Pasta. This quick recipe combines tender chicken, rich garlic butter, …

Read more

Categories Dinner
Older posts
Newer posts
← Previous Page1 … Page49 Page50 Page51 … Page104 Next →

TOASTED RECIPES

Where ideas are warm, crisp, and ready to serve! 🍞

PAGES

Home About Contact Privacy Policy Terms & Conditions Cookie Policy GDPR Policy Copyright Policy Disclaimer

CATEGORIES

Appetizers Desserts Salads Breakfast Dinner

Contact

  • Pinterest
  • Mail
Copyright © 2025 Toasted Recipes. All rights reserved.