Skip to content
toastedrecipes.com
  • Home
  • Appetizers
  • Desserts
  • Salads
  • Breakfast
  • Dinner
  • Privacy Policy
  • Contact
  • About

Chef Theo

Roasted Parmesan Zucchini and Tomatoes Delight

July 5, 2025 by Chef Theo
- 2 medium zucchinis, sliced into half-moons - 1 cup cherry tomatoes, halved - 1/2 cup grated Parmesan cheese - 3 tablespoons olive oil - 2 cloves garlic, minced - 1 teaspoon dried oregano - 1/2 teaspoon salt - 1/4 teaspoon black pepper - Fresh basil leaves for garnish When I make Roasted Parmesan Zucchini and Tomatoes, I pick fresh veggies. The zucchinis should feel firm and look shiny. The skins should be bright green. I aim for medium-sized zucchinis. They hold up well when cooked. For cherry tomatoes, I look for bright colors and smooth skins. I squeeze them gently to check for firmness. Ripe tomatoes have a sweet taste. You want that burst of flavor in every bite! - Choosing ripe zucchinis: Look for a vibrant green color and a firm texture. - Picking the best cherry tomatoes: Choose ones that are bright, plump, and free of blemishes. - Cheese alternatives: You can use grated mozzarella or a dairy-free cheese. - Olive oil options: Avocado oil or melted butter can work in place of olive oil. Using good ingredients makes this dish shine. The flavor of fresh veggies makes each bite special. If you want to switch things up, feel free to get creative with your choices! Check out the Full Recipe for more details. First, preheat your oven to 400°F (200°C). This step is key to getting that nice, roasted flavor. While the oven heats, line a baking sheet with parchment paper. This makes cleanup easy later. Now, grab a large mixing bowl. Add the sliced zucchinis and halved cherry tomatoes. Next, drizzle three tablespoons of olive oil over the veggies. This helps them roast well. Add two minced garlic cloves, one teaspoon of dried oregano, half a teaspoon of salt, and a quarter teaspoon of black pepper. Toss everything together until the vegetables are well coated. Spread the vegetable mixture evenly on the prepared baking sheet. Make sure they sit in a single layer for even cooking. Now, sprinkle half a cup of grated Parmesan cheese over the top. This will add a rich flavor that you will love. Place the baking sheet in the preheated oven. Roast for 20 to 25 minutes. You want the zucchini to be tender and the cheese to turn a golden brown. Keep an eye on it toward the end. Once the time is up, remove the baking sheet from the oven. Let the dish cool for a couple of minutes. This helps to avoid burns. Now, transfer the roasted vegetables to a serving dish. Garnish with fresh basil leaves for a pop of color and flavor. You can serve this dish as a side or even as a light main. It's perfect on its own or over grains. For the full recipe, check out the earlier section. Enjoy your meal! To get the best texture when roasting vegetables, follow these tips: - Cut zucchini into even half-moons. This ensures they cook evenly. - Spread the vegetables in a single layer on the baking sheet. This helps them roast instead of steam. - Keep an eye on the roasting time. Aim for 20-25 minutes at 400°F (200°C). For golden-brown cheese, sprinkle Parmesan evenly over the veggies. Using shredded cheese instead of grated can create nice, crispy bits. To boost the flavor, consider adding herbs and spices. Fresh thyme, rosemary, or parsley can add depth. You can even try a pinch of red pepper flakes for heat. Using infused oils can elevate the dish, too. Garlic-infused olive oil or herb-infused oil can add extra taste without much effort. Avoid overcooking your vegetables. They should be tender but still firm. If they turn mushy, it’s time to adjust the roasting time. Not using enough seasoning can make your dish bland. Don’t shy away from salt and pepper. You can always add more herbs to enhance the taste. For the full recipe, check out the detailed instructions to make Roasted Parmesan Zucchini and Tomatoes. {{image_2}} You can easily change this dish with more veggies. Try adding bell peppers, mushrooms, or red onions. These will give your dish more color and flavor. If you want to make it a full meal, add protein. Grilled chicken, shrimp, or beans work great. These options add nutrition and make it heartier. While Parmesan is a star here, you can swap it out. Feta cheese adds a tangy twist. Mozzarella gives a milder, creamy taste. For those who prefer dairy-free, many vegan cheeses can work too. Look for brands that melt well to keep the texture nice. You can serve this dish in many ways. Try it over pasta or rice for a filling meal. This adds a nice base and makes it more filling. You can also toss it into salads. Just mix the roasted veggies into fresh greens for a colorful, tasty dish. For the full recipe, visit the detailed instructions above. To keep your roasted Parmesan zucchini and tomatoes fresh, follow these steps. First, let the dish cool down to room temperature. Then, place it in an airtight container. Store it in the fridge. This will keep the flavors intact. You can enjoy it for up to three days. When reheating, use the oven or a microwave. To reheat in the oven, set it to 350°F (175°C). Place the dish in for about 10 minutes. This warms it evenly and keeps the cheese nice and crispy. If you use a microwave, heat it in short bursts. Stir in between to prevent hot spots. Freezing is a great way to save leftovers for later. To freeze, place the cooled roasted vegetables in a freezer-safe bag or container. Make sure to remove as much air as possible. This helps prevent freezer burn. You can store them for up to two months. When you're ready to enjoy, thaw the vegetables in the fridge overnight. After thawing, reheat them in the oven. This will help restore their texture and flavor. In the fridge, roasted Parmesan zucchini and tomatoes last about three days. You should eat it within this time for the best taste. Look for signs of spoilage. If the zucchini becomes slimy or the tomatoes smell off, it’s best to toss it. Always trust your senses when it comes to food safety. To make Roasted Parmesan Zucchini and Tomatoes, follow these steps: 1. Preheat your oven to 400°F (200°C) and line a baking sheet with parchment paper. 2. In a bowl, mix 2 sliced zucchinis and 1 cup of halved cherry tomatoes. 3. Drizzle 3 tablespoons of olive oil over the mix. 4. Add 2 minced garlic cloves, 1 teaspoon of dried oregano, 1/2 teaspoon of salt, and 1/4 teaspoon of black pepper. Toss to coat. 5. Spread the mixture on the baking sheet in a single layer. 6. Sprinkle 1/2 cup of grated Parmesan cheese on top. 7. Roast for 20-25 minutes until the zucchini is tender and the cheese is golden. 8. Let it cool for a few minutes, then garnish with fresh basil leaves. You can find the Full Recipe for more details. Yes, you can make this recipe ahead of time. Here are some best practices: - Prepare the zucchini and tomatoes a day before. Store them in an airtight container in the fridge. - Toss the vegetables with oil and seasonings just before roasting. This keeps them fresh. - You can roast them up to 30 minutes before serving. Let them cool, then reheat in the oven at 350°F (175°C) for about 10 minutes. This dish pairs well with many options. Here are some ideas: - Serve it alongside grilled chicken or fish for a balanced meal. - It complements pasta dishes nicely, adding a fresh touch. - Pair it with quinoa or rice for a hearty vegetarian option. Feel free to experiment with your favorite proteins and grains! This blog post covered a tasty recipe for roasted zucchini and tomatoes. You learned about fresh ingredients, easy substitutions, and cooking tips for the best results. We also discussed variations to suit your taste and storage methods for leftovers. Remember, with simple steps, you can create a delicious dish that impresses everyone. Enjoy trying this recipe and make it your own! Happy cooking!

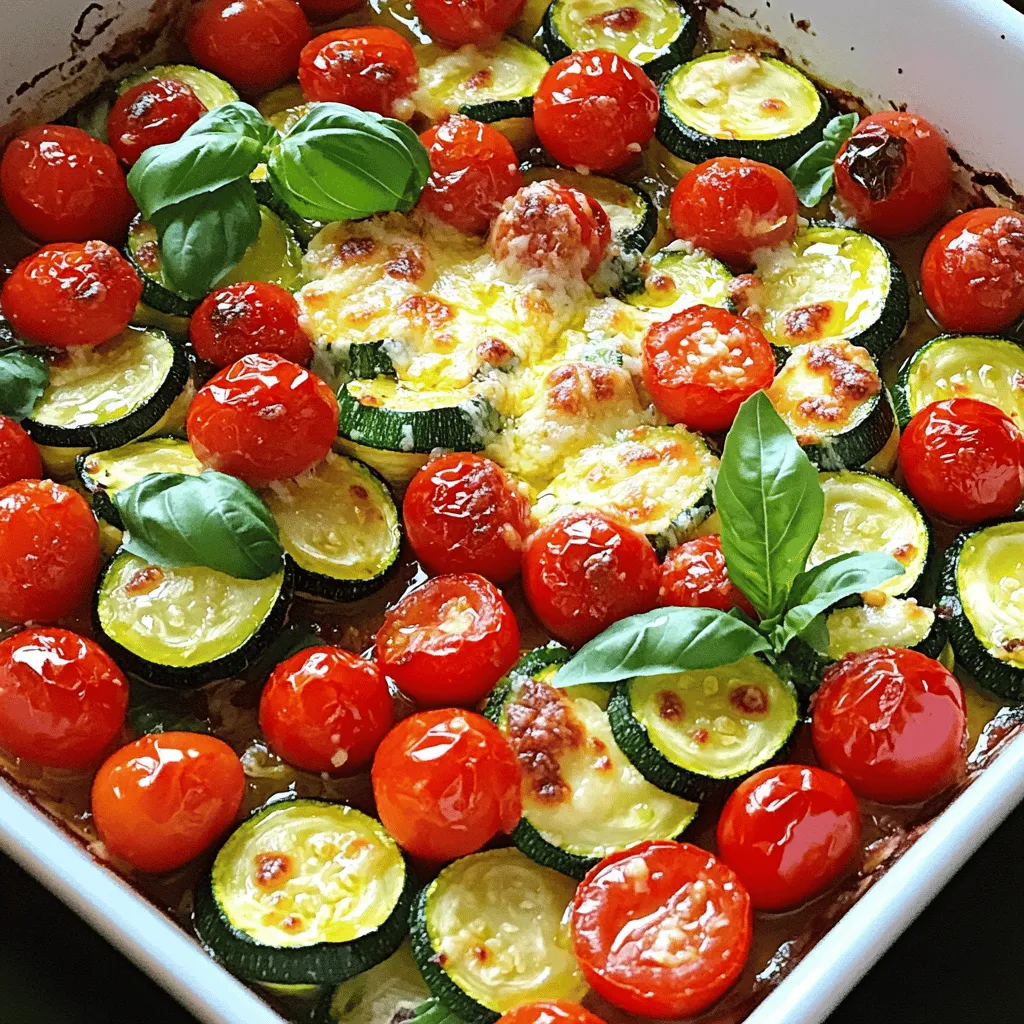
Are you ready to elevate your vegetable game? Roasted Parmesan Zucchini and Tomatoes Delight is a flavorful dish that’s simple and fun to make. Juicy cherry tomatoes and tender zucchini …

Read more

Categories Dinner

Crispy Parmesan Chicken Irresistible Flavor Delight

July 4, 2025 by Chef Theo
To make Crispy Parmesan Chicken, you need: - 2 boneless, skinless chicken breasts - 1 cup breadcrumbs (preferably panko) - 1/2 cup grated Parmesan cheese These ingredients create a crunchy, cheesy crust that makes this dish so special. Add flavor with these seasonings: - 1 teaspoon garlic powder - 1 teaspoon dried oregano - 1 teaspoon paprika - 1/2 teaspoon salt - 1/4 teaspoon black pepper These spices enhance the taste of the chicken and add depth. To hold everything together, you will need: - 2 large eggs - 2 tablespoons olive oil - Fresh parsley, chopped (for garnish) The eggs help the breadcrumbs stick, and the olive oil adds richness. The parsley adds a touch of color when serving. When you gather these ingredients, you set the stage for a delightful meal. Check out the Full Recipe for all the details on how to put it together. - Preheat your oven to 400°F (200°C). - Line a baking sheet with parchment paper. - In a shallow dish, mix breadcrumbs, grated Parmesan cheese, garlic powder, dried oregano, paprika, salt, and black pepper. Make sure it's well combined. - Take two large eggs and beat them in another shallow bowl. - Dip one chicken breast in the egg mixture. Let the excess drip off. - Coat the chicken breast in the breadcrumb-Parmesan mixture. Press firmly to help it stick. - Repeat this with the second chicken breast. - Heat two tablespoons of olive oil in a skillet over medium heat. - Carefully add the breaded chicken breasts to the hot oil. Cook for about 3-4 minutes per side, until golden brown. - Transfer the browned chicken to the prepared baking sheet. - Bake for 15-20 minutes, or until the chicken reaches an internal temperature of 165°F (75°C). - Let the chicken rest for a few minutes. Slice and garnish with fresh parsley before serving. For the complete dish, check out the Full Recipe. To make your crispy Parmesan chicken extra crunchy, use panko breadcrumbs. Panko gives a light and airy texture that regular breadcrumbs can't match. Next, check your oil temperature before frying. If the oil is too cool, it will soak into the chicken instead of crisping it up. Aim for a medium heat, around 350°F (175°C), for the best results. Boost the taste by adding herbs or spices to your breadcrumb mix. A touch of Italian seasoning or some crushed red pepper flakes can elevate the flavor. You can also marinate the chicken beforehand. A simple mix of olive oil, lemon juice, and garlic adds depth and moisture. Let it sit for about 30 minutes for the best effect. For a stunning presentation, place the crispy chicken on a bed of mixed greens. Add lemon wedges for a fresh pop of color. Sprinkle fresh parsley on top for a beautiful finish. As for sides, pair this dish with roasted vegetables or a light salad. These add balance and enhance the meal's overall flavor. For the full recipe, check out the instructions provided! {{image_2}} You can switch cheeses for a new taste. Asiago or mozzarella works well. These cheeses give a different flavor and texture. If you need gluten-free, try almond flour or crushed cornflakes. Both options still give you that crispy bite without the gluten. For a healthier choice, use an air fryer. It cooks the chicken evenly and keeps it crispy with less oil. Simply set your air fryer to 375°F (190°C) and cook for about 12-15 minutes. You can also skip the frying step altogether. Just coat the chicken and bake it in the oven. This method is easy and still tastes great. To change the flavor, mix in different seasonings. Try adding Italian herbs like thyme or basil for a fresh twist. For spice lovers, sprinkle cayenne or add hot sauce. This will give your Crispy Parmesan Chicken an extra kick. Experimenting with flavors keeps this dish new and exciting. You can find the full recipe above to start your culinary adventure! To keep Crispy Parmesan Chicken fresh, use airtight containers. Store it in the fridge right after it cools. This helps keep the chicken from drying out. You can keep leftovers for up to three days. If you want to save it longer, freezing is a great option. For freezing, wrap each chicken piece in plastic wrap. Then, place them in a freezer bag. This method keeps moisture in and ice crystals out. To reheat frozen Crispy Parmesan Chicken, thaw it in the fridge overnight. Then, warm it in the oven at 375°F (190°C) for about 15-20 minutes. This keeps the chicken crispy and tasty. You can prepare Crispy Parmesan Chicken ahead of time for quick meals. Bread the chicken and store it in the fridge for up to 24 hours. This makes weeknight dinners easy. Pair it with sides like roasted veggies or a fresh salad. These add color and nutrition to your plate. For a fun twist, try adding a dipping sauce for extra flavor. To check if the chicken is done, use a meat thermometer. The safe internal temperature is 165°F (75°C). Insert the thermometer into the thickest part of the chicken. Make sure it does not touch the bone. If it reads 165°F (75°C) or higher, your chicken is cooked. Yes, you can bake the chicken. Baking gives a different texture than frying. Frying makes the chicken crispy on the outside. Baking can still be crispy if done right. To bake, coat the chicken as usual, then place it on a baking sheet. Bake at 400°F (200°C) for 15-20 minutes. This method is healthier but can be less crispy. Pair this chicken with tasty sides. Here are some ideas: - Garlic mashed potatoes - Steamed broccoli - Caesar salad - Roasted vegetables - Rice pilaf You can also serve it on a bed of mixed greens. Add lemon wedges for a fresh touch. For the full recipe, check out the details above. This blog post covered everything you need for Crispy Parmesan Chicken, from key ingredients to cooking tips. You learned about seasoning, cooking methods, and even variations. Remember, using panko and frying properly brings the best crunch. Consider meal prepping for quick dinners or freezing leftovers for later. With these easy steps, you can impress everyone at your table. Enjoy your cooking adventure and savor the delicious results!

Welcome to your new favorite dinner recipe: Crispy Parmesan Chicken! This dish is easy and packed with flavor. With just a few simple ingredients, you can make a golden, crunchy …

Read more

Categories Dinner

Creamy Yellow Squash Soup Hearty and Nourishing Dish

July 4, 2025 by Chef Theo
- 3 medium yellow squash, diced - 1 large onion, chopped - 3 cloves garlic, minced - 2 medium potatoes, peeled and diced - 4 cups vegetable broth - 1 cup coconut milk - 2 tablespoons olive oil - 1 teaspoon ground cumin - 1/2 teaspoon turmeric - Salt and pepper to taste - Fresh basil leaves for garnish To make a creamy yellow squash soup, start with fresh yellow squash. Look for squash that feels firm and heavy. The skin should be bright and shiny. Next, gather the other key veggies: one large onion, three cloves of garlic, and two medium potatoes. These add depth and flavor to the soup. You'll need liquids to create the base. Four cups of vegetable broth give the soup a rich taste. A cup of coconut milk makes it creamy and adds a hint of sweetness. For seasoning, use two tablespoons of olive oil to sauté the veggies. Add one teaspoon of ground cumin and a half teaspoon of turmeric for warmth. Salt and pepper will balance all the flavors. Finally, fresh basil leaves are perfect for garnishing. They add a pop of color and a fresh taste. This list of ingredients ensures a hearty and nourishing dish. For the complete cooking process, check the Full Recipe. To start, heat 2 tablespoons of olive oil in a large pot over medium heat. Once hot, add 1 large chopped onion. Sauté the onion for about 5 minutes until it turns soft and translucent. This step builds a strong flavor base for your soup. Next, stir in 3 minced garlic cloves along with 1 teaspoon of ground cumin and 1/2 teaspoon of turmeric. Cook this mixture for another minute until it smells amazing. The spices will add warmth and depth to your soup. Now it's time to add the main ingredients. Toss in 3 medium diced yellow squash and 2 medium peeled and diced potatoes. Stir everything together to coat the veggies with the onion and spices. Pour in 4 cups of vegetable broth, and bring the mixture to a boil. Once it bubbles, reduce the heat to low. Let it simmer for about 15-20 minutes until the squash and potatoes are nice and tender. This step allows the flavors to meld beautifully. After simmering, take the pot off the heat. Let it cool for a few minutes. Then, using an immersion blender, blend the soup until it’s smooth and creamy. If you don’t have an immersion blender, you can use a regular blender in batches. Just be careful with the hot mixture. Return the soup to low heat. Stir in 1 cup of coconut milk, which makes it rich and creamy. Season with salt and pepper to taste. Heat it through for about 5 more minutes. Now, your creamy yellow squash soup is ready to enjoy! Serve it hot, garnished with fresh basil leaves for a pop of color and flavor. For the complete recipe, check out the Full Recipe section. To find the best yellow squash, look for bright, smooth skin. They should feel firm and heavy for their size. Avoid squash with soft spots or wrinkles. Store your yellow squash in the fridge. Keep them in a paper bag to let them breathe. This helps them stay fresh longer. For that perfect creaminess, blend the soup until smooth. If you want it creamier, add more coconut milk. If the soup is too thick, pour in some vegetable broth. This keeps your soup nice and smooth while enhancing the flavor. Herbs and spices can take your soup to the next level. Try adding fresh basil or a pinch of thyme. These flavors pair well with squash. For a bit of crunch, top your soup with toasted pumpkin seeds or croutons. They add texture and make the dish more exciting. Explore the [Full Recipe] for more tips! {{image_2}} You can make this soup vegan by swapping coconut milk for other plant-based options. Almond milk or oat milk works well. These choices add a nice creaminess without using dairy. You can also try cashew cream for a rich, nutty flavor. Each option brings its unique taste, so pick what you enjoy most. To make a low-calorie version, I suggest reducing the amount of coconut milk. You can use just half a cup or switch to a lighter milk. Also, skip the olive oil and sauté the onions in a splash of vegetable broth. This keeps the flavor while cutting down on calories. You can still enjoy the soup without the extra fat. If you want to add protein, beans or lentils are great options. White beans blend well with the soup's flavor. You can add them during the cooking stage. Lentils are another choice; they cook quickly and thicken the soup. This makes your dish heartier and more filling. You can customize the recipe to fit your family's needs. For the full recipe, see above. You can keep creamy yellow squash soup in the fridge for about 3 to 5 days. To store it properly, place the soup in an airtight container. Make sure to let it cool first. Label the container with the date. This way, you'll know how fresh it is. Freezing is a great way to save soup for later. To freeze it, first cool the soup completely. Then, pour it into freezer-safe bags or containers. Leave some space at the top for expansion. Seal them well to avoid air. You can store it in the freezer for up to 3 months. To reheat after freezing, take the soup out and let it thaw overnight in the fridge. You can also use the microwave or a pot over low heat. Stir often to ensure even heating. If the soup seems too thick, add a splash of vegetable broth or coconut milk to get the right consistency. If you want to know how to make this delicious soup, check out the Full Recipe. Yes, you can use yellow zucchini. Both yellow squash and yellow zucchini have a similar taste and texture. They offer a mild, sweet flavor that works well in soup. However, yellow squash has a slightly softer skin and is a bit sweeter. Yellow zucchini, on the other hand, has a firmer texture and a more robust taste. You may notice a slight difference in the final dish, but both will yield a creamy and delicious soup. If your soup is too thin, there are easy ways to thicken it. Here are some tips: - Add more potatoes: Cooked potatoes blend well and give a thicker texture. - Use a thickener: You can mix cornstarch with water to make a slurry, then stir it in. - Blend longer: Blending the soup more can create a creamier texture. - Add more coconut milk: This will not only thicken but also enhance the flavor. Creamy yellow squash soup pairs well with many sides. Here are some great options: - Crusty bread: A nice loaf of sourdough or baguette complements the soup well. - Salad: A light green salad adds freshness and crunch. - Grilled cheese: A classic grilled cheese sandwich is perfect for dipping. - Herb toppings: Fresh herbs like basil or parsley can brighten the dish. For a complete guide on making this delicious soup, check out the Full Recipe. This blog post shared how to make a tasty creamy yellow squash soup. You learned about the key ingredients like yellow squash, onion, and spices. The step-by-step guide showed how to sauté, simmer, and blend for the perfect texture. I offered tips to select fresh squash and shared ways to adjust flavor. We also explored fun variations for your tastes and storage options to keep the soup fresh. Enjoy making this soup and feel free to experiment with your favorite twists!

Are you ready to savor a delicious bowl of creamy yellow squash soup? This hearty and nourishing dish combines fresh squash with fragrant spices, creating a warm hug in a …

Read more

Categories Dinner

Fresh Blueberry Brownies Delightful and Simple Recipe

July 4, 2025 by Chef Theo
To make fresh blueberry brownies, you need simple and fresh items. Here’s the list of ingredients: - 1 cup fresh blueberries - 1/2 cup unsalted butter, melted - 1 cup granulated sugar - 2 large eggs - 1 teaspoon vanilla extract - 1/3 cup unsweetened cocoa powder - 1/2 teaspoon baking powder - 1/4 teaspoon salt - 1 cup all-purpose flour - 1/2 cup chocolate chips (optional) These ingredients come together to create a rich and fruity treat. The blueberries add a burst of flavor and moisture to the brownies. Using fresh blueberries makes a big difference in taste. If you want a chocolatey boost, add chocolate chips. You can find the full recipe in the previous section. Enjoy baking these delightful brownies! First, preheat your oven to 350°F (175°C). Grease a 9x9-inch baking pan or line it with parchment paper. This helps with easy removal later. In a mixing bowl, combine 1/2 cup of melted unsalted butter and 1 cup of granulated sugar. Stir these two until they blend well. Then, add 2 large eggs, one at a time. Mix well after each one. Finally, stir in 1 teaspoon of vanilla extract. In a separate bowl, whisk together the dry ingredients. This includes 1/3 cup of unsweetened cocoa powder, 1/2 teaspoon of baking powder, 1/4 teaspoon of salt, and 1 cup of all-purpose flour. Gradually add this dry mix to the wet ingredients. Stir until just combined. Be careful not to over-mix; this keeps your brownies soft. Next, gently fold in 1 cup of fresh blueberries and 1/2 cup of optional chocolate chips. Be careful not to mash the blueberries. They add great flavor and color! Now, pour the batter into the prepared baking pan. Spread it evenly. Bake for 25-30 minutes. Check if they are done by inserting a toothpick. It should come out with a few moist crumbs. Let the brownies cool in the pan for about 10 minutes. Then, move them to a wire rack to cool completely before cutting them into squares. Enjoy your fresh blueberry brownies! For the full recipe, refer to the earlier section. - Measuring ingredients accurately: Use measuring cups and spoons. Level off dry ingredients with a knife. This keeps your brownies moist and chewy. - Not over-mixing the batter: Mix just until you combine the wet and dry ingredients. Over-mixing can make your brownies tough. Fold gently when adding blueberries for the best texture. - Using fresh blueberries properly: Rinse the blueberries gently and pat them dry. This helps keep the batter from becoming too wet. Fold them in carefully to avoid smashing. - Presentation tips for a beautiful dessert: Cut brownies into even squares. Dust with powdered sugar for a lovely look. Add a few fresh blueberries on top for color. - Pairing with ice cream or whipped cream: Serve warm brownies with a scoop of vanilla ice cream. The cold ice cream melts slightly on the warm brownie, creating a tasty treat. Whipped cream also adds a nice touch! For the complete recipe, check out the [Full Recipe]. {{image_2}} You can make these blueberry brownies even more fun! Here are a couple of ideas: - Adding nuts for crunch: Adding chopped nuts, like walnuts or pecans, brings a nice crunch. Mix in about half a cup with the blueberries. This adds texture and a nutty flavor. - Swapping chocolate chips for white chocolate: If you love white chocolate, use it instead of regular chocolate chips. It pairs well with the blueberries. Just replace the chocolate chips with the same amount of white chocolate chips. You can also change the recipe to fit different diets. Here are some options: - Gluten-free options: To make these brownies gluten-free, swap all-purpose flour for a gluten-free blend. Many blends work well in baking. Just ensure you pick one for desserts. - Vegan substitutions: For a vegan version, replace the eggs. Use 1/4 cup of applesauce for each egg. You can also use a plant-based butter instead of regular butter. These variations let you customize the brownies to your taste or dietary needs. You can enjoy them your way! Check out the Full Recipe for all the steps. To keep your fresh blueberry brownies tasty, store them at room temperature. Place brownies in an airtight container. This helps them stay soft and moist. If you plan to eat them within a few days, this is perfect. For longer freshness, refrigerate your brownies. Wrap them well in plastic wrap or foil. This will keep out air and moisture. You can enjoy them for up to a week. If you have leftovers, freezing is a great option. Start by cooling the brownies completely. Once cool, cut them into squares. Wrap each square in plastic wrap tightly. Place the wrapped brownies in a freezer-safe bag or container. When you want a brownie, thaw it out. To do this, take it out of the freezer. Leave it in the fridge overnight. For a quick thaw, you can leave it at room temperature for a few hours. This keeps the flavor and texture just right. You can find the full recipe to make these delightful treats again anytime. - Can I use frozen blueberries? Yes, you can use frozen blueberries. They may add more moisture, so adjust baking time. If you do use them, do not thaw them first. This helps keep them whole in the batter. - How do I know when the brownies are done? Check the brownies after 25 minutes. Insert a toothpick into the center. If it comes out with a few moist crumbs, they are done. If it has wet batter, bake for a few more minutes. - Can I double the recipe for a larger batch? Yes, you can double the recipe. Use a larger pan, like a 9x13-inch, for even baking. Keep an eye on the baking time, as it may change with the bigger batch. - What's the best way to cut brownies? Use a sharp knife to cut brownies. Lightly grease the knife to prevent sticking. For neat cuts, wipe the knife after each slice. This keeps the edges clean and tidy. For the full recipe, check the link above. You learned how to make delicious blueberry brownies, from ingredients to baking tips. Fresh blueberries mix well with cocoa powder for a new treat. Don’t forget to measure carefully and avoid over-mixing! You can also create fun variations to suit your taste. Store brownies properly to keep them fresh, and don't hesitate to freeze extras. Now, it’s time to enjoy your homemade dessert!

Are you ready to elevate your dessert game? These Fresh Blueberry Brownies are easy and delicious! Bursting with juicy blueberries and rich chocolate, this simple recipe will make your taste …

Read more

Categories Desserts

Easy Peach Tea Refreshing Summer Beverage Recipe

July 4, 2025 by Chef Theo
To make Easy Peach Tea, you need just a few simple ingredients. Here’s what you will need: - 4 ripe peaches, pitted and sliced - 4 cups of water - 4 tablespoons of loose black tea leaves or 4 black tea bags - 2 tablespoons of honey (adjust to taste) - 1 tablespoon of freshly squeezed lemon juice - Fresh mint leaves for garnish - Ice cubes These ingredients come together to create a refreshing drink that’s perfect for summer. You can use either fresh or frozen peaches for this recipe. Fresh peaches give a bright, juicy flavor. They also add a nice texture to your drink. Look for ripe peaches that are firm but slightly soft when you squeeze them. Frozen peaches are handy when fresh ones are out of season. They can also save you time since they are already sliced. Just let them thaw a bit before blending. Both options work well, so choose what suits you best! Honey is a great way to sweeten your peach tea. If you prefer something else, try these options: - Maple syrup - Agave nectar - Stevia Each sweetener can change the taste a bit, so feel free to experiment. Start with a little and add more if you want it sweeter. Adjusting the sweetness helps you make the drink just right for your taste. Start by washing your ripe peaches. Make sure they are sweet and juicy. Slice the peaches and remove the pits. Take the sliced peaches and place them in a blender. Add the honey to the peaches; this will add sweetness. Blend the mixture until it is smooth. You want a nice, creamy texture. This peach puree will give your tea a fresh taste. Set it aside for later. Next, bring 4 cups of water to a boil in a medium saucepan. Watch the water closely so it does not boil over. Once it boils, take the saucepan off the heat. Add your black tea leaves or tea bags to the hot water. Let the tea steep for about 5 to 7 minutes. If you like strong tea, steep it longer. If you prefer it milder, steep for less time. After steeping, strain the tea to remove the leaves or bags. Now comes the fun part! In a large pitcher, mix the warm tea with the peach puree. Pour in the freshly squeezed lemon juice for a bit of zing. Stir everything together until well combined. This blend of flavors is key to a refreshing peach tea. Let the tea cool to room temperature. Then, refrigerate it for at least 1 hour. This cooling step is essential, especially on a hot summer day. When you’re ready to serve, fill glasses with ice cubes and pour the chilled tea over the ice. Garnish with fresh mint leaves for a pop of color and taste. Enjoy your Easy Peach Tea! For the full recipe, check the details above. To get the right sweetness, start with ripe peaches. They add natural sugar. You can add honey to taste. I suggest starting with two tablespoons. Taste the tea after mixing. If it needs more sweetness, add a bit more honey. Remember, you can always add more, but you can’t take it out. Herbs can make your peach tea shine. Fresh mint is my favorite. It pairs nicely with peach. Just toss a few leaves into the blender with peaches. You can also try basil for a twist. Both herbs add freshness and depth to your drink. Serving is key to enjoying your peach tea. Use clear glasses to show off the color. Add ice cubes for a nice chill. Garnish each glass with fresh mint leaves. You can also add a peach slice on the rim. This makes the drink look inviting. For the Full Recipe, enjoy each sip and share with friends! {{image_2}} You can turn your peach tea into a cool iced drink. Start with the full recipe. After steeping the tea, let it cool. Pour it over ice in a tall glass. You can add extra peach slices for a fun touch. This drink is perfect for hot days. Want to mix things up? Try adding herbs to your peach tea. You can use mint or basil for a fresh twist. Simply add a few leaves while the tea is steeping. This gives the tea a unique flavor. It pairs well with the sweetness of peaches. If you like fizzy drinks, this variation is for you. Prepare the peach tea as usual. Once it’s chilled, add sparkling water or soda. This adds bubbles and makes the tea lively. Serve it over ice with a peach slice for a pretty look. To chill your peach tea, start with a large pitcher. After mixing your tea and peach puree, let it cool at room temperature. Then, move it to the fridge. This step helps the flavors blend. Always cover your pitcher with a lid or plastic wrap. This helps keep your tea fresh. Serve it cold over ice for the best taste. Peach tea stays fresh in the fridge for about 3-5 days. After that, it may lose flavor and freshness. To keep it tasting great, check for any signs of spoilage. If it looks or smells off, it is best to toss it. Use an airtight container to help it last longer. You can freeze peach tea for later enjoyment. Pour the tea into ice cube trays for easy use. Once frozen, move the cubes into a zip-top bag. This way, you can add peach tea to smoothies or drinks. For best quality, use the frozen tea within 2-3 months. Yes, you can use other fruits. Berries, apples, and citrus work well. They add flavor and color. You can mix them with peaches for a fun twist. For example, try adding strawberries for a sweet note or lemons for a zesty kick. Experiment to find your favorite combination! To make more tea, simply double or triple the ingredients. For eight servings, use 8 peaches and 8 cups of water. Increase the tea bags or leaves to match the water. Adjust honey to taste. Make sure you have a larger pot to boil the water. You can also use a bigger pitcher to hold the tea. Peach tea is refreshing and healthy. Peaches are rich in vitamins A and C. They help boost your immune system. This tea is also good for digestion. The black tea has antioxidants that help fight free radicals. Enjoying peach tea can keep you hydrated on hot days. It is a simple way to enjoy the summer! You learned about making easy peach tea with fresh or frozen peaches. We explored sweetening options, like honey alternatives. You now know how to prepare peach puree and steep black tea perfectly. Remember, adjusting sweetness and adding herbs can enhance your drink. You can also try delicious variations like iced or sparkling peach tea. Store your tea right to enjoy it later. Enjoy your peach tea adventure and share it with others!

Looking for a refreshing drink this summer? My Easy Peach Tea recipe is just what you need! This simple beverage combines ripe peaches and classic black tea for a delightful …

Read more

Categories Dinner

Million Dollar Chicken Bake Tasty Family Dinner

July 4, 2025 by Chef Theo
To make Million Dollar Chicken Bake, gather these items: - 4 boneless, skinless chicken breasts - 1 cup cream cheese, softened - 1 cup sour cream - 1 cup shredded cheddar cheese - ½ cup ranch dressing - ½ teaspoon garlic powder - ½ teaspoon onion powder - 1 teaspoon dried parsley - ½ teaspoon black pepper - 1 cup crispy fried onions (for topping) You can swap ingredients if needed. Here are some ideas: - Use Greek yogurt instead of sour cream for a healthier option. - Swap cream cheese with Neufchâtel cheese for fewer calories. - Try different cheese, like Monterey Jack, for a unique taste. - If you don't have ranch dressing, use a mix of mayo and herbs. Quality matters in this dish. Here are some tips: - Look for chicken breasts that are pink and firm. - Choose cream cheese that feels soft and fresh. - Check the expiration date on the sour cream and ranch dressing. - Pick sharp cheddar cheese for a stronger flavor. - Fresh herbs will always taste better than dried ones. Using fresh, high-quality ingredients will elevate your Million Dollar Chicken Bake to a new level. For the full recipe, refer to the section above. First, gather your ingredients. You will need: - 4 boneless, skinless chicken breasts - 1 cup cream cheese, softened - 1 cup sour cream - 1 cup shredded cheddar cheese - ½ cup ranch dressing - ½ teaspoon garlic powder - ½ teaspoon onion powder - 1 teaspoon dried parsley - ½ teaspoon black pepper - 1 cup crispy fried onions (for topping) Next, preheat your oven to 375°F (190°C). Grease a 9x13 inch baking dish. In a large bowl, mix the cream cheese, sour cream, ranch dressing, cheddar cheese, garlic powder, onion powder, parsley, and black pepper. Stir until smooth. This mix is the heart of the dish. Now, place the chicken breasts in the greased dish. Spread half of the cheese mixture over the chicken. Cover them well so they soak up the flavor. Bake in the oven for 25-30 minutes. Your chicken is done when it reaches 165°F (74°C). After the first bake, take out the dish. Spread the rest of the cheese mixture on top of the chicken. Sprinkle crispy fried onions over everything for extra crunch. Return the dish to the oven for another 10-15 minutes. You want the top to be golden and bubbly. Let the dish cool for about 5 minutes after baking. This helps it set. Serve it right from the baking dish for a cozy family meal. Garnish with fresh parsley for color. Pair it with a side salad or steamed vegetables. This makes the meal more balanced. For the full recipe, check the earlier section! To keep chicken juicy, choose the right cut. Boneless, skinless chicken breasts are great, but they can dry out. Marinating the chicken in ranch dressing adds flavor and moisture. Let it sit for at least 30 minutes before baking. This helps the flavors soak in. During cooking, avoid opening the oven door too much. Each time you do, heat escapes. Baking is ideal for this dish. It cooks the chicken evenly and keeps it moist. Preheat your oven to 375°F (190°C) for best results. You can also use a meat thermometer. Aim for an internal temperature of 165°F (74°C). This ensures the chicken is safe to eat. If you want a crispy top, broil the dish for a few minutes at the end. This gives a nice golden finish. One mistake is overcooking the chicken. This leads to dry meat. Always check the temperature to avoid this. Another common error is not greasing the baking dish. This can cause sticking and make serving hard. Also, don’t forget to let the dish cool for five minutes before digging in. This helps set the cheese mixture and makes serving easier. For the full recipe, check out the Million Dollar Chicken Bake. {{image_2}} To add a kick, try making a spicy version. You can mix in diced jalapeños or a splash of hot sauce into the cheese mixture. This gives each bite a nice heat. If you love spice, this change will excite your taste buds! For a low-carb option, swap the chicken breasts for cauliflower. Use the same cheese mixture to cover the cauliflower. Bake it until it is tender and golden. This makes a great vegetarian dish that still feels rich and creamy. You can also make this dish vegetarian by using chickpeas instead of chicken. Use the same cheese sauce over the chickpeas. You can add spinach or bell peppers for extra flavor and color. This way, you keep the creamy texture, but it becomes a plant-based meal. These variations keep the spirit of the Million Dollar Chicken Bake while adding new twists. Feel free to mix and match based on your taste! For more details, check out the Full Recipe. After enjoying your Million Dollar Chicken Bake, store leftovers in an airtight container. Place the cooled dish in the fridge. It can stay fresh for about 3 to 4 days. If you want to keep it longer, freezing is a better option. To reheat, preheat your oven to 350°F (175°C). Place the chicken bake in a baking dish. Cover it with foil to keep it moist. Heat for about 20-25 minutes or until hot throughout. You can also use a microwave for quick reheating. Just cover it and heat in short bursts, stirring in between. To freeze, wrap the chicken bake tightly in plastic wrap, then in foil. This helps prevent freezer burn. You can freeze it for up to 3 months. When you're ready to eat, thaw it overnight in the fridge before reheating. Enjoy your delicious meal whenever you crave it! You can serve Million Dollar Chicken Bake with many sides. I love pairing it with a fresh salad. A simple green salad adds crunch and freshness. Steamed vegetables like broccoli or green beans work great too. You can also serve it with rice or mashed potatoes for a hearty meal. These sides balance the rich flavors of the chicken bake. Yes, you can prepare Million Dollar Chicken Bake ahead of time. Just follow the recipe steps up to baking. Cover the dish and place it in the fridge. When you're ready to eat, bake it directly from the fridge. You might need to add a few extra minutes to the cooking time. This makes dinner easier on busy days. To check if the chicken is fully cooked, use a meat thermometer. The thickest part of the chicken should reach 165°F (74°C). If you don’t have a thermometer, cut into the chicken. The meat should be white with no pink inside. Juices should run clear. This ensures your chicken is safe to eat. If you don't have ranch dressing, don’t worry! You can make a quick substitute. Mix equal parts sour cream and mayonnaise. Add some herbs like dill or parsley for flavor. You can also use Italian dressing or a yogurt-based dressing. These options will keep your dish delicious and creamy. You learned about choosing great ingredients and their substitutions. We explored steps for prep, cooking, and serving. I shared tips for juicy chicken and the best cooking methods. We also looked at fun variations and important storage info. Finally, remember to avoid common mistakes to get the best meal. Use these tips to make cooking enjoyable and easy. Happy cooking!

Looking for a tasty family dinner that’s easy to make and packed with flavor? The Million Dollar Chicken Bake is just what you need! This dish combines tender chicken, rich …

Read more

Categories Dinner

Easy Zucchini Puffs Simple and Flavorful Snack

July 4, 2025 by Chef Theo
To make easy zucchini puffs, gather these ingredients: - 2 medium zucchinis, grated - 1 cup all-purpose flour - ½ cup grated Parmesan cheese - 2 large eggs - 1 teaspoon garlic powder - 1 teaspoon onion powder - ½ teaspoon baking powder - Salt and pepper to taste - ¼ cup chopped fresh herbs (such as parsley or basil) - Olive oil for frying Each ingredient plays a key role. The zucchini brings moisture and flavor. The eggs and flour bind everything together. The cheese adds a nice creaminess, while the herbs give a fresh touch. When picking zucchini, look for firm and shiny ones. Choose zucchinis that are medium-sized. Avoid ones with soft spots or blemishes. Fresh zucchini should feel heavy for its size. You can store it in the fridge for up to a week. If you want to add more flavor, consider these options: - Red pepper flakes for heat - Feta cheese for a tangy taste - Chopped sun-dried tomatoes for sweetness - Lemon zest for brightness These ingredients can transform your zucchini puffs into a unique dish. Mix and match based on your taste! For the full recipe, check out the detailed instructions in the article. To make Easy Zucchini Puffs, start with fresh zucchinis. Grate two medium zucchinis using a box grater. This step helps them cook evenly. After grating, place the zucchini in a clean kitchen towel. Gather the corners of the towel and squeeze out excess moisture. Removing this water is key for crispy puffs. In a large mixing bowl, combine the dried zucchini, one cup of all-purpose flour, and half a cup of grated Parmesan cheese. Add two large eggs, one teaspoon of garlic powder, one teaspoon of onion powder, and half a teaspoon of baking powder. Season with salt and pepper to taste. Mix all these ingredients well until you create a thick batter. Next, fold in a quarter cup of chopped fresh herbs, like parsley or basil. These herbs add great flavor and freshness to your puffs. Now, heat a large skillet over medium heat. Add a thin layer of olive oil to the pan. Once the oil is hot, drop spoonfuls of the zucchini mixture into the skillet. Make sure to flatten them slightly with the back of a spoon. Cook the puffs for about three to four minutes on each side. Look for a golden brown and crispy finish. As you cook, repeat with the remaining mixture, adding more oil as needed. Finally, transfer the cooked puffs to a paper towel-lined plate to soak up any excess oil. For crispy Easy Zucchini Puffs, moisture control is crucial. Grating zucchinis is just the first step. Squeezing out the excess moisture helps the puffs crisp up nicely when frying. If they are too wet, the puffs will turn out soggy. Using the right heat is also important. Medium heat allows the puffs to cook through without burning. If the oil is too hot, the outside will brown too quickly. Be patient, and let them cook until golden. Finally, ensure even cooking by flattening the mixture in the skillet. This helps create a nice, uniform texture. Flip them carefully to maintain their shape. To prepare easily, gather all your ingredients before you start. This makes the cooking process smoother. Set a timer for about 15 minutes for prep. Grating zucchinis and mixing the batter shouldn't take long. While cooking the puffs, use the time to clean up. Wipe down counters and wash mixing bowls. This keeps your kitchen tidy and makes it easier to enjoy your meal. By managing your time well, you can have delicious Zucchini Puffs ready in just 30 minutes. For the full recipe, check back to ensure you have all the steps covered. To make crispy zucchini puffs, you need to remove excess water. After grating the zucchinis, place them in a clean kitchen towel. Squeeze tightly to get rid of moisture. This step is key. A drier mixture leads to a crispier puff. Also, use enough oil in your skillet. A thin layer helps fry them evenly. Don't overcrowd the pan; this can lower the oil temperature. Cook in batches for the best results. Grating zucchinis can be simple with a few tips. First, use a box grater for fast results. Choose medium-sized zucchinis for easy handling. Grate them right before cooking for freshness. If you notice too much moisture, squeeze it out as mentioned. This helps keep the puffs from getting soggy. Finally, use a large bowl to mix everything. It makes combining ingredients much easier. A few mistakes can ruin your zucchini puffs. First, don’t skip squeezing out the moisture. Skipping this makes puffs soggy. Second, avoid using too much flour. If you add more than the recipe states, the texture changes. It can make them dense. Third, don't cook them on high heat. This can burn the outside while leaving the inside raw. Stick to medium heat for even cooking. Follow the Full Recipe for the best outcome! {{image_2}} You can easily change up the Easy Zucchini Puffs to keep things fun. Try adding corn or diced bell peppers for a sweet crunch. You can also mix in cooked bacon bits for a savory twist. If you like a kick, add some diced jalapeños or a dash of hot sauce. These changes will bring new flavors and textures to your snack. Cheese choices can really change the taste. Instead of Parmesan, try feta or cheddar. Each cheese gives a unique flavor. You can also play with spices. Add smoked paprika for a deep, warm flavor. Or, sprinkle in some Italian herbs like oregano or thyme. These options let you customize the puffs to fit your taste. Making these puffs vegetarian is simple. Just skip the cheese or use a plant-based option. For a vegan version, replace the eggs with flaxseed meal or a banana. Both options bind the ingredients well. You can also add nutritional yeast for a cheesy flavor without dairy. These swaps make the puffs friendly for all diets. Check out the Full Recipe for the complete details! Store leftover zucchini puffs in an airtight container. Let them cool completely first. Keep the container in the fridge for up to three days. This keeps the puffs fresh but may soften them. To freeze zucchini puffs, let them cool completely. Place them in a single layer on a baking sheet. Freeze for about an hour until firm. Then, transfer the puffs to a freezer bag. Label the bag and store for up to three months. To reheat, preheat your oven to 375°F (190°C). Place the puffs on a baking sheet. Bake for about 10 minutes until they are hot and crispy again. You can also use an air fryer for a quicker option. This method keeps them crunchy, just like when you first made them. For more details, check the Full Recipe. To make Easy Zucchini Puffs gluten-free, swap the all-purpose flour for a gluten-free blend. Look for a blend that includes xanthan gum. This helps bind the mixture. You can also use almond flour or coconut flour. These options add unique flavors. Keep in mind that the texture may change slightly, but they will still be delicious. Zucchini Puffs pair well with many dips and sides. Here are some ideas: - Tzatziki sauce - Spicy yogurt dip - Tomato salsa - A fresh salad - Sliced avocados These will enhance the flavors of your puffs. You can serve them warm or at room temperature. Yes, you can bake Zucchini Puffs! Preheat your oven to 400°F (200°C). Line a baking sheet with parchment paper. Place spoonfuls of the zucchini mixture on the sheet. Flatten them slightly. Bake for about 20-25 minutes, flipping halfway through. They may not be as crispy as fried puffs, but they will still be tasty and healthy. For the best results, brush them lightly with olive oil before baking. For the full recipe, check out the details above. Enjoy making these Easy Zucchini Puffs! In this post, we explored how to make Easy Zucchini Puffs. We covered the best ingredients, how to prepare them, and tips for success. You learned key cooking methods, storage tips, and how to avoid common mistakes. Try adding your favorite spices or cheeses for a new twist. With these steps, you'll enjoy crisp, tasty puffs every time. Enjoy your cooking journey!

If you’re looking for a quick and tasty snack, Easy Zucchini Puffs are the answer. I love how simple they are to make, and they pack a punch of flavor! …

Read more

Categories Appetizers

Summer Cavatelli with Corn, Tomatoes, and Zucchini Dish

July 4, 2025 by Chef Theo
To make Summer Cavatelli with Corn, Tomatoes, and Zucchini, you'll need: - 400g cavatelli pasta - 2 cups fresh corn kernels (about 3-4 ears) - 1 medium zucchini, diced - 2 cups cherry tomatoes, halved - 3 cloves garlic, minced - 3 tablespoons olive oil - 1 teaspoon red pepper flakes (optional) - Fresh basil leaves, roughly torn - Salt and pepper to taste - ½ cup grated Parmesan cheese (optional for garnish) When it comes to ingredient amounts, feel free to adjust based on your taste. If you like more corn, add an extra ear or two. You can swap the zucchini for bell peppers or eggplant if you prefer. For garlic lovers, add more than three cloves. If you want a bit of heat, keep the red pepper flakes. Otherwise, leave them out. You can use any pasta you have on hand, but cavatelli holds the sauce well. If you're out of Parmesan, try a different cheese like feta or omit it for a dairy-free dish. This dish shines during summer when vegetables are fresh and sweet. Corn tastes best when harvested in summer. It adds a crunch and natural sweetness. Zucchini is plentiful and tender, making it perfect for this recipe. Cherry tomatoes burst with flavor and color, making your plate pop. Plus, fresh basil gives a bright aroma. Using these seasonal ingredients not only supports local farmers but also enhances the taste and nutrition of your meal. Eating in season can make cooking more fun and flavorful. You’ll find the full recipe here to get cooking! Cooking Summer Cavatelli with corn, tomatoes, and zucchini is simple. You will boil pasta, sauté veggies, and combine everything. This dish highlights fresh summer flavors. Each step builds layers of taste. 1. Cook Pasta: Start by boiling water in a large pot. Add salt once it boils. Cook cavatelli until it is al dente. This takes about 10 minutes. Reserve 1 cup of pasta water for later. Drain the pasta and set it aside. 2. Sauté Vegetables: Heat olive oil in a large skillet over medium heat. Add minced garlic and red pepper flakes. Sauté for 1 minute until it smells great. 3. Add Corn and Zucchini: Next, stir in fresh corn and diced zucchini. Cook for 5-7 minutes. The zucchini should be tender, and the corn should caramelize a bit. 4. Incorporate Tomatoes: Now, add halved cherry tomatoes to the skillet. Cook for another 3-4 minutes. Stir gently until the tomatoes soften. 5. Combine with Pasta: Add the drained cavatelli to the skillet. Toss everything together gently. If it looks dry, add some reserved pasta water. This helps create a light sauce. 6. Season and Serve: Season the dish with salt, pepper, and fresh basil. Toss until everything is well mixed and heated through. 7. Garnish: Serve the cavatelli hot. You can add grated Parmesan cheese on top if you like. Fresh basil leaves add a nice touch, too. - Don't Overcook: Check the pasta often to avoid mushiness. - Use Plenty of Water: Always boil pasta in a large pot with salted water. - Save Pasta Water: The starchy water helps sauce stick better. - Taste as You Go: Adjust seasoning based on your preference. Enjoy making this dish! You can find the full recipe above for more details. To boost flavor in your Summer Cavatelli, use fresh ingredients. Fresh corn adds sweetness. Use ripe cherry tomatoes for that juicy burst. A touch of red pepper flakes adds heat, but adjust to your taste. Always season with salt and pepper as you cook. This helps flavors meld together. Finish with fresh basil for a bright taste. Prep your ingredients before cooking. This keeps the cooking process smooth. Start by husking and cutting the corn off the cob. Dice your zucchini into even pieces. Halve the cherry tomatoes for quick cooking. Mince the garlic finely to release its flavor. Having everything ready makes the dish easier to create. If the pasta is too sticky, you may have overcooked it. Always check the package instructions for timing. If your sauce seems dry, add reserved pasta water slowly until it reaches your desired consistency. If the veggies burn, lower the heat. Stirring often helps prevent this. Enjoy your dish without worry! For the full recipe, check out the section above. {{image_2}} You can easily swap ingredients to fit your diet. For a gluten-free option, use gluten-free cavatelli or another gluten-free pasta. If you're vegan, leave out the Parmesan cheese or use a plant-based version. You can also replace corn with peas for a different flavor. For a lower-carb choice, zucchini noodles can work well too. Try roasting the vegetables for a smoky flavor. Toss the corn, zucchini, and tomatoes with olive oil and salt. Roast them at 400°F for 20 minutes. This adds a nice char and depth to your dish. You could also grill the vegetables for a fresh taste. Just remember to keep an eye on them so they don’t burn! Serve your cavatelli in a big bowl with a sprinkle of fresh basil on top. You can also add a drizzle of balsamic glaze for a sweet twist. For a unique touch, try serving it in a hollowed-out zucchini or bell pepper. This makes the dish look fun and inviting. Pair with a light salad or crusty bread for a complete meal. After enjoying your summer cavatelli, let it cool completely. Place it in an airtight container. This keeps the flavors fresh. Store it in the fridge for up to three days. If you have more, consider freezing it. To reheat, use a skillet on medium heat. Add a splash of olive oil or water. This helps prevent sticking. Stir gently until heated through. You can also use the microwave. Heat in short bursts, stirring in between. For meal prep, freeze portions in airtight containers. Use freezer bags for easy stacking. Remove as much air as possible to avoid freezer burn. Thaw overnight in the fridge before reheating. This meal stays tasty even when frozen! Cavatelli is a type of pasta that looks like small shells. It is made from flour and water. The shape helps it hold sauces well. This pasta is great for dishes with sauce or veggies. It cooks quickly and has a nice chewiness. Yes, you can make this recipe vegan. Simply leave out the Parmesan cheese. You can also swap olive oil with a plant-based butter. Use nutritional yeast for a cheesy flavor. This keeps all the taste without using any animal products. You will know the vegetables are cooked when they are tender. The zucchini should be soft but still firm. The corn should look bright and slightly caramelized. The tomatoes will soften and release some juice. This usually takes about 8-10 minutes of cooking. To add protein, consider adding cooked chickpeas or white beans. Grilled chicken or shrimp also works well. You can even toss in some cooked lentils for a plant-based option. These additions will make your dish more filling and nutritious. For the full recipe, you can check out the Summer Cavatelli Delight section above. This will guide you through all the steps. You’ll find everything you need to make a delicious meal. This blog post shared everything you need to know about cavatelli. We looked at ingredients, cooking steps, and tips to enhance flavor. You also learned about interesting variations and how to store leftovers properly. Cavatelli is a fun pasta to make and enjoy. With the right ingredients and methods, you can create a tasty dish. Take these tips and tricks to feel more confident in your cooking. Happy cooking!

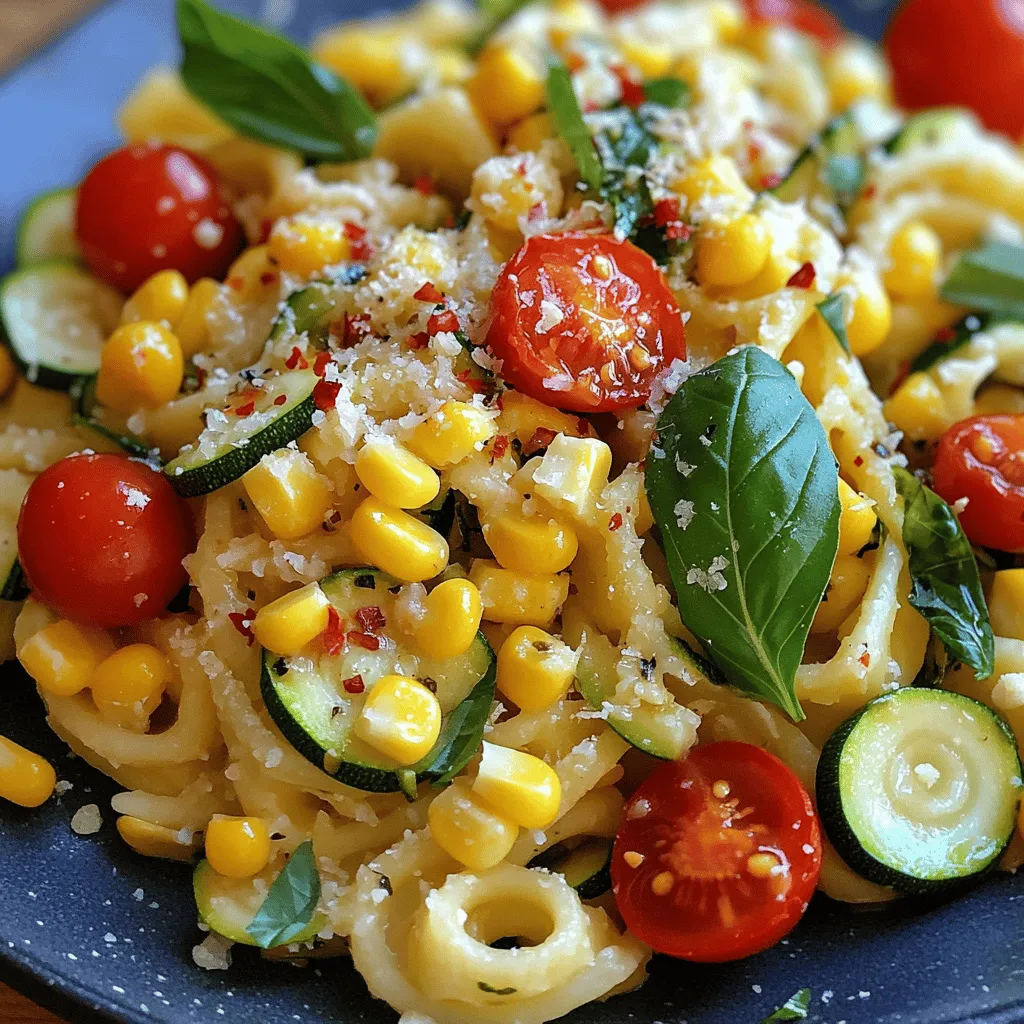
Ready to dive into a delightful summer dish? My Summer Cavatelli with Corn, Tomatoes, and Zucchini is the perfect blend of fresh, seasonal ingredients. This recipe bursts with flavor and …

Read more

Categories Dinner

Kentucky Squash Casserole Delightful and Simple Recipe

July 4, 2025 by Chef Theo
- 4 medium yellow squash, sliced thin - 1 medium onion, chopped - 1 cup shredded sharp cheddar cheese - 1 cup crushed saltine crackers (plus extra for topping) - 3 large eggs, beaten - ½ cup milk - 1 tablespoon olive oil - 1 teaspoon garlic powder - 1 teaspoon dried thyme - ½ teaspoon paprika - Salt and pepper to taste To create a delicious Kentucky squash casserole, the right ingredients matter. The squash gives a fresh taste, while the cheddar adds a creamy kick. The crushed saltine crackers provide a nice crunch. Eggs and milk hold everything together. You will also need some spices for flavor, like garlic powder and thyme. You can swap some items if you want. For cheese, use mozzarella or a dairy-free option. Instead of saltine crackers, try gluten-free breadcrumbs or crushed corn chips. If you want it vegetarian, use a plant-based cheese. This recipe is flexible to meet your needs. Experiment with what you have! You can also add more veggies like bell peppers or zucchini for extra flavor. 1. Preheat your oven to 350°F (175°C). 2. Grease a 9x13 inch baking dish with a bit of olive oil. 3. In a large skillet over medium heat, add the olive oil. 4. Next, add the chopped onion and sauté until it turns clear, about 5 minutes. 5. Now, add the sliced squash to the skillet. Cook until tender, about 8-10 minutes. Stir often. 1. In a big bowl, combine the sautéed onion and squash. 2. Add beaten eggs, milk, garlic powder, dried thyme, paprika, salt, and pepper. 3. Mix everything well to blend the flavors. 4. Then, fold in the shredded cheddar cheese and crushed saltine crackers. 5. Make sure to save some crackers for topping later. 1. Pour the mixture into the greased baking dish. Smooth it out. 2. Sprinkle the reserved crushed saltine crackers on top for crunch. 3. Bake in the oven for 30-35 minutes. Check when the top is golden brown. 4. Remove from the oven and let it cool for a few minutes. 5. Slice and serve warm for the best taste. For the complete recipe, check the Full Recipe section. To make your Kentucky Squash Casserole shine, focus on seasoning. Use salt and pepper to enhance the flavor. A touch of garlic powder wakes up the dish. Adding thyme gives it a fresh taste. Don’t be shy about tasting as you go. This ensures the right balance. For texture, consider how you cut the squash. Thin slices cook quickly and blend well. If you want a little bite, cut them thicker. You can also sauté them longer for a more caramelized flavor. This adds depth to your casserole. Pair your casserole with a light side salad. A mix of greens with a lemon vinaigrette works wonders. You can also serve it with cornbread for extra comfort. My favorite is to enjoy it warm. The flavors really pop when it’s fresh from the oven. Let it cool for a few minutes before serving. This helps the casserole set up well. You’ll find it easier to slice clean pieces. If you want to kick up the flavor, add herbs. Fresh basil or parsley can brighten the dish. You can also try a bit of crushed red pepper. This adds a nice heat that some may enjoy. For heartiness, think about adding proteins. Ground turkey or cooked sausage works great. You can mix in other vegetables too. Spinach or bell peppers add color and nutrition. This way, your casserole stays interesting and fun. Feel free to explore with the Full Recipe for more ideas! {{image_2}} You can easily change up your Kentucky squash casserole. One popular addition is ground turkey or sausage. Adding meat gives the dish more protein and flavor. Just cook the meat before adding it to the mix. This step ensures it blends well with the squash. You can also add more vegetables. Consider bell peppers, zucchini, or spinach. These add color and nutrients. They mix well with the squash and enhance the dish's taste. Feel free to experiment with what you have on hand. Southern states each have their take on squash casserole. In Alabama, some people add bacon or pimento cheese. This twist adds a smoky rich flavor. In Louisiana, you might find Cajun spices like cayenne. This gives it a fun kick! You can also modify your casserole based on local ingredients. If you have fresh tomatoes, toss them in for a burst of flavor. Seasonal veggies can make your casserole unique and fresh. If you're watching carbs, try low-carb options. Replace some squash with cauliflower. Cauliflower has a similar texture and absorbs flavors well. You can also skip the crackers and use almond flour instead. For dairy-free options, swap the cheese and milk with plant-based alternatives. Nutritional yeast can add a cheesy flavor without dairy. Coconut milk works well for a creamy base. These adjustments keep the dish delicious and friendly to various diets. If you want the full recipe, check out the Kentucky Comfort Squash Casserole 🥬. Enjoy making it your own! To keep your Kentucky Squash Casserole fresh, store leftovers in the fridge. Use an airtight container to prevent moisture loss. This helps maintain flavor and texture. Make sure to cool the casserole to room temperature first. It can last up to three days in the fridge. If you want to save it for later, freezing is a great option. Cut the casserole into serving-sized pieces. Wrap each piece tightly in plastic wrap. Place wrapped pieces in a freezer bag or container. This helps prevent freezer burn. You can freeze it for up to three months. When ready to eat, thaw it overnight in the fridge. To reheat, use the oven for the best results. Preheat your oven to 350°F (175°C). Place the casserole in an oven-safe dish. Cover it with foil to keep moisture in. Heat for about 25 minutes or until warmed through. This keeps the casserole from drying out. If you want a crisp top, remove the foil for the last 5-10 minutes. Avoid microwaving, as it can make the dish soggy. For best flavor, serve warm and enjoy! Kentucky Squash Casserole has roots in Southern cooking. It showcases summer squash, a staple in the region. Families often made this dish to use up their garden harvest. The blend of cheese and crackers adds comfort and flavor. This casserole reflects the warmth of Southern hospitality and tradition. It brings people together at the dinner table, making it a beloved dish. Yes, you can prepare Kentucky Squash Casserole ahead of time. Cook the squash and onion, then mix the ingredients. Store the mixture in the fridge for one to two days. When ready to bake, pour it into the dish and top with crackers. Bake as directed. This method saves time and makes hosting easier. To serve more people, simply scale the ingredients. For every additional two servings, add one medium squash and half an onion. Increase the cheese and crackers to match. Adjust eggs and milk accordingly. A larger dish may be needed, so keep an eye on the baking time. This way, everyone can enjoy Kentucky Squash Casserole. Yes, this dish is perfect for vegetarians. All the ingredients are plant-based, except for the eggs. You can easily replace eggs with a plant-based alternative, like flaxseed meal or applesauce. This keeps the casserole vegetarian-friendly while maintaining its delicious taste. Enjoy this comforting dish with friends and family! In summary, we explored the key ingredients for Kentucky Squash Casserole and how to prepare it step by step. We talked about exciting variations, substitutions, and storage tips. Overall, this dish is versatile and offers many options for all tastes. Whether vegetarian or loaded with meat, you can make it your own. I hope you feel inspired to try this comforting recipe. Happy cooking!

If you’re looking for a dish that’s both easy and packed with flavor, you’ve found it! Kentucky Squash Casserole is a classic comfort food that brightens any meal. This simple …

Read more

Categories Dinner

Zucchini Breadsticks Savory and Satisfying Treat

July 2, 2025 by Chef Theo
Here’s what you need to make these tasty zucchini breadsticks: - 2 medium zucchinis, grated and excess moisture squeezed out - 1 cup all-purpose flour - 1/2 cup grated parmesan cheese - 1/2 cup shredded mozzarella cheese - 1 large egg - 2 tablespoons olive oil - 1 teaspoon garlic powder - 1 teaspoon dried oregano - 1/2 teaspoon salt - 1/4 teaspoon black pepper - 1/4 teaspoon red pepper flakes (adjust to taste) - Optional: Marinara sauce for dipping These simple ingredients come together to create a savory and satisfying treat. The zucchinis give moisture and flavor. The cheeses add creaminess and a rich taste. Using garlic and oregano gives them a wonderful aroma. Be sure to squeeze out the moisture from the zucchini. This step helps keep the breadsticks from becoming soggy. You can enjoy these breadsticks on their own or dip them in marinara sauce. For the full recipe, check out the instructions. You'll love how easy they are to make! 1. Preheat your oven to 400°F (200°C). Line a baking sheet with parchment paper. 2. Take your zucchinis and grate them. Squeeze out the extra moisture using a clean towel. This step keeps your breadsticks from being soggy. 1. In a large bowl, combine the grated zucchini, flour, parmesan cheese, mozzarella cheese, and the egg. Mix well until everything blends nicely. 2. Add olive oil, garlic powder, oregano, salt, black pepper, and red pepper flakes to the bowl. Stir until all ingredients are evenly mixed. 1. Spread the mixture onto the prepared baking sheet. Shape it into a rectangle, about 1/2 inch thick. 2. Bake in the preheated oven for 20-25 minutes. Look for golden edges and a firm center. 3. Once baked, remove the sheet from the oven and let it cool for 5 minutes. Use a knife to cut the baked mixture into sticks. 4. For added crispiness, return the cut breadsticks to the oven for another 5 minutes. 5. Serve warm with marinara sauce on the side for dipping. For the complete list of ingredients and details, refer to the Full Recipe. To make great zucchini breadsticks, you need to squeeze out excess moisture from the zucchini. Here’s how: - Grate the zucchini using a box grater or food processor. - Place the grated zucchini in a clean kitchen towel. - Twist the towel and squeeze hard to remove water. This step keeps your breadsticks from becoming soggy. For even baking, spread the zucchini mixture evenly on the baking sheet. Aim for about half an inch thick. This helps all sides cook the same. Rotate the baking sheet halfway through cooking. This helps the breadsticks brown nicely on all sides. Zucchini breadsticks are great on their own, but you can elevate them. Pair them with marinara sauce for a classic touch. You can also try these toppings for extra flavor: - Sprinkle more cheese on top before baking. - Add fresh herbs like basil or parsley for color and taste. - Serve with a creamy dip like ranch or hummus. These small changes make the breadsticks even more fun to eat. Enjoy your savory and satisfying treat! {{image_2}} You can make tasty swaps for the ingredients in zucchini breadsticks. This makes them fit your needs. - Gluten-free flour options: Use almond flour or coconut flour instead of all-purpose flour. Both work well and keep the breadsticks moist. - Non-dairy cheese alternatives: Try using vegan mozzarella or nutritional yeast. They add great flavor without dairy. To make your zucchini breadsticks stand out, add more flavor! Here’s how: - Extra spices for heightened flavor: You can mix in cumin or smoked paprika. These spices bring warmth and depth to each bite. - Adding herbs and other vegetables: Fresh basil or chopped spinach can be added. They boost the taste and add more nutrition. You can also add bell peppers or onions for extra crunch. For the full recipe, check out the Zesty Zucchini Breadsticks section above. Enjoy experimenting with these variations! To store your leftover zucchini breadsticks, let them cool first. Place them in an airtight container. You can keep them in the fridge for up to three days. If you want to save them longer, consider freezing. Wrap each stick tightly in plastic wrap. Then, place them in a freezer bag. They can last for up to three months in the freezer. When you're ready to enjoy your zucchini breadsticks again, reheating is simple. The best method is to use an oven. Preheat your oven to 350°F (175°C). Place the breadsticks on a baking sheet. Heat them for about 10-15 minutes. This will make them crispy again. You can also use a microwave for quick reheating. Just remember, this may make them a bit softer. If you want to dip them in marinara sauce, warm that up too for the best flavor. How to keep zucchini breadsticks from being soggy? To prevent sogginess, remove excess moisture from the grated zucchini. Squeeze it in a clean kitchen towel or paper towels. Use a good amount of flour to balance moisture in the mix. Baking them until golden brown also helps. Can I make zucchini breadsticks ahead of time? Yes, you can make zucchini breadsticks ahead of time. Bake them and let them cool. Store them in the fridge for up to three days. Then, simply reheat them in the oven before serving. This keeps them fresh and tasty. What can I use instead of marinara sauce for dipping? If you want a change from marinara sauce, try ranch dressing or hummus. You can also use tzatziki for a cool, refreshing dip. Another option is a spicy salsa for a kick. Get creative with your favorite flavors! Feel free to check out the Full Recipe for more details! This article covered how to make tasty zucchini breadsticks. We detailed the key ingredients and offered step-by-step baking instructions. You learned tips for perfecting your recipe and explored variations. Storing leftovers and reheating options were also discussed. In closing, these breadsticks are a fun, healthy snack. Experiment with flavors and enjoy every bite. You’ll impress friends and family with your skills!

Are you ready to enjoy a tasty snack that’s both healthy and fun to make? My Zucchini Breadsticks are a savory treat perfect for any time of day. With simple …

Read more

Categories Appetizers
Older posts
Newer posts
← Previous Page1 … Page37 Page38 Page39 … Page105 Next →

TOASTED RECIPES

Where ideas are warm, crisp, and ready to serve! 🍞

PAGES

Home About Contact Privacy Policy Terms & Conditions Cookie Policy GDPR Policy Copyright Policy Disclaimer

CATEGORIES

Appetizers Desserts Salads Breakfast Dinner

Contact

  • Pinterest
  • Mail
Copyright © 2025 Toasted Recipes. All rights reserved.