Skip to content
toastedrecipes.com
  • Home
  • Appetizers
  • Desserts
  • Salads
  • Breakfast
  • Dinner
  • Privacy Policy
  • Contact
  • About

Chef Theo

Avocado Brownies Rich and Decadent Dessert Treat

July 12, 2025 by Chef Theo
To whip up these delicious avocado brownies, gather the following ingredients: - 1 large ripe avocado, mashed - 1/2 cup almond butter - 1/2 cup maple syrup - 1 teaspoon vanilla extract - 1/3 cup unsweetened cocoa powder - 1/2 teaspoon baking soda - 1/4 teaspoon salt - 1/2 cup dark chocolate chips (dairy-free if desired) These simple items create a rich and tasty treat. The ripe avocado gives the brownies a creamy texture and a healthy twist. Why use avocado in brownies? Avocado is packed with nutrients. It provides healthy fats, fiber, and vitamins. Here are some key benefits: - Healthy Fats: Avocados contain monounsaturated fats, which are good for your heart. - Fiber: This helps keep you full and aids digestion. - Vitamins: They are rich in vitamins E, C, and B6, which support overall health. Using avocado instead of butter or oil lowers the calorie count too. This makes your dessert a little better for you without losing that decadent taste. If you have dietary restrictions or preferences, you can swap some ingredients. Here are a few ideas: - Nut Butter: Use peanut butter or cashew butter instead of almond butter. - Sweeteners: Try honey or agave syrup in place of maple syrup. - Flour Substitutes: If you want gluten-free, use almond flour or coconut flour. These changes keep the brownies tasty while meeting your needs. Now you can enjoy a treat that fits your lifestyle! For the full recipe, check below. To start, gather your ingredients. You will need: - 1 large ripe avocado, mashed - 1/2 cup almond butter - 1/2 cup maple syrup - 1 teaspoon vanilla extract - 1/3 cup unsweetened cocoa powder - 1/2 teaspoon baking soda - 1/4 teaspoon salt - 1/2 cup dark chocolate chips First, preheat your oven to 350°F (175°C). This step is key for even baking. Next, grease an 8x8 inch baking pan or line it with parchment paper. This helps the brownies come out easily. In a mixing bowl, combine the mashed avocado and almond butter. Mix until smooth and creamy. This will be your wet mixture. Now, add the maple syrup and vanilla extract to the avocado mix. Stir well until everything blends together. In a separate bowl, sift together the cocoa powder, baking soda, and salt. This helps make sure there are no lumps. Gradually add the dry mix to the wet mix. Stir gently until just combined. You want no flour pockets left. Finally, fold in the dark chocolate chips. You can save a few to sprinkle on top. Now the batter is ready. Pour the brownie batter into the prepared baking pan. Spread it evenly with a spatula. Sprinkle any reserved chocolate chips on top for a nice finish. Place the pan in your preheated oven. Bake for 20-25 minutes. Use a toothpick to check for doneness. It should come out mostly clean, with a few moist crumbs. Once baked, allow the brownies to cool in the pan for at least 10 minutes. This makes cutting easier. After cooling, cut them into squares. For a fun serving idea, dust them with cocoa powder. You can also serve them warm with a scoop of your favorite dairy-free ice cream. This adds a special touch to your dessert. Enjoy! To make your brownies fudgy, use ripe avocados. The creaminess of ripe fruit helps. You also want to mix well but not too much. Overmixing can add air and make them cakey. When you bake, keep an eye on the time. Bake just until a toothpick comes out with a few moist crumbs. This way, they stay rich and soft. One big mistake is using unripe avocados. They can make your brownies taste green and bitter. Another mistake is not measuring ingredients correctly. Always use measuring cups for precision. If you skip the cocoa powder, your brownies will lack that rich chocolate flavor. Lastly, do not open the oven door too early. This can cause the brownies to sink in the middle. You can boost the flavor of your brownies with fun add-ins. Try adding chopped nuts like walnuts or pecans for crunch. You can also mix in dried fruit for a sweet surprise. For a richer flavor, use dark chocolate chips or a sprinkle of sea salt on top. If you want a fun twist, try adding a dash of espresso powder. This will intensify the chocolate taste. Check out the Full Recipe for more ideas! {{image_2}} You can easily make these avocado brownies gluten-free and vegan. Use almond butter as your base. It’s creamy and adds a nice flavor. Instead of maple syrup, try agave syrup. This keeps the recipe vegan and sweet. Ensure your chocolate chips are dairy-free. This way, you keep it all plant-based and tasty. Want to spice things up? You can add nuts like walnuts or pecans. Chopped nuts give a nice crunch. You can also add spices like cinnamon or cayenne for warmth. These flavors mix well with chocolate. Just toss in about 1/4 cup of nuts or spices when you fold in the chocolate chips. Need to swap ingredients? No problem! For nut allergies, use sunflower seed butter instead of almond butter. If you want a sugar-free option, try stevia or erythritol. These substitutes can change the taste a bit, but they keep your brownies delicious. Just make sure to adjust the amounts as needed. For the full recipe, you can find all the details to guide your swaps. To keep your avocado brownies fresh, store them in an airtight container. This will prevent them from drying out. You can also wrap them in plastic wrap for extra protection. Make sure to place them in a cool, dry spot. Avoid direct sunlight to keep them tasty. These brownies stay fresh for up to five days at room temperature. If you want to keep them longer, freeze them. Wrap each brownie in plastic wrap and place them in a freezer bag. They will last for about three months in the freezer. When ready to eat, just thaw them in the fridge overnight. To enjoy your brownies warm, reheat them in the oven. Preheat the oven to 350°F (175°C). Place the brownies on a baking sheet and cover them with foil. Heat for about 10 minutes. You can also use a microwave. Heat for about 20 seconds, but keep an eye on them. Enjoy your rich and decadent treat! For the full recipe, refer to the section above. Yes, you can use fresh avocado. Fresh avocado gives the brownies a creamy texture. Just make sure it is ripe. A ripe avocado will mash easily. This ensures a smooth mix. If you use a hard avocado, your brownies may not be as creamy. Avocado brownies can be healthier. They use avocado instead of butter or oil. Avocados add healthy fats and fiber. They also bring a rich taste. You can also reduce sugar with maple syrup. This makes them a better choice for your diet. Plus, they can satisfy your sweet tooth without guilt. Check the brownies at 20 minutes. Insert a toothpick into the center. If it comes out with a few moist crumbs, they are ready. If it comes out wet, bake for a few more minutes. Remember, overbaking can make them dry. Let them cool for 10 minutes before cutting. This helps them set up nicely. For the full recipe, check out the earlier section. Avocado brownies offer a tasty twist on a classic treat. We explored ingredients, benefits, and alternatives. I shared step-by-step instructions for perfecting your bake. You learned tips for the best texture and flavor. We discussed gluten-free and vegan options, plus how to store brownies well. Overall, avocado brownies can fit many diets and still taste great. Enjoy experimenting with your favorite flavors. Happy baking!

If you love brownies but want a healthier twist, you’re in the right place! I’m excited to share my recipe for rich and decadent avocado brownies. This delicious treat swaps …

Read more

Categories Desserts

Crockpot Taco Rice Soup Hearty and Flavorful Dish

July 12, 2025 by Chef Theo
- 1 pound ground turkey or beef - 1 onion, diced - 2 cloves garlic, minced These main ingredients form the heart of our soup. Ground turkey or beef gives it a rich taste. Diced onion and minced garlic add great depth and aroma. - 1 can (15 oz) black beans, drained and rinsed - 1 can (15 oz) diced tomatoes with green chilies - 1 cup corn (frozen or canned) Adding black beans boosts the protein and fiber. The diced tomatoes with green chilies bring a kick of flavor. Corn adds sweetness and texture, making each spoonful delightful. - 1 packet taco seasoning - 1 cup uncooked brown rice - Optional toppings: avocado, cilantro, shredded cheese, lime wedges The taco seasoning ties all the flavors together. Uncooked brown rice thickens the soup and adds a hearty feel. For toppings, you can choose avocado, cilantro, shredded cheese, or lime wedges. These toppings add freshness and a burst of flavor to each bowl. For the complete list of ingredients, check the Full Recipe. First, I start by browning the ground turkey or beef in a skillet. I heat the skillet over medium heat and add the meat. I stir it often until it is fully cooked. Once cooked, I drain any excess fat. This step is key for a nice texture and flavor. Next, I add all the ingredients to my crockpot. I put in the cooked meat, diced onion, minced garlic, black beans, diced tomatoes, corn, broth, taco seasoning, uncooked brown rice, diced bell pepper, and cumin. I mix everything well to ensure an even blend. This helps the flavors meld together as it cooks. Now, it’s time to cook! I cover the crockpot and set it on low for 6-8 hours or high for 4-5 hours. I check the rice for doneness after the cooking time. It should be tender and soak up all the flavors. When done, I stir the soup again and adjust the seasoning with salt and pepper if needed. For the full recipe, refer to the earlier sections. To make your Crockpot Taco Rice Soup even more tasty, add spices like paprika or chili powder. These spices give a warm kick. You can also mix in a pinch of cayenne for heat. Consider toppings to boost flavor. Fresh avocado adds creaminess. Cilantro gives a fresh taste. Shredded cheese melts nicely on top. A squeeze of lime adds zing. Prep your ingredients the night before. Chop the onion, garlic, and bell pepper ahead of time. Store them in the fridge. This makes cooking in the morning easy. If you have leftovers, store them in airtight containers. The soup stays fresh in the fridge for up to four days. Sometimes, you may want a thicker soup. To thicken it, add more rice or a bit of cornstarch. Mix the cornstarch with cold water first, then stir it in. If your soup is too thick, add more broth or water. This keeps the soup tasty and easy to eat. Adjust until it feels just right. {{image_2}} You can switch up the protein in this soup. Using chicken instead of turkey or beef works great. Just cook the chicken until it's done and shred it before adding it to the crockpot. For a vegetarian or vegan twist, try using lentils or chickpeas. They add protein and fiber, keeping the dish hearty. You don't have to stick with brown rice. You can use white rice if you prefer a softer texture. It cooks faster, too! Quinoa is another good choice. It's rich in protein and gives a nutty flavor. If you're looking for a low-carb option, try cauliflower rice. It soaks up the soup flavors well. Adjusting the spice level is easy. If your kids are eating, keep it mild. You can skip the taco seasoning or use a mild version. For spice lovers, add chopped jalapeños or a dash of hot sauce. You can also sprinkle in chili powder or cayenne pepper for extra heat. This way, everyone can enjoy a bowl that fits their taste. To keep your Crockpot Taco Rice Soup fresh, store it properly. Start by letting the soup cool down. Once cooled, place it in an airtight container. Glass or plastic containers work well. Make sure to leave some space at the top, as the soup may expand when frozen. Label your container with the date so you know when you made it. You can freeze the soup for later use. To freeze, follow the same steps as above. Place the cooled soup in a freezer-safe container. Remember to leave space for expansion. When you're ready to enjoy it again, let it thaw in the fridge overnight. To reheat, warm it on the stove over medium heat. Stir often to ensure even heating. You can also microwave it, but stir it halfway through to avoid hot spots. In the fridge, your leftovers will last about 3 to 4 days. If you freeze it, the soup will stay good for about 2 to 3 months. Always check for signs of spoilage before eating. If you see mold or notice an off smell, it’s best to throw it away. Enjoy your hearty soup safe and sound! For the full recipe, check the main article. Yes, you can easily make this soup vegetarian. Just swap the ground turkey or beef for a plant-based alternative like lentils or chickpeas. Use vegetable broth instead of chicken broth. You might also want to add more veggies, like zucchini or mushrooms, for extra flavor and texture. These swaps keep the soup hearty and delicious while meeting vegetarian needs. Cooking times can vary. If you set your crockpot on low, it will take about 6 to 8 hours. If you choose high, it will take around 4 to 5 hours. Both methods will give you tender rice and rich flavors. Just check the rice before serving to ensure it is fully cooked. This soup pairs well with a variety of sides. Try serving it with tortilla chips for crunch. A simple side salad can add freshness. You could also offer warm tortillas for wrapping. For a fun twist, serve it with cornbread or quesadillas for a filling meal. You can use instant rice, but it will change the soup's texture. Instant rice cooks faster and may get mushy if added too early. If you decide to use it, add it in the last 30 minutes of cooking. This way, it stays firm and gives you the best result. This blog post shared a simple recipe for Crockpot Taco Rice Soup. You learned the key ingredients, step-by-step cooking instructions, and helpful tips. You can adjust the recipe to your preferences with protein swaps and spice levels. Don’t forget storage tips for leftovers and freezing guidelines, too. This dish is easy to make and perfect for busy days. Enjoy creating a delicious meal that satisfies everyone at your table. Give it a try, and make it your own!

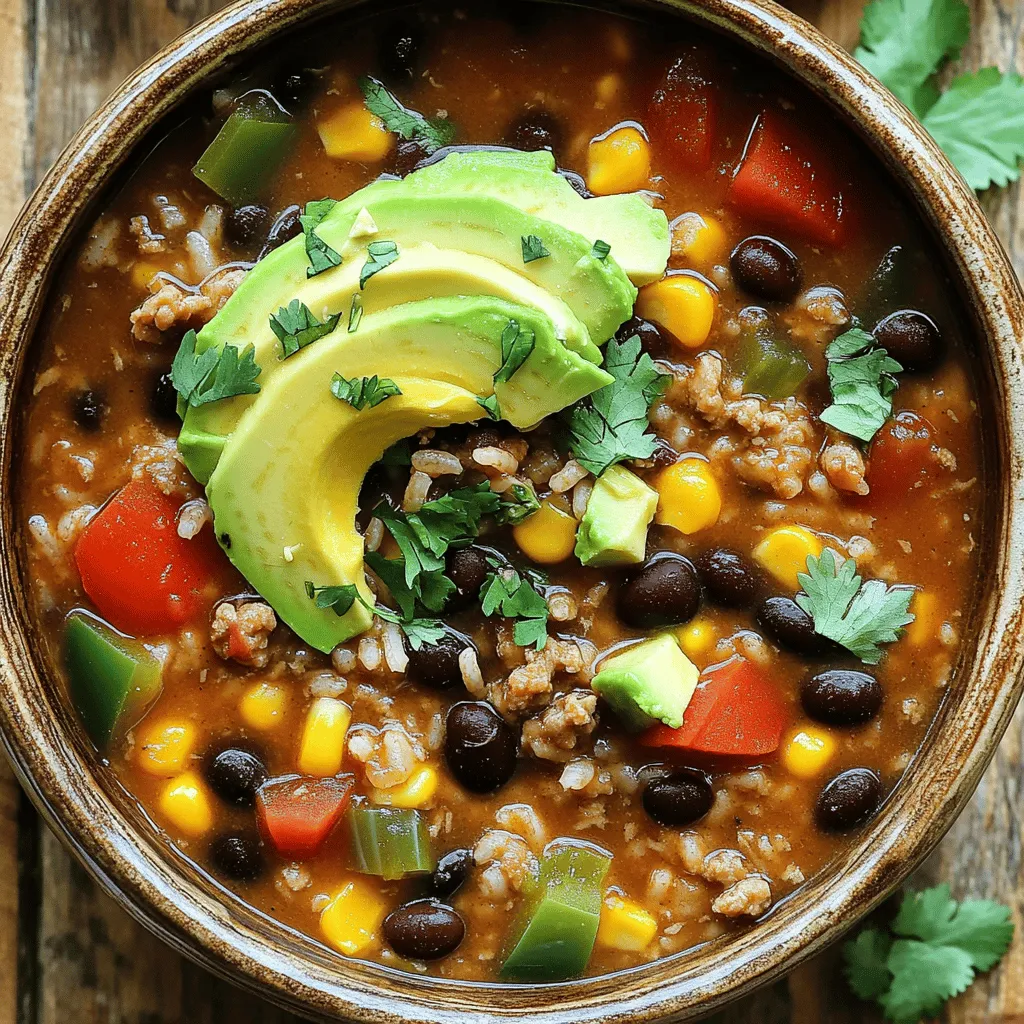
Looking for a warm, hearty meal that’s easy to make? Look no further than Crockpot Taco Rice Soup! This dish combines ground meat, beans, and rice for a filling experience …

Read more

Categories Dinner

Flourless Zucchini Brownies Delightful Recipe to Try

July 12, 2025 by Chef Theo
- 1 medium zucchini (about 1 cup, grated) - 1 cup almond butter (or any nut/seed butter you prefer) - 1/2 cup cocoa powder - 1/2 cup maple syrup (or honey) - 2 large eggs - 1 teaspoon vanilla extract - 1/2 teaspoon baking soda - 1/4 teaspoon salt - 1/2 cup dark chocolate chips (optional) The main ingredient here is zucchini. It adds moisture and makes these brownies less dense. The almond butter gives a rich flavor and creamy texture. Cocoa powder brings that deep chocolate taste we love. Maple syrup sweetens while keeping it natural. Eggs help bind everything, making the brownies rise. Vanilla adds a nice aroma. Baking soda helps with fluffiness, while salt boosts flavor. Lastly, dark chocolate chips provide extra bursts of chocolate in every bite. Each brownie has about 120 calories. It contains around 7 grams of fat, 10 grams of carbs, and 3 grams of protein. This makes it a sweet treat you can enjoy without guilt. The healthy fats from almond butter fill you up. Zucchini adds fiber, aiding digestion. If you want to make these brownies even better, consider adding nuts or seeds for extra crunch and nutrition. For more details, check out the Full Recipe. - Preheat your oven to 350°F (175°C). - Prepare a 9x9 inch baking pan by greasing it or lining it with parchment paper. - In a large mixing bowl, combine the grated zucchini and almond butter. - Stir until the mixture is smooth. - Next, add the cocoa powder, maple syrup, eggs, and vanilla extract. - Mix well until everything is fully combined and creamy. - Sprinkle the baking soda and salt over the mixture. - Gently fold them in to combine. - If you want, fold in the dark chocolate chips. - Pour the brownie batter into your prepared baking pan. - Spread it out evenly. - Bake for 25-30 minutes. - A toothpick inserted in the center should come out mostly clean with a few moist crumbs. Enjoy baking these flourless zucchini brownies! For the complete process, check the Full Recipe. To make your brownies perfect, start by managing the zucchini's moisture. Grate it finely and squeeze it in a clean cloth to remove excess water. This step helps avoid sogginess. Too much moisture can lead to brownies that fall apart. Next, mix your ingredients well. Combine the grated zucchini with almond butter until smooth. Then, add cocoa powder, maple syrup, eggs, and vanilla extract. Stir until you see a creamy mix. Don't rush this step. A well-blended batter gives you a fluffy texture. For a lovely presentation, dust your brownies with cocoa powder or powdered sugar. This simple touch makes them look fancy and inviting. You can also cut them into fun shapes for a party or event. To elevate your dessert, serve the brownies with a scoop of vanilla ice cream. The cold ice cream pairs well with warm brownies. It creates a delightful contrast of flavors and temperatures. You can also add fresh berries or a drizzle of chocolate sauce for extra flair. Check out the Full Recipe for detailed instructions and make your baking adventure a success! {{image_2}} If you want to make these brownies vegan, you can swap the eggs. Use flax eggs or chia seeds instead. To make one flax egg, mix one tablespoon of ground flaxseed with two and a half tablespoons of water. Let it sit for five minutes to thicken. For chia seeds, do the same with one tablespoon of chia seeds. This change will keep your brownies moist and tasty. You can make these brownies gluten-free easily. Instead of almond butter, try sunflower seed butter or cashew butter. Both work well and keep the flavor rich. For add-ins, look for gluten-free chocolate chips or nuts. This way, you get a delicious treat without gluten. Want to add more flavor to your brownies? You can mix in some spices or extracts. A teaspoon of espresso powder gives a deep, rich taste. Almond extract adds a nutty flavor that pairs well with chocolate. Cinnamon can also bring warmth and depth, making these brownies even more special. Experiment with flavors that you enjoy, and let your creativity shine! For the full recipe, check the details above. Store your flourless zucchini brownies at room temperature for up to three days. Keep them in an airtight container. This method keeps them soft and moist. If you live in a warm area, consider refrigerating them. In the fridge, they can last about a week. To freeze brownies, first let them cool completely. Cut them into squares. Wrap each square tightly in plastic wrap. Place the wrapped brownies in a freezer bag. They can stay frozen for up to three months. When you're ready to enjoy one, just thaw it at room temperature. These brownies taste best within three days of baking. After that, they still taste good for about a week in the fridge. If frozen, enjoy them within three months for the best flavor. Keeping track of these timelines helps you enjoy your brownies at their best! Yes, you can use other nuts or nut butters. If you have allergies, try sunflower seed butter or tahini. These options work well and add a different flavor. You can also use peanut butter or cashew butter. Each choice will change the taste a bit, so pick what you love! If your brownies crumble, they may need more moisture. Double-check that you added enough zucchini and eggs. If they seem dry, try adding a little more almond butter or maple syrup. Mixing well also helps. Make sure to bake them for the right time, too. If they bake too long, they can dry out. Look for a few signs to tell if your brownies are ready. First, check the edges. They should pull away from the pan slightly. Then, insert a toothpick in the center. If it comes out mostly clean with a few moist crumbs, it's done. If there's wet batter, bake a bit longer. Keep an eye on them towards the end! You learned how to make delicious brownies using simple ingredients. We walked through the steps, including mixing and baking. I shared tips to perfect texture and presentation. You can even try variations, like vegan options or flavor boosts. Storage tips help keep your brownies fresh longer. Enjoy experimenting with your own twists on this recipe. Baking should be fun, so savor every bite of your tasty creation.

Are you ready to indulge in a treat that’s both delicious and healthy? These Flourless Zucchini Brownies will spark joy in your kitchen! Packed with rich chocolate flavor and the …

Read more

Categories Desserts

Super Moist Chocolate Cake Irresistible and Decadent

July 12, 2025 by Chef Theo
- 1 ¾ cups all-purpose flour - 3/4 cup unsweetened cocoa powder - 2 cups granulated sugar - 1 ½ teaspoons baking powder - 1 ½ teaspoons baking soda - 1 teaspoon salt - 2 large eggs - 1 cup whole milk - 1/2 cup vegetable oil - 2 teaspoons vanilla extract - 1 cup boiling water - 1 cup sour cream - Chocolate chips - Chopped dark chocolate When I make my super moist chocolate cake, I start with the dry ingredients. The flour, cocoa powder, sugar, baking powder, baking soda, and salt create a strong base. Sifting these together helps avoid lumps and ensures even mixing. Next, I mix the wet ingredients. The eggs, milk, vegetable oil, vanilla extract, and boiling water blend together beautifully. The boiling water is key. It helps the cocoa bloom, enhancing the chocolate flavor. Then, I fold in sour cream. This adds richness and keeps the cake moist. I often add chocolate chips or chopped dark chocolate for extra decadence. These melt into the cake, creating pockets of gooey goodness. You can find the full recipe to see how to combine these ingredients perfectly. This careful combination of dry and wet ingredients makes each bite of the cake rich and delightful. The balance of flavors makes it a favorite for many. - Preheat your oven to 350°F (175°C). - Grease and flour two 9-inch round cake pans or line them with parchment paper. - Sift together the dry ingredients and whisk until combined. This helps the cake rise. - In a separate bowl, combine the wet ingredients and mix until well incorporated. - Gradually pour the wet ingredients into the dry ingredients, mixing until smooth. Use a medium speed for about two minutes. - Carefully stir in the boiling water. This adds moisture to your cake. - Fold in the sour cream until fully blended. This keeps the cake soft. - Divide the batter evenly into the prepared pans and bake for 30-35 minutes. Check with a toothpick to see if it's done. Once the cakes cool, they will be rich and moist. Enjoy this super moist chocolate cake! You can find the full recipe above. Using boiling water in your batter is key. It helps the cocoa powder bloom, which brings out its rich flavor. This step ensures your cake stays moist throughout. The heat also activates the ingredients well, making a smooth batter. Sour cream plays an important role too. It adds fat, which gives the cake a soft texture. It also helps keep the cake moist. If you want a richer taste, add more sour cream. You can even mix in some yogurt if you run out. To check if your cake is done, use a toothpick. Insert it in the center; if it comes out clean, your cake is ready. If you see wet batter on the toothpick, bake it for a few more minutes. Letting the cake cool correctly is crucial. After baking, cool it in the pan for just ten minutes. Then, move it to a wire rack to cool completely. This helps avoid a soggy cake, which can happen if you leave it in the pan too long. For frosting, rich chocolate buttercream pairs perfectly with this cake. You can also try cream cheese frosting for a tangy twist. Both options enhance the cake's flavor. For a stunning finish, use chocolate shavings or fresh berries on top. Arrange them nicely for an appealing look. You can even add a dusting of powdered sugar for a touch of elegance. Enjoy this masterpiece with your loved ones! For the full recipe, check out the section above. {{image_2}} To elevate your Super Moist Chocolate Cake, consider adding a hint of coffee. Just one tablespoon can deepen the chocolate flavor. If you prefer a fruity twist, try infusing the batter with orange zest or a few drops of mint extract. Both options give your cake a unique taste that surprises and delights. The frosting can change the whole cake experience. A classic chocolate buttercream is always a favorite. Its rich and smooth texture pairs perfectly with the cake's moistness. If you want something tangy, cream cheese frosting works well too. The slight acidity cuts through the sweetness and adds a nice balance. You can make your cake even more exciting by adding some extras. Chopped nuts like walnuts or pecans add a great crunch. If you love fruit, mix in some raspberries or cherries. They bring a fresh burst of flavor and make each bite special. For the full recipe, check out the instructions above! To keep your super moist chocolate cake fresh, store it in an airtight container. This prevents it from drying out. Place the cake in the fridge if you have leftovers. Make sure to let it cool completely before refrigerating. The cake can last in the fridge for up to a week. If you want to store the cake for a longer time, freezing is the way to go. Wrap each piece tightly in plastic wrap. Then, place the wrapped pieces in a freezer bag. This keeps out air and frost. The cake can stay good in the freezer for up to three months. When you're ready to enjoy your cake again, there are easy ways to refresh it. If it's in the fridge, take it out and let it sit for about 30 minutes. This brings it back to room temperature. You can also warm individual slices in the microwave for about 10-15 seconds. To avoid dryness, don't overheat the cake. You just want it warm enough to enhance the flavors. If you froze the cake, let it thaw in the fridge overnight before reheating. You’ll have a delicious slice just like when it was fresh from the oven! To make your chocolate cake more moist, consider these tips: - Use boiling water in the batter. This adds steam and moisture. - Add sour cream, which gives richness and a soft crumb. - Incorporate vegetable oil instead of butter. Oil keeps the cake tender. - Use brown sugar instead of white sugar. Brown sugar has moisture. - Don’t overmix your batter. Mix just until combined to keep it light. Yes, you can use cake flour instead of all-purpose flour. Cake flour has a lower protein content. This means a softer cake with a finer crumb. If you use cake flour, you may need a bit less. Replace one cup of all-purpose flour with 1 cup minus 2 tablespoons of cake flour. The super moist chocolate cake lasts: - At room temperature: 3-4 days in an airtight container. - In the fridge: up to a week in a sealed container. - In the freezer: 2-3 months when wrapped well. Allow it to cool fully before wrapping. You can make this cake ahead of time. Bake the cake, then let it cool completely. Wrap it tightly in plastic wrap. Store it in the fridge for up to a week. You can also freeze it for longer storage. Just be sure to thaw it before frosting. If you don’t have sour cream, try these options: - Plain yogurt works well for a similar texture and taste. - Buttermilk can also be used, but it may change the cake's texture slightly. - Silken tofu blended until smooth can be a dairy-free option. - Cream cheese thinned with a little milk can work too. For the full recipe, refer to the earlier section. Enjoy baking! You now have all the details to make a super moist chocolate cake. We covered the right dry and wet ingredients, outlined step-by-step instructions, and shared tips for perfecting texture. Remember, using boiling water and sour cream is key to moisture. Don’t forget to explore fun variations, like adding coffee or fruits, to spice things up. With proper storing and reheating tips, you can enjoy your cake longer. Dive into baking without fear; this recipe brings tasty results! Happy baking, and may your cake be delicious!

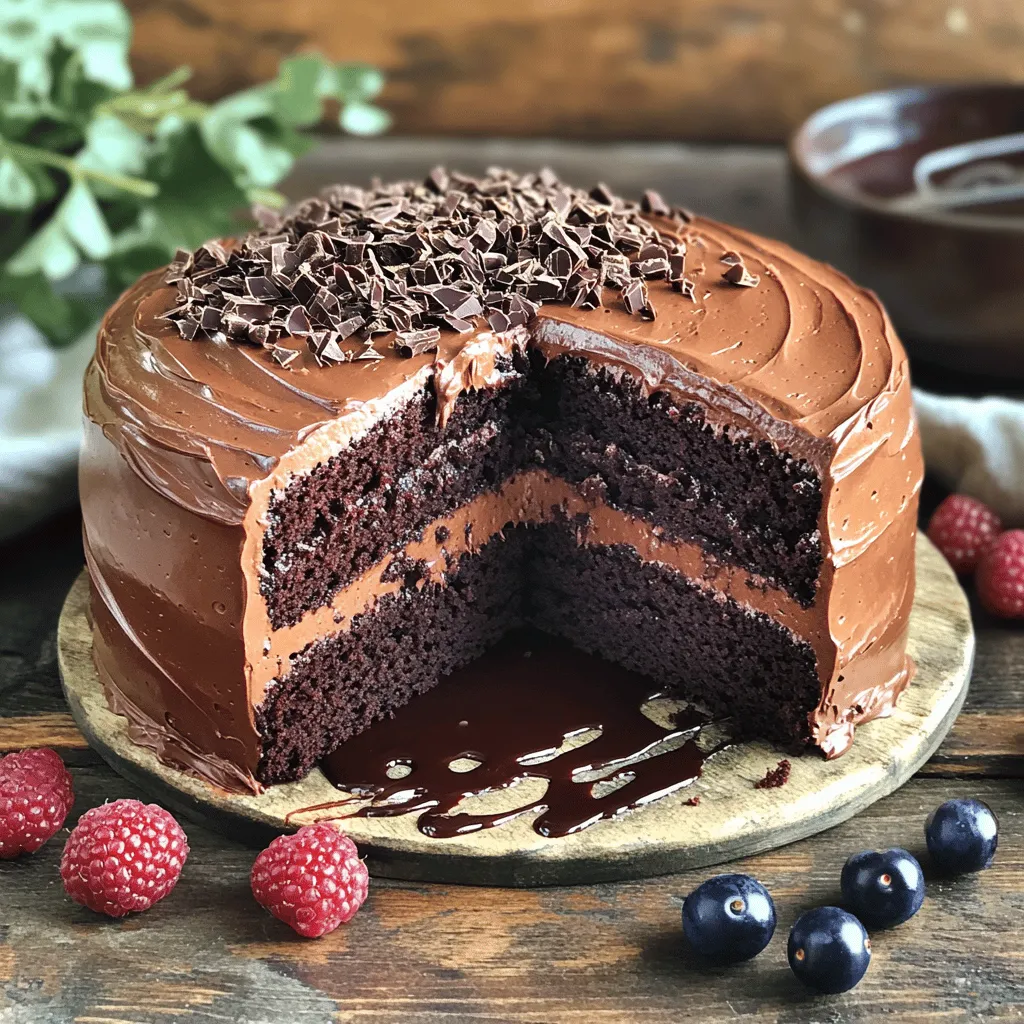
If you crave the ultimate chocolate cake, you’re in the right place! My Super Moist Chocolate Cake is a dream come true for any dessert lover. With rich cocoa and …

Read more

Categories Desserts

Easy Slow Cooker Hawaiian Chicken Delightful Recipe

July 12, 2025 by Chef Theo
- 4 boneless, skinless chicken breasts - 1 cup pineapple chunks (fresh or canned, undrained) - 1/2 cup low-sodium soy sauce - 1/3 cup honey - 2 cloves garlic, minced - 1 tablespoon minced fresh ginger - 1 red bell pepper, sliced - 1 tablespoon cornstarch (optional, for thickening) - 2 green onions, sliced (for garnish) - Cooked rice (for serving) - Additional spices (e.g., black pepper, red pepper flakes) - Other vegetables (e.g., carrots, snow peas) To create this Easy Slow Cooker Hawaiian Chicken, you need simple and fresh ingredients. Start with boneless, skinless chicken breasts. These cook perfectly in the slow cooker. Pineapple adds a sweet and tangy flavor. You can use fresh or canned pineapple; both work well. Soy sauce gives the dish a savory base. I recommend low-sodium soy sauce to keep it healthier. Honey balances the saltiness with sweetness. Minced garlic and fresh ginger add depth and warmth to the dish. For color and crunch, add a sliced red bell pepper. If you want a thicker sauce, mix in cornstarch towards the end of cooking. Finally, garnish with sliced green onions for freshness. Serve this meal over cooked rice to soak up all the delicious flavors. Feel free to get creative! Add spices like black pepper or red pepper flakes for extra heat. You can also toss in other vegetables like carrots or snow peas for added nutrition. This dish is all about your taste, so make it your own! For the complete recipe, check out the Full Recipe section. First, place the chicken breasts in the slow cooker. Make sure they lie flat and do not overlap. Next, grab a medium bowl. In this bowl, mix the pineapple chunks, soy sauce, honey, minced garlic, and ginger. Stir well until everything blends nicely. This sauce will add a sweet and tangy flavor to the chicken. Now, pour the sauce over the chicken. Make sure every piece gets a good coating. This is key for flavor! Then, add the sliced red bell pepper on top of the chicken. It will add color and crunch. You can choose how long to cook it. Set the slow cooker to low for 4-6 hours or high for 2-3 hours. The chicken should be cooked through and very tender. If you want a thicker sauce, mix cornstarch with a little water. Stir it into the sauce about 30 minutes before serving. This will give you a nice, rich sauce. Once it’s done, shred the chicken right in the slow cooker. Use two forks to mix it well with the sauce. This is a great time to serve it over cooked rice. Top with sliced green onions for a fresh touch. Enjoy your Easy Slow Cooker Hawaiian Chicken! For the complete method, check the Full Recipe. To boost the flavor of your Hawaiian chicken, you can marinate the chicken. Try mixing soy sauce, honey, and garlic for a tasty base. Let it sit for at least 30 minutes before cooking. If you want to swap ingredients for dietary needs, use coconut aminos instead of soy sauce. You can also add maple syrup instead of honey for a vegan option. To check if the chicken is done, use a meat thermometer. It should read 165°F (75°C) in the thickest part. If you have larger chicken breasts, you may need to adjust the cooking time. For bigger pieces, add 30 minutes on low or 15 minutes on high. Serving your Hawaiian chicken over rice makes a great dish. Use fluffy white rice or even brown rice for a nutty flavor. For garnishing, slice green onions and sprinkle them on top. You can also add sesame seeds for a nice touch. This not only looks good but adds extra flavor too. {{image_2}} You can switch up the protein in this dish for a new taste. Using turkey or pork works really well. Simply replace the chicken with an equal amount of turkey or pork. This change adds a different flavor that is still delicious. For a vegetarian option, try jackfruit. Jackfruit has a meaty texture and absorbs flavors well. You can use about 2 cups of canned jackfruit. Just drain and shred it before adding. It makes a great meat substitute that fits in perfectly. To change the flavor, consider adding teriyaki sauce or your favorite spices. A splash of teriyaki sauce gives a sweet, savory twist. You could also try adding black pepper or red pepper flakes for some heat. Tropical fruit variations can also elevate this dish. Try using mango or papaya instead of pineapple. These fruits add a unique sweetness that pairs well with the savory sauce. You can mix and match fruits to find your favorite flavor combo. For the full recipe, check the Easy Slow Cooker Hawaiian Chicken section above. After cooking, you may have some tasty leftovers. To store them, let the chicken cool down. Then, place it in an airtight container. This keeps the flavors fresh and safe. You can store it in the fridge for up to 3-4 days. Make sure to label your container with the date. This way, you know when to eat it by. If you want to save some for later, freezing is a great option. Divide the chicken into single portions. Use freezer-safe bags or containers for this. Squeeze out any air to prevent freezer burn. You can freeze the chicken for up to 3 months. When you’re ready to eat, thaw it in the fridge overnight. To reheat, you can use the microwave or a stovetop. If using the microwave, cover the dish to keep moisture in. Heat it in short bursts, stirring in between. If using the stovetop, add a splash of water to keep it juicy. Enjoy your Easy Slow Cooker Hawaiian Chicken again! How long does it take to cook chicken in a slow cooker? It takes about 4 to 6 hours on low heat or 2 to 3 hours on high heat. The chicken should be tender and cooked through. Cooking times may vary based on your slow cooker’s model and the thickness of the chicken breasts. Can I make this recipe without soy sauce? Yes, you can replace soy sauce with coconut aminos or a gluten-free soy sauce. Both options will give your dish a nice flavor. If you want a sweeter taste, consider adding a bit more honey. What to serve with Easy Slow Cooker Hawaiian Chicken? I recommend serving it over a bed of rice. You can also add steamed vegetables like broccoli or snap peas. A side salad with a light dressing pairs well too, adding freshness. Can I use frozen chicken? Yes, you can use frozen chicken. Just extend the cooking time by an hour or so. Ensure the chicken reaches a safe temperature of 165°F (75°C) before serving. Is it necessary to brown the chicken first? No, browning the chicken is not necessary for this recipe. Cooking the chicken directly in the slow cooker keeps it moist and flavorful. This recipe for Easy Slow Cooker Hawaiian Chicken is simple and full of flavor. You learned about the key ingredients, step-by-step cooking, and helpful tips. Variations allow you to customize the dish with different proteins or spices. Plus, you can store leftovers for later meals. Now, you can easily whip up a tasty meal everyone will enjoy. Remember, you can adapt and experiment to make it your own. Enjoy your cooking adventure!

Welcome to your new favorite dish: Easy Slow Cooker Hawaiian Chicken! If you crave sweet and savory flavors in a simple recipe, you’re in the right place. This dish combines …

Read more

Categories Dinner

Garlic Ginger Green Beans Quick and Flavorful Dish

July 12, 2025 by Chef Theo
To make garlic ginger green beans, you will need: - 1 pound fresh green beans, trimmed - 3 tablespoons olive oil - 4 cloves garlic, minced - 1 tablespoon fresh ginger, minced - 1 tablespoon soy sauce (or tamari for gluten-free) - 1 teaspoon sesame oil - 1 teaspoon red pepper flakes (adjust based on heat preference) - Salt and pepper to taste - 2 tablespoons toasted sesame seeds (for garnish) - Fresh cilantro or green onions (for garnish) If you don’t have some ingredients on hand, here are a few swaps: - Olive oil can be replaced with avocado oil or vegetable oil. - Soy sauce can be substituted with coconut aminos for a low-sodium option. - Fresh ginger can be swapped with ground ginger in a pinch, but use less. - If you want less heat, skip the red pepper flakes or use paprika instead. When selecting green beans, look for these traits: - Choose bright green beans without brown spots or blemishes. - The beans should feel firm and snap easily. - Avoid limp or dull-looking beans, as they may not be fresh. - If possible, buy organic green beans to ensure better quality and taste. Using quality ingredients will make your garlic ginger green beans shine. Check out the Full Recipe to get all the details! First, we need fresh green beans. Trim the ends and rinse them. Next, bring a pot of salted water to a boil. Add the green beans and blanch them for 2 to 3 minutes. They should be bright green and tender-crisp. Drain the green beans and move them to an ice bath. This stops the cooking and keeps them crunchy. After a minute, drain them again and set them aside. Now it’s time to heat things up. In a large skillet or wok, pour in 3 tablespoons of olive oil. Turn the heat to medium-high. Once the oil is hot, add 4 minced cloves of garlic and 1 tablespoon of minced ginger. Sauté these for about 30 seconds to 1 minute. You want them fragrant but not burned. The smell will be amazing! Add the blanched green beans to the skillet. Toss them for about 3 to 5 minutes. We want them heated through and slightly tender. Now, drizzle 1 tablespoon of soy sauce and 1 teaspoon of sesame oil over the green beans. Sprinkle in 1 teaspoon of red pepper flakes, plus salt and pepper to taste. Toss everything together. Make sure the green beans are well-coated with the flavors. It’s time to serve! Transfer the green beans to a serving dish. For a finishing touch, sprinkle 2 tablespoons of toasted sesame seeds on top. You can also add fresh cilantro or sliced green onions for garnish. These green beans pair well with rice or grilled meats. Enjoy your delicious garlic ginger green beans! For the full recipe, check out the earlier section. To boost the taste, try adding a squeeze of lemon juice. This adds a bright note. You can also toss in sliced bell peppers for color and crunch. Another option is to mix in sliced mushrooms for a rich, earthy flavor. If you like nuts, add chopped almonds or cashews for a nice crunch. These additions make the dish even better. One mistake is overcooking the green beans. They should be bright green and crisp. Another error is skipping the ice bath after blanching. This keeps them vibrant and crunchy. Avoid using too much soy sauce, as it can make the dish too salty. Lastly, don't forget to taste as you cook. Adjust the seasoning to suit your taste. To cook green beans just right, start with fresh beans. Look for ones that are bright and firm. Blanch them in boiling water for 2-3 minutes. Then, quickly transfer them to an ice bath. This halts the cooking process and locks in color. When stir-frying, keep the heat high and stir often. This ensures that they cook evenly and stay crisp. For the best results, follow the Full Recipe carefully. Enjoy your tasty green beans! {{image_2}} You can easily add protein to garlic ginger green beans. Tofu or chicken works great. For tofu, use firm or extra-firm. Cut it into cubes and sauté it in the skillet before adding the garlic and ginger. This way, the tofu gets crispy and has flavor. If using chicken, cut it into bite-sized pieces. Cook the chicken until it is no longer pink, then add the garlic and ginger. This makes your dish heartier and more filling. Feel free to mix in other vegetables too. Carrots, bell peppers, or broccoli can add color and crunch. Slice the carrots thinly so they cook quickly. Bell peppers can be cut into strips for a nice texture. Broccoli florets can be blanched with the green beans. Just remember to adjust cooking time based on the veggies you choose. This not only adds variety but also boosts the dish's nutrition. You can control the heat in this dish easily. If you like it mild, skip the red pepper flakes or use less. On the other hand, if you want it spicy, add more flakes or even a dash of hot sauce. You could also try fresh chili peppers for a different flavor. Adjusting spice levels lets you cater the dish to your taste. This makes garlic ginger green beans a versatile side for any meal. Try these variations to keep your cooking exciting and fresh. For the full recipe, check out the details above. Store leftover garlic ginger green beans in an airtight container. Place them in the fridge. They will last for about 3 days. Make sure they cool down before sealing. This keeps them fresh and tasty. To reheat, use a skillet on medium heat. Add a splash of olive oil. Heat for about 3-4 minutes, stirring often. This helps retain the crunch. You can also use the microwave. Heat for 30 seconds, stir, then heat again if needed. You can freeze garlic ginger green beans for longer storage. First, blanch them for 2 minutes. Drain and cool them in ice water. After that, dry them thoroughly. Place in freezer bags and remove excess air. They can stay fresh for up to 3 months. When ready to use, thaw in the fridge overnight. Then reheat as usual. For the full recipe, check out the details above. I like to use fresh green beans. They taste better and have a nice crunch. Look for beans that are bright green and firm. Avoid beans with brown spots or wrinkles. You can use haricots verts for a more delicate flavor. Yes, you can make garlic ginger green beans ahead. Cook the beans and store them in the fridge for up to three days. When you are ready to serve, just heat them up in a skillet. This keeps them fresh and tasty. Absolutely! You can use tamari for a gluten-free option. If you want a soy-free choice, try coconut aminos. They add a nice umami flavor while keeping it vegetarian. This dish has roots in Asian cuisine, where garlic and ginger are popular. It combines simple and fresh flavors. Many cultures use green beans in stir-fries, making it a versatile dish worldwide. To spice it up, add more red pepper flakes. You can also use fresh chili peppers for an extra kick. If you like heat, try adding sriracha or chili oil when serving. Yes, you can use frozen green beans. They are quick and easy to prepare. Just thaw them and skip the blanching step. However, fresh beans will give you a better texture and flavor. For the best results, follow the [Full Recipe]. In this blog post, we explored the essential ingredients, preparation steps, and tips for cooking garlic ginger green beans. We discussed how to enhance flavors, avoid mistakes, and use different variations. Finally, I shared smart ways to store and reheat leftovers. The right approach can make your green beans shine. Try these ideas, and enjoy a tasty dish that impresses everyone at your table. Your cooking will become more fun and rewarding!

Looking for a quick and delicious way to enjoy your veggies? Garlic Ginger Green Beans are just what you need! This simple dish combines fresh green beans with zesty garlic …

Read more

Categories Dinner

One Pan Balsamic Chicken Easy and Flavorful Recipe

July 12, 2025 by Chef Theo
To make One Pan Balsamic Chicken, you will need these ingredients: - 4 boneless, skinless chicken breasts - 1 cup cherry tomatoes, halved - 1 red onion, sliced - 3 cloves garlic, minced - 1/2 cup balsamic vinegar - 1/4 cup honey - 2 tablespoons olive oil - 1 teaspoon dried oregano - 1 teaspoon dried basil - Salt and pepper to taste - Fresh basil leaves for garnish You can boost flavor with these optional items: - Spinach or kale for extra greens - Bell peppers for sweetness and color - Feta cheese for a tangy twist - Crushed red pepper flakes for heat When shopping for ingredients, look for these tips: - Choose chicken breasts that are pale pink and firm. - Pick cherry tomatoes that are bright and plump. - Select a red onion with dry, smooth skin. - Buy garlic bulbs that feel firm and heavy. - Opt for fresh herbs over dried for better taste. Using these fresh ingredients makes a big difference. They help create a dish that tastes great and looks beautiful too! For more details on the recipe, check the Full Recipe. First, gather your ingredients. You need four boneless, skinless chicken breasts, cherry tomatoes, red onion, garlic, balsamic vinegar, honey, olive oil, dried oregano, dried basil, salt, and pepper. Fresh basil leaves add great flavor for garnish. Wash and cut the cherry tomatoes in half. Slice the red onion. Mince the garlic. Next, preheat your oven to 425°F (220°C). This step ensures the chicken cooks evenly. Mix the balsamic vinegar, honey, olive oil, oregano, basil, salt, and pepper in a bowl. Whisk them together until they blend well. Set this mixture aside. Heat a drizzle of olive oil in a large oven-safe skillet over medium-high heat. Season the chicken with salt and pepper. Place the chicken in the skillet. Sear each side for about 4-5 minutes. You want them golden brown. After browning the chicken, add minced garlic, sliced red onion, and halved cherry tomatoes around the chicken. This mix will add depth to the dish. Pour the balsamic mixture over the chicken and veggies. Make sure to coat everything evenly. Now, transfer the skillet to your preheated oven. Bake for 20-25 minutes. Check that the chicken reaches an internal temperature of 165°F (75°C) to ensure it’s safe to eat. Searing the chicken creates a lovely crust. This adds flavor and keeps the meat juicy. Do not overcrowd the skillet when searing; it can lower the heat. Using a thermometer helps you know when the chicken is done. This method prevents overcooking. Let the chicken rest for 5 minutes after baking. This step allows the juices to redistribute, keeping it moist. Garnish with fresh basil leaves right before serving. This not only looks nice but also adds fresh flavor. Enjoy this one-pan meal straight from the skillet for a beautiful presentation! For the complete recipe, refer to the Full Recipe section. When cooking One Pan Balsamic Chicken, some mistakes can spoil the dish. Here are key points to keep in mind: - Not Searing the Chicken: Searing adds a nice crust. Skipping this step can make it bland. - Overcrowding the Pan: If you add too many chicken breasts, they won’t brown well. Cook in batches if needed. - Ignoring Rest Time: Let the chicken rest after cooking. This keeps it juicy and tender. Adding depth to your dish is simple with a few tricks: - Use Fresh Herbs: Fresh basil adds bright flavor. Try adding it right before serving. - Add a Splash of Lemon Juice: A little lemon juice brightens the dish. It balances the sweetness of the balsamic and honey. - Include Other Vegetables: Bell peppers or zucchini can add more color and flavor. They roast well alongside the chicken. To ensure your chicken stays juicy, follow these tips: - Choose the Right Cut: Boneless, skinless chicken breasts are best. They cook evenly and stay moist. - Check Internal Temperature: Use a meat thermometer. The chicken should reach 165°F (75°C) to be safe and juicy. - Marinate Before Cooking: If you have time, marinating the chicken in the balsamic mix for an hour or overnight works wonders. It infuses the meat with flavor. For a complete guide on how to prepare this dish, check out the Full Recipe. {{image_2}} You can swap out the cherry tomatoes and red onion. Think about using bell peppers, zucchini, or broccoli. These veggies add color and taste. You can also use asparagus for a nice crunch. Just make sure to cut the vegetables to similar sizes. This helps them cook evenly. While I love boneless, skinless chicken breasts, you can try other cuts. Chicken thighs are juicy and full of flavor. They can handle higher heat too. Bone-in chicken works as well, but cook it longer. Adjust the baking time to ensure it cooks through. Each cut brings its unique taste to the dish. Feel free to play with the sauce. You can add soy sauce for a savory twist. Try Dijon mustard for a zesty kick. If you want it sweeter, add more honey. For a tangy flavor, mix in some lemon juice. These changes keep the recipe fresh and exciting. Check out the Full Recipe for even more ideas! To keep your One Pan Balsamic Chicken fresh, let it cool first. Place it in an airtight container. This keeps moisture in and air out. You can also wrap it tightly with plastic wrap. Always label your container with the date. This helps you know when to use it. When you’re ready to enjoy leftovers, reheat them gently. You can use a microwave, but I prefer the oven. Preheat your oven to 350°F (175°C). Place the chicken in an oven-safe dish. Cover it with foil to keep it moist. Heat for about 15-20 minutes or until warm. Stir in any remaining sauce for extra flavor. You can safely store One Pan Balsamic Chicken in the fridge for up to four days. If you want to keep it longer, freeze it! It can last up to three months in the freezer. Just make sure to store it well. When you’re ready to eat, thaw in the fridge overnight before reheating. Enjoy your flavorful meal anytime! You can pair One Pan Balsamic Chicken with many sides. I love serving it with rice or quinoa. They soak up the tasty sauce. You can also add a fresh salad. A simple green salad with a light dressing works well. Roasted veggies complement the dish too. Try carrots, broccoli, or zucchini for color and taste. Yes, you can make One Pan Balsamic Chicken ahead of time. Cook the dish and let it cool. Store it in the fridge for up to three days. When you’re ready to eat, reheat it in the oven or microwave. You can also prep the chicken and sauce the day before. Just mix and cook when you’re ready. To check if the chicken is fully cooked, use a meat thermometer. Insert it into the thickest part of the chicken. It should read 165°F (75°C). If you don’t have a thermometer, cut into the chicken. The meat should be white and juices should run clear. If it’s pink, cook it a bit longer. For the full recipe, check out the complete guide. This blog post covered how to make One Pan Balsamic Chicken. We reviewed the ingredients needed, cooking steps, and some helpful tips. I also shared ways to store leftovers and answered common questions. Making this dish is easy and rewarding. You can adjust flavors and try new veggies. With these methods, you’ll create a tasty meal that everyone will enjoy. Happy cooking!

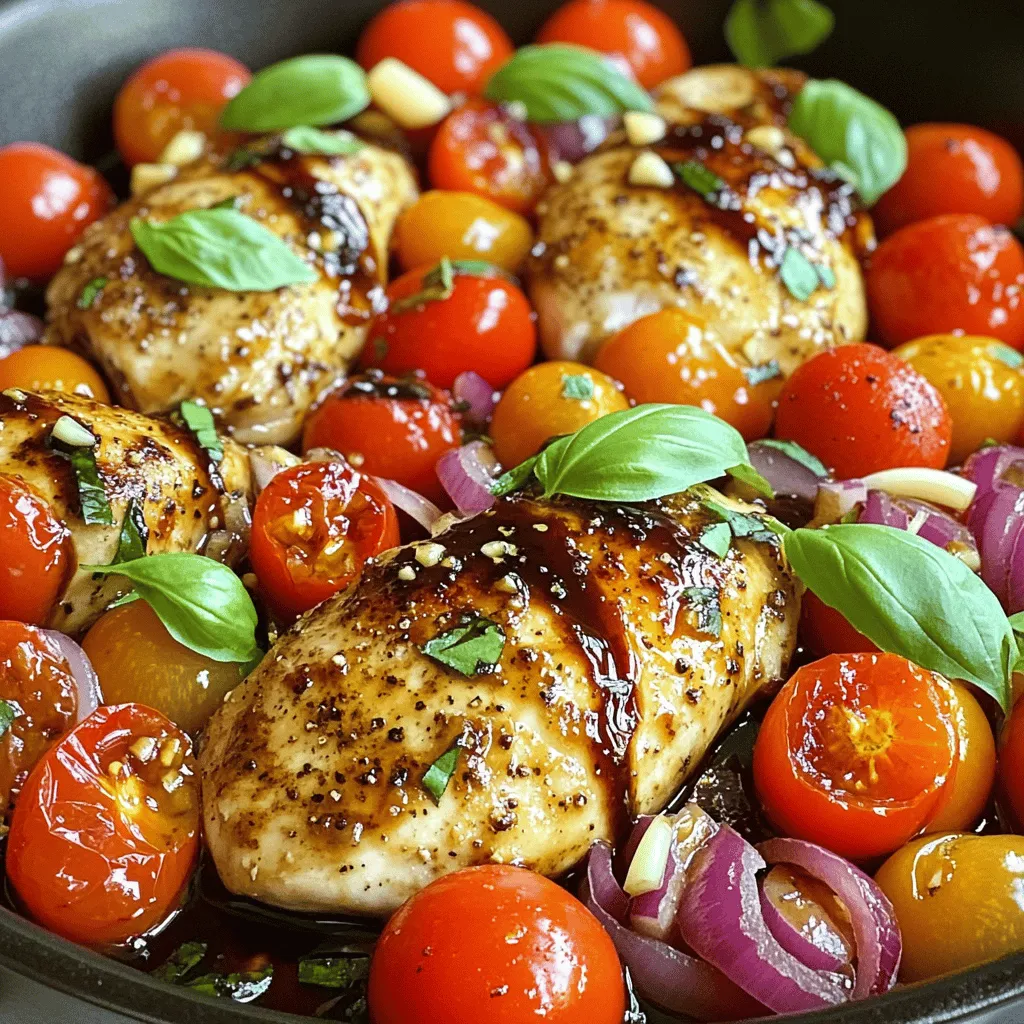
Craving a tasty dinner that’s quick and easy? Look no further! My One Pan Balsamic Chicken is packed with flavor and simplicity. You can make this dish in just one …

Read more

Categories Dinner

Cajun Garlic Butter Chicken Flavorful and Simple Dish

July 11, 2025 by Chef Theo
To make Cajun Garlic Butter Chicken, gather these main ingredients: - 4 boneless skinless chicken breasts - 6 tablespoons unsalted butter, divided - 1 tablespoon Cajun seasoning - 1 teaspoon smoked paprika - 1 teaspoon garlic powder - 4 cloves garlic, minced - 1 lemon, juiced - 1 tablespoon fresh parsley, chopped - Salt and pepper to taste - 1/2 cup chicken broth These ingredients come together for a dish full of flavor. The Cajun seasoning is key in this dish. It adds warmth and depth. Smoked paprika gives a nice, smoky flavor. Garlic powder boosts the garlicky taste. Salt and pepper enhance all the flavors. Adjust these spices to match your taste. Fresh parsley brightens up the dish. You can also add fresh thyme or oregano for more flavor. If you like heat, consider adding some cayenne pepper or crushed red pepper flakes. These add-ons make the dish even more exciting. For a twist, serve with lemon slices for a zesty touch. For the complete recipe, check out the Full Recipe section. To start, take your chicken breasts and season them well. Use Cajun seasoning, smoked paprika, garlic powder, salt, and pepper. Make sure to coat both sides. Press the spices into the meat. This helps the flavors stick. Allow the chicken to sit for a few minutes. This step lets the spices soak in. Next, grab a large skillet. Melt three tablespoons of butter over medium-high heat. Watch for it to melt and bubble. When it is ready, place the seasoned chicken breasts in the skillet. Cook the chicken for about 5-6 minutes on each side. You want them golden brown. Use a meat thermometer to check the temperature. It should reach 165°F (75°C). Once done, remove the chicken and set it aside on a plate. In the same skillet, lower the heat to medium. Add the remaining three tablespoons of butter. Let it melt before adding minced garlic. Sauté the garlic for 1-2 minutes. Keep an eye on it; you don’t want it to burn. Then, pour in the chicken broth. Scrape up any browned bits from the bottom of the skillet. This adds great flavor. Squeeze in the juice of the lemon and stir everything together. Return the chicken breasts to the skillet. Let them simmer in the garlic butter sauce for 3-5 minutes. This helps the chicken absorb all the tasty flavors. Once heated through, sprinkle chopped parsley on top. This adds a nice touch. For the full recipe, check the detailed instructions above. To cook chicken breasts just right, start with even thickness. If they are uneven, pound them gently with a meat mallet. This helps them cook evenly. Season both sides well with Cajun seasoning and spices. Heat your skillet over medium-high heat. Melt three tablespoons of butter until it bubbles. Add chicken and cook for five to six minutes per side. You want a nice golden color. Check the internal temperature. It should be 165°F. If not, cook a bit longer. To boost flavor, consider adding a touch of lemon zest. This adds freshness to the dish. You can also toss in some sliced bell peppers or onions when cooking. They add sweetness and texture. For a twist, try adding some diced tomatoes. They will bring a lovely acidity. Fresh herbs, like thyme or basil, can also enhance the flavor. Just sprinkle them in during the last few minutes of cooking. One common mistake is overcrowding the skillet. If you pack too many chicken breasts in, they will steam instead of sear. This means no nice brown crust. Always give space between each piece. Another mistake is not letting the chicken rest after cooking. Let it sit for five minutes before slicing. This keeps the juices in. Lastly, don’t skip scraping the skillet. Those brown bits add tons of flavor to your sauce. If you follow these tips, your Cajun Garlic Butter Chicken will shine. For the full recipe, check out the earlier section. {{image_2}} You can add more heat to your dish by using a spicy Cajun seasoning. This simple twist makes the chicken fiery and full of flavor. Try adding chopped jalapeños or red pepper flakes to the garlic butter sauce. You will feel the warmth with each bite. This variation is great for spice lovers who want a kick. If you want juicier meat, use chicken thighs instead of breasts. Chicken thighs have more fat, which keeps them moist during cooking. Just season them like you would the breasts. Cook them in the skillet for about 7-8 minutes on each side. They will soak up the flavors well and taste amazing. You can make this dish healthier with some easy swaps. For butter, use olive oil or avocado oil to cut down on saturated fat. You can also use skinless chicken breasts to reduce calories. If you want a lighter sauce, use low-sodium chicken broth. Fresh lemon juice adds brightness and flavor without extra calories. These changes keep the taste while making it better for you. For the full recipe, check out the complete guide. To keep your Cajun garlic butter chicken fresh, store it right. Place the chicken in an airtight container. Make sure it cools down first before sealing. This helps to prevent moisture buildup. You can keep leftovers in the fridge for up to three days. If you want to enjoy it later, freezing is a great option. When you want to reheat your chicken, do it gently. Use a skillet over low heat. Add a splash of chicken broth to keep it moist. Cover the skillet to trap the heat. Cook until warm, about 5-7 minutes. This keeps the chicken juicy and tasty. You can also use the microwave. But be careful not to dry it out. Heat on medium for 1-2 minutes, stirring halfway. Freezing Cajun garlic butter chicken is simple. Cut the chicken into smaller pieces for quicker thawing. Wrap each piece tightly in plastic wrap. Then place them in a freezer-safe bag. Remove as much air as you can to prevent freezer burn. You can freeze it for up to three months. When you're ready to eat, thaw it in the fridge overnight before reheating. For the full recipe, check out the detailed steps above. You should cook Cajun Garlic Butter Chicken for about 12-14 minutes total. Start with 5-6 minutes on one side. Flip it and cook for another 5-6 minutes. The chicken must reach 165°F for safety. This ensures juicy, well-cooked chicken that keeps all the flavors inside. Yes, you can use different meats. Chicken thighs work great in this dish. You can also try pork chops or shrimp. Just adjust the cooking time. Shrimp cooks fast, about 3-4 minutes per side. Always ensure your meat is cooked through for the best taste and safety. Serve Cajun Garlic Butter Chicken with rice or roasted veggies. Steamed rice soaks up the tasty sauce well. Roasted vegetables add a nice crunch and color to your plate. You can also add a fresh salad for a light side. This combo makes your meal complete and satisfying. For the full recipe, check out the main section above. Cajun Garlic Butter Chicken is simple and tasty. We discussed key ingredients, cooking tips, and variations. I shared easy steps to prepare and cook chicken well, along with a flavorful garlic butter sauce. You can store leftovers and reheat them for great taste. Understanding these details enhances your cooking skills. With this recipe, you can impress family and friends. Enjoy creating this dish and make it your own!

Looking for a dish that’s both simple and packed with flavor? Cajun Garlic Butter Chicken is your answer! This recipe combines juicy chicken with zesty Cajun spices and rich garlic …

Read more

Categories Dinner

Lemon Zucchini Bread Fresh and Flavorful Delight

July 11, 2025 by Chef Theo
To make a great lemon zucchini bread, you need a few key items: - 1 cup grated zucchini (about 1 medium zucchini) - 1 cup granulated sugar - 1/2 cup unsalted butter, softened - 2 large eggs - 1/4 cup lemon juice (freshly squeezed) - Zest of 1 lemon These ingredients create a sweet base. The zucchini adds moisture and texture. The lemon gives a bright, fresh flavor. Next, you’ll need some dry ingredients to balance the wet ones: - 1 1/2 cups all-purpose flour - 1 teaspoon baking powder - 1/2 teaspoon baking soda - 1/2 teaspoon salt - 1/2 teaspoon ground cinnamon - 1/4 teaspoon nutmeg These dry ingredients help the bread rise and give it a nice crumb. The spices add warmth and depth to the flavor. If you want to make your bread even better, consider these add-ins: - 1/2 cup chopped walnuts or pecans - 1 tablespoon granulated sugar (for topping) The nuts add a nice crunch. A sprinkle of sugar on top creates a sweet crust. You can find the full recipe to see how everything comes together. Enjoy making this delicious lemon zucchini bread! 1. Preheat your oven to 350°F (175°C). Grease a 9x5 inch loaf pan. You can also use parchment paper for easy removal. 2. In a mixing bowl, cream together the softened butter and granulated sugar until light and fluffy. This should take about 3-4 minutes. 3. Beat in the eggs, one at a time. Mix well after each egg. Add the lemon juice and lemon zest, then mix until combined. 4. In a separate bowl, whisk together the flour, baking powder, baking soda, salt, cinnamon, and nutmeg. 5. Gradually add the dry ingredients to the wet mixture. Stir just until combined. Be careful not to overmix. 6. Fold in the grated zucchini and chopped nuts if using. The batter will be somewhat thick. 7. Pour the batter into the prepared loaf pan. Smooth the top with a spatula. Sprinkle a tablespoon of sugar over the top for a nice crust. 8. Bake in the preheated oven for 50-60 minutes. Check for doneness with a toothpick. It should come out clean. 9. Once baked, remove from the oven. Let the bread cool in the pan for about 10 minutes. Transfer to a wire rack to cool completely. These steps will help you create a moist and delicious Lemon Zucchini Bread. For the full recipe, check out [Full Recipe]. To get the best texture in your lemon zucchini bread, avoid overmixing. When you mix the batter, stir just until the ingredients combine. This keeps the bread light and fluffy. Overmixing can make it dense and tough. Using fresh ingredients also matters. Fresh zucchini gives moisture and flavor. If your zucchini is old, it can lead to a dry bread. Always choose firm, bright green zucchini for the best taste. Checking for doneness is key. Use a toothpick to test the center of the bread. Insert it into the bread; if it comes out clean, it’s done! If not, bake a little longer. After baking, cool the bread in the pan for ten minutes. Then, transfer it to a wire rack. Cooling helps the bread set and makes slicing easier. For a lovely presentation, slice the zucchini bread and serve it on a rustic wooden board. You can garnish each slice with lemon zest. A dollop of crème fraîche adds a nice touch, too. Pair the bread with a warm cup of tea or coffee. It also goes well with fresh fruit or yogurt. Enjoy this delightful treat with family or friends! For the full recipe, check out Lemon Zucchini Delight! {{image_2}} You can add a twist to your lemon zucchini bread. Try mixing in other citrus fruits, like orange. This gives a bright, fresh flavor. You can also add chocolate chips or dried fruits. Chocolate chips add richness, while dried fruits add texture. Both options make your bread even more delightful. If you need gluten-free options, use almond flour or coconut flour instead of all-purpose flour. This keeps the bread light and moist. For vegan substitutions, swap eggs with flax eggs or applesauce. You can also use plant-based butter and almond milk for a creamy texture. These changes ensure everyone can enjoy this treat. You can explore different regions with your lemon zucchini bread. Add Mediterranean-inspired ingredients like olives or sun-dried tomatoes for a savory flavor. Or, try Southern-style additions like buttermilk or pecans. These changes give your bread a unique touch, making it a fun and tasty experiment. For the full recipe, check the section above. Enjoy your baking! Let the Lemon Zucchini Bread cool completely on a wire rack. Once cool, wrap it tightly in plastic wrap. This keeps the bread fresh. Place it in an airtight container. Store it in the fridge for up to one week. This method works well to keep the flavors bright. To save your Lemon Zucchini Bread for later, freeze it. First, slice the bread into portions. Wrap each slice in plastic wrap. Then, place the slices in a freezer bag. Remove as much air as possible before sealing. You can freeze it for up to three months. When you want to enjoy a slice, thaw it in the fridge overnight. Lemon Zucchini Bread lasts about one week in the fridge. If stored properly in the freezer, it can last up to three months. Signs of spoilage include a dry texture and off smells. If you see mold, discard the bread immediately. Enjoy your fresh and flavorful delight! For the full recipe, refer back to the beginning. You can change the sweetness by using alternative sweeteners. Try honey, maple syrup, or agave nectar. These options add unique flavors. You may need to adjust the liquid in the recipe. Use about 3/4 cup of honey for 1 cup of sugar. When using liquid sweeteners, reduce other liquids slightly. This keeps the bread from being too wet. You can also lower the sugar amount if you prefer less sweetness. Start by using 3/4 cup of sugar instead of 1 cup. Taste the batter before baking to ensure it meets your needs. Yes, you can use frozen zucchini. First, thaw it completely and drain excess water. Squeeze it in a clean towel to remove moisture. This prevents the bread from becoming soggy. Use about one cup of frozen zucchini for the recipe. Frozen zucchini works well if you don’t have fresh. It saves time and reduces food waste. Just remember to chop it into smaller pieces if needed. This helps it blend well into your batter. Keeping zucchini bread moist is easy with a few tips. First, don’t overmix the batter. This helps keep it light and fluffy. Letting the bread cool in the pan prevents it from drying out. Also, store the bread in an airtight container or wrap it tightly. This keeps moisture in and helps it stay fresh longer. If you want to enjoy it later, freeze slices individually. This way, you can take them out as needed. You can also add a bit more grated zucchini for extra moisture. Just be careful not to add too much! In this blog post, we explored how to make lemon zucchini bread. We covered key ingredients, from fresh zucchini to sweeteners, and shared useful preparation steps. You learned about mixing, baking, and the importance of texture. Our tips included serving ideas and storage methods to keep your bread fresh. Finally, I shared variations and dietary options to suit your tastes. Baking lemon zucchini bread is simple and fun, so get started and enjoy!

If you’re looking for a fresh and tasty treat, lemon zucchini bread is the answer. This simple recipe blends the vibrant taste of lemon with the subtle sweetness of zucchini. …

Read more

Categories Desserts

Millionaire Peach Salad Tasty and Refreshing Dish

July 11, 2025 by Chef Theo
- 4 ripe peaches, sliced - 2 cups baby spinach - 1 cup arugula Fresh produce is key to a great salad. Start with ripe peaches. When you slice them, they should be juicy and fragrant. The sweetness of the peaches shines in every bite. Baby spinach adds a tender green base. Its mild flavor pairs well with the fruits. Next, include arugula for a peppery kick. This mix of greens creates a delightful balance. - 1/2 cup crumbled feta cheese - 1/3 cup toasted pecans Now, let’s add some creaminess and crunch. Crumbled feta cheese brings a salty taste. It adds richness and pairs perfectly with the sweet peaches. Toasted pecans bring a nutty flavor. They also add a crunchy texture, making the salad more exciting. - 1/4 cup dried cranberries - 2 tablespoons honey - 2 tablespoons balsamic vinegar - 1 tablespoon olive oil - Salt and pepper Next, we need some sweetness and tang. Dried cranberries add a chewy texture and a burst of flavor. Honey gives the salad a natural sweetness. Balsamic vinegar adds a tangy taste, while olive oil brings richness. Don’t forget salt and pepper. They enhance all the flavors in the mix. With these ingredients, your Millionaire Peach Salad packs a punch of flavor. You can find the full recipe in this article to guide you through making it! First, we need to mix fresh ingredients. Take a large mixing bowl and add the sliced peaches. Then, add the baby spinach and arugula. These greens give a nice balance to the sweet peaches. Next, toss in the crumbled feta cheese, toasted pecans, and dried cranberries. Gently fold everything together with a spatula. This keeps the peaches whole and juicy. Now, let’s make the dressing. In a small bowl, whisk together the honey, balsamic vinegar, olive oil, salt, and pepper. Whisk until it blends well. This dressing will bring all the flavors together. Next, we combine the salad. Drizzle the dressing over the salad mixture. Use a spatula to toss everything very gently. You want the dressing to coat the peaches and greens without smashing them. This step is key to keeping the salad light and fresh. For presentation, transfer the salad to a beautiful serving platter. You can also serve it in individual bowls. This makes it easy for guests to take what they want. To garnish, sprinkle extra feta and pecans on top. This adds a nice touch and makes the salad look even more inviting. For the full recipe, check the detailed instructions above. Enjoy your Millionaire Peach Salad! Pick the best peaches for your salad. I love using yellow peaches. They have a sweet and juicy taste. White peaches are also good. They are sweeter and less acidic. Look for peaches that feel slightly soft when you press them. This means they are ripe and ready to eat. Peach season runs from late spring to early fall. The best time to buy is mid-summer. During this time, peaches are at their peak sweetness. To make your salad pop, add extra spices. A pinch of cinnamon or nutmeg can work wonders. You can also try fresh herbs. Basil or mint adds a nice twist. For texture, mix in crunchy ingredients. Toasted pecans give a great crunch. You can also use walnuts or almonds. They add richness to the dish. Cleaning up after cooking can be a breeze. Use a cutting board to slice your peaches. This keeps your counter clean. For easy washing, soak your mixing bowl in warm soapy water. Keep a dish towel handy for quick spills. Wipe as you go, and it will save time later. Enjoy your cooking and the fun of making Millionaire Peach Salad! {{image_2}} You can easily change up the nuts and cheeses in this salad. Instead of pecans, try walnuts or almonds. Both add a great crunch. For cheese, goat cheese works well if you want a creamier taste. You can also use a sharp cheddar for a stronger flavor. Seasonal fruits can make this salad even better. When peaches are out of season, try using nectarines or plums. Berries like strawberries or blueberries add a nice burst of flavor. You can even add sliced apples or pears for a sweet crunch. If you want a vegan version, skip the feta cheese. You can use avocado instead for creaminess. Nutritional yeast provides a cheesy flavor without the dairy. It’s a great way to keep things tasty. For gluten-free eaters, this salad is already a good choice. Just make sure any nuts or toppings you use are certified gluten-free. Enjoy the fresh flavors without worrying about gluten. This salad pairs well with various proteins. Grilled chicken or shrimp adds a nice touch. You can also serve it with salmon for a healthy meal. Using this salad as a side dish works great too. It complements grilled meats or sandwiches. Serve it at barbecues or picnics for a refreshing bite. You can find the full recipe to make this delicious Millionaire Peach Salad [Full Recipe]. To store leftover Millionaire Peach Salad, place it in an airtight container. Make sure to keep it in the fridge. This salad stays fresh for about 2 days. The peaches may soften, but the flavors will still shine. If you want to keep the crunch, store the dressing separately. This way, you can add it just before eating. You can prepare many parts of this salad ahead of time. Slice the peaches and mix them with lemon juice to stop browning. You can wash and dry the spinach and arugula a day in advance. Crumble the feta cheese and toast the pecans ahead too. Assemble the salad right before serving for the best taste. You can find the full recipe to get all the details. To make this salad shine, focus on ripe peaches. They should be sweet and juicy. Fresh baby spinach and arugula add a nice crunch. Combine textures by using crunchy toasted pecans. The feta cheese gives a creamy touch. Balance flavors with honey and balsamic vinegar for sweetness and tang. Toss gently to keep the peaches intact. This way, every bite bursts with flavor. You can prepare parts of this salad ahead of time. Slice the peaches a few hours before serving. Store them in lemon juice to stop browning. You can also wash and dry the greens ahead. Mix the dressing and store it separately. Combine everything just before serving for the best taste and texture. This salad is packed with nutrients. Peaches are rich in vitamins A and C. They support skin health and boost immunity. Spinach and arugula are full of iron and calcium. They help with energy and bone strength. Pecans add healthy fats and protein. Feta cheese provides calcium and flavor. Together, they create a healthy and delicious meal. This article shared all you need to know about making a delicious peach salad. We covered fresh ingredients, creamy cheese, sweet dressings, and helpful tips. You learned how to mix and serve this dish beautifully. I hope you feel ready to recreate this fruity delight. Enjoy trying different swaps and variations. Remember, salads can be fun and made to suit your taste. Keep the leftovers fresh and prep ahead if you want. With these tips, your peach salad will be a hit every time. Happy cooking!

If you’re craving a light and delicious dish, look no further than the Millionaire Peach Salad! This tasty salad combines juicy peaches, fresh greens, and crunchy nuts for a refreshing …

Read more

Categories Salads
Older posts
Newer posts
← Previous Page1 … Page31 Page32 Page33 … Page105 Next →

TOASTED RECIPES

Where ideas are warm, crisp, and ready to serve! 🍞

PAGES

Home About Contact Privacy Policy Terms & Conditions Cookie Policy GDPR Policy Copyright Policy Disclaimer

CATEGORIES

Appetizers Desserts Salads Breakfast Dinner

Contact

  • Pinterest
  • Mail
Copyright © 2025 Toasted Recipes. All rights reserved.