Skip to content
toastedrecipes.com
  • Home
  • Appetizers
  • Desserts
  • Salads
  • Breakfast
  • Dinner
  • Privacy Policy
  • Contact
  • About

Chef Theo

Slow-Cooker Flat Belly Foods for Easy Meal Prep

July 18, 2025 by Chef Theo
- 4 large bell peppers (any color) - 1 cup quinoa, rinsed - 2 cups vegetable broth - 1 can (15 oz) black beans, drained and rinsed - 1 cup corn, frozen or canned - 1 small red onion, diced - 2 cloves garlic, minced - 1 cup diced tomatoes (canned or fresh) - 1 teaspoon cumin - 1 teaspoon smoked paprika - 1 teaspoon chili powder - Salt and pepper to taste - Fresh cilantro, chopped - Lime wedges for serving When you gather these ingredients, you set the stage for a tasty meal. Start with the bell peppers. They add color and nutrition. Choose red, green, yellow, or orange. Each has a unique taste. Next, you need quinoa. Rinse it well to remove any bitter taste. This grain is filling and packed with protein. Combine it with vegetable broth for flavor. Black beans are a must. They provide fiber and protein. Make sure to rinse them well to cut back on sodium. Corn adds sweetness and texture. You can use frozen or canned corn. Both work great. Onions and garlic bring depth to your dish. Dice the onion small so it mixes well. Mince the garlic for a strong flavor boost. Tomatoes add juiciness and freshness. Use canned or fresh, based on what you have. For seasonings, cumin, smoked paprika, and chili powder create warmth and flavor. Adjust salt and pepper to your taste. Finally, fresh cilantro and lime wedges brighten the dish. They add a refreshing finish. This recipe is not just easy; it's also healthy and satisfying. Check out the Full Recipe for detailed cooking steps! - Combine rinsed quinoa and vegetable broth in a saucepan. - Boil, then reduce heat and simmer for 15 minutes. Cooking quinoa is simple. Start by rinsing it well. This removes any bitterness. Then, mix it with vegetable broth. Boil the mixture on high heat. Once it boils, lower the heat and cover the pot. Let it simmer for about 15 minutes. After the time is up, remove the pot and fluff the quinoa with a fork. - Slice tops off and remove seeds from the bell peppers. - Place hollowed peppers upright in the slow cooker. Next, grab your bell peppers. You can use any color you like. Cut off the tops and remove the seeds. Make sure to hollow them out nicely. This creates a space for the stuffing. Stand the peppers up in your slow cooker. - Mix cooked quinoa with black beans, corn, and seasonings. - Stuff each bell pepper and add vegetable broth to the slow cooker. In a big bowl, combine your cooked quinoa with black beans, corn, and seasonings. Toss in diced red onion, minced garlic, diced tomatoes, salt, and pepper. Stir until it’s all mixed well. Now, take a spoon and fill each bell pepper with this tasty mixture. Press it down lightly to fit. Pour a bit of vegetable broth into the slow cooker. This helps steam the peppers. - Cover and cook on low for 6-8 hours or high for 3-4 hours. Now it’s time to cook! Cover the slow cooker with its lid. Set it to low for 6-8 hours or high for 3-4 hours. You want the peppers to become tender. Once done, carefully remove them. You can garnish with fresh cilantro and serve with lime wedges. Enjoy your meal! Prepping your ingredients saves time. I suggest cooking quinoa and chopping veggies the night before. This way, you can simply toss everything in the slow cooker in the morning. It makes your meal prep easy and stress-free. Want to mix things up? Add different spices like oregano or thyme. You can also switch up the beans. Try kidney beans or pinto beans for a new taste. This adds fun and keeps your meals fresh. Serve your stuffed peppers with a light salad. A fresh green salad adds crunch and balance. You can also add a dollop of yogurt on top. The creaminess of yogurt pairs well with the peppers. It enhances the dish and makes it even more satisfying. {{image_2}} You can mix things up with different stuffing options. Instead of quinoa, try brown rice or lentils. Both options add a nice texture and flavor. You can also add in vegetables like zucchini or spinach. This boosts nutrition and makes the dish even more colorful. If you like a little kick, consider spice level adjustments. You can add jalapeños or hot sauce for heat. Start with a small amount and taste as you go. This way, you control the spice to suit your taste. You can make this dish fit any diet. For a vegetarian version, stick with the quinoa and beans. If you want something heartier, add ground turkey or beef. This makes the meal filling and packed with protein. For the full recipe, check out Slow-Cooker Quinoa & Black Bean Stuffed Peppers. To store leftover stuffed peppers, place them in an airtight container. Make sure the peppers cool down to room temperature first. Once cool, seal the container and refrigerate. They will stay fresh for about three to four days. If you want to enjoy them later, I recommend labeling the container with the date. Freezing stuffed peppers is a great way to save meals for later. First, let the peppers cool completely. Wrap each pepper in plastic wrap or aluminum foil. Then, place them in a freezer-safe bag or container. You can freeze them for up to three months. When you are ready to eat, let them thaw overnight in the fridge before reheating. To reheat your stuffed peppers, you can use either the oven or the microwave. For the oven, preheat it to 350°F (175°C). Place the peppers in a baking dish and cover with foil. Heat for about 20 minutes or until warm. If using a microwave, place a pepper on a microwave-safe plate. Heat for 2-3 minutes, checking halfway. Enjoy your meal with ease! You can store cooked stuffed peppers in the fridge for about 3 to 5 days. Keep them in an airtight container to stay fresh. If you want to keep them longer, freezing is a great option. Stuffed peppers can last in the freezer for 2 to 3 months. When ready to eat, just thaw in the fridge overnight before reheating. Yes, you can make these stuffed peppers ahead of time. Prepare the filling and stuff the peppers a day before. Store them in the fridge until you are ready to cook. You can cook them right from the fridge too. Just adjust the cooking time slightly if they are cold. If you want to swap quinoa, there are great options. You can use brown rice, farro, or barley as alternatives. For a protein boost, try lentils or chickpeas. These choices still give you a tasty and filling dish while changing the flavor and texture. Absolutely! These stuffed peppers are perfect for meal prep. They store well in the fridge and taste great reheated. Making a batch at once saves time during busy weeknights. You can easily grab a pepper for lunch or dinner. They are nutritious, filling, and packed with flavor, making them an ideal meal prep option. Check out the Full Recipe for step-by-step guidance! Slow-cooker quinoa and black bean stuffed peppers make a tasty and healthy meal. You learned the best ingredients, step-by-step preparation, and cooking methods. The variety of options lets you customize flavors and ingredients to suit your taste. These peppers are great for meal prep, ensuring easy dinners all week. Store the leftovers or freeze them for future meals. Enjoy the ease of making this dish and its rich flavors. Your next meal can be both simple and satisfying!

Are you ready to simplify your meal prep and boost your health? Slow-cooker flat belly foods can help you enjoy tasty meals while keeping belly fat at bay. In this …
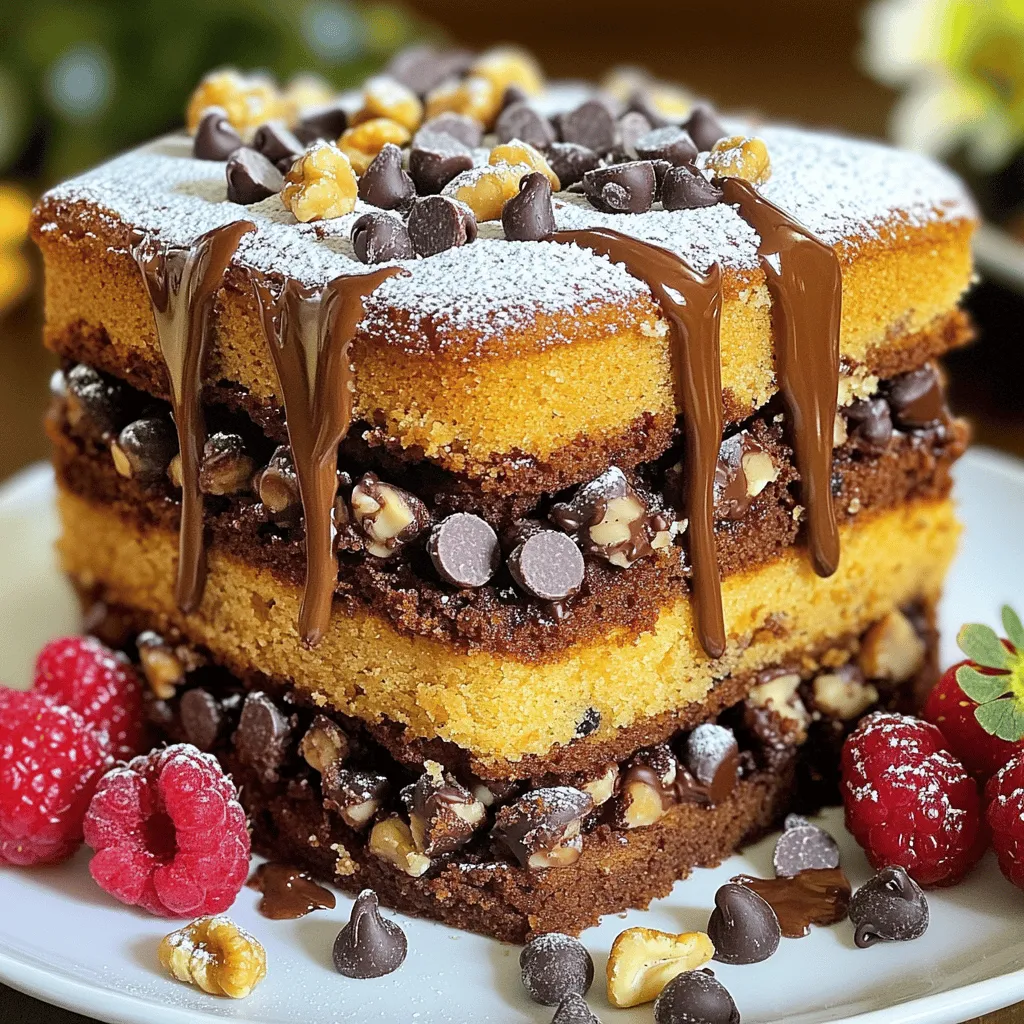
Read more

Categories Dinner

Chocolate Lover’s Zucchini Cake Delightful and Easy

July 18, 2025 by Chef Theo
To make this delightful cake, gather these key ingredients: - 2 cups grated zucchini (about 2 medium-sized zucchinis) - 1 ½ cups all-purpose flour - ½ cup unsweetened cocoa powder - 1 cup granulated sugar - ½ cup brown sugar, packed - 1 teaspoon baking soda - 1 teaspoon baking powder - ½ teaspoon salt - 1 teaspoon cinnamon - ½ cup vegetable oil - 3 large eggs - 1 teaspoon vanilla extract - 1 cup semi-sweet chocolate chips - ½ cup chopped walnuts or pecans (optional) These ingredients work together to create a rich and moist cake. The zucchini adds moisture and keeps the cake tender. Cocoa powder gives that deep chocolate flavor you crave. You might want to customize your cake with some fun add-ins and toppings: - ½ cup shredded coconut - 1 teaspoon espresso powder for a coffee boost - Chocolate frosting for extra sweetness - Fresh berries for a fruity touch - Whipped cream for serving These options bring unique flavors and textures. Feel free to explore what you like best. If you need to swap some items, here are a few ideas: - Use almond flour instead of all-purpose flour for a gluten-free option. - Substitute applesauce for vegetable oil to reduce fat. - Replace granulated sugar with coconut sugar for a healthier choice. - Use flax eggs instead of regular eggs for a vegan version. These substitutions help you cater to different diets without losing taste. Don’t be afraid to experiment with what you have on hand! For the full recipe, check [Full Recipe]. Start by washing the zucchini. Grate two medium zucchinis. You need about two cups of grated zucchini. Place the grated zucchini in a bowl. Add granulated sugar and brown sugar. Mix well and let it sit for 5 to 10 minutes. This step helps draw out moisture. Moist zucchini keeps the cake soft and moist. In a separate bowl, combine the all-purpose flour, cocoa powder, baking soda, baking powder, salt, and cinnamon. Whisk these ingredients together until mixed well. This helps to evenly distribute the leavening agents. When you mix dry ingredients well, the cake rises evenly. After the zucchini has rested, add vegetable oil, eggs, and vanilla extract to the bowl. Mix everything until well combined. Then, gradually stir in the dry ingredients. Be gentle while mixing. Overmixing can make the cake tough. Once mixed, fold in the chocolate chips and nuts if you choose to add them. Pour the batter into a greased and floured 9x13 inch baking pan. Spread it evenly in the pan. Bake in a preheated oven at 350°F (175°C) for 30 to 35 minutes. Check for doneness by inserting a toothpick in the center. It should come out clean or have a few moist crumbs. After baking, cool the cake for 10 minutes. Then, move it to a wire rack to cool completely. For the full recipe, refer to the instructions above. To get the best texture, use fresh zucchini. Grate it finely for a smooth mix. Letting the zucchini sit with sugar pulls out moisture. This step makes the cake moist and tender. Be careful not to overmix the batter. Stir just until combined to keep it soft. If you have extra cake, store it well. Place it in an airtight container. This keeps it fresh for several days. You can also cover it with plastic wrap. For longer storage, freeze slices. Wrap them tightly in foil or freezer bags. They stay good for up to three months. To boost flavor, add a pinch of sea salt. This brings out the chocolate taste. You can also try adding a splash of strong coffee. It deepens the chocolate flavor without being too strong. For extra moisture, consider adding applesauce. It keeps the cake soft and adds a nice sweetness. For the full recipe, check the detailed steps above. {{image_2}} To make this cake gluten-free, swap the all-purpose flour with a gluten-free blend. Use a blend that has a mix of flours and starches. Look for one that includes xanthan gum for better texture. Follow the same recipe steps, and your cake will still taste great! You can easily make this cake vegan. Replace the eggs with flaxseed meal or applesauce. For each egg, mix 1 tablespoon of flaxseed meal with 2.5 tablespoons of water. Let it sit until it thickens. Use a plant-based oil like coconut or canola. Choose dairy-free chocolate chips to keep it vegan friendly. Feel free to get creative with nuts and spices! Chopped pecans or almonds add a nice crunch. You can also try spices like nutmeg or ginger for a warm flavor. For a fun twist, mix in some orange zest or espresso powder. These small changes can make your cake truly unique. For the full recipe, check out the details above. To keep your Chocolate Lover’s Zucchini Cake fresh, store it properly. Use an airtight container. This helps to lock in moisture and flavor. If you do not have one, wrap the cake tightly in plastic wrap. Place it in a cool, dry place. Avoid direct sunlight or heat, as these can dry out the cake. If you plan to eat it within a few days, the counter is fine. If not, refrigerate it to keep it fresh longer. Freezing is a great option for long-term storage. First, let the cake cool completely. Then, slice it into portions for easy serving. Wrap each piece in plastic wrap tightly. After that, place the wrapped slices in a freezer bag. Squeeze out as much air as possible before sealing. Label the bag with the date. You can freeze the cake for up to three months. When you want to enjoy a slice, remove it from the freezer. Let it thaw in the fridge overnight. The shelf life of your Chocolate Lover’s Zucchini Cake depends on how you store it. When kept in an airtight container at room temperature, it lasts about 3 to 4 days. If stored in the fridge, it can last up to a week. If frozen, it remains good for about three months. Always check for signs of spoilage. If it smells off or has mold, it’s best to toss it out. Enjoy your cake while it's fresh for the best taste! For the full recipe, check out the detailed instructions provided earlier. No, you cannot taste the zucchini in the cake. The zucchini adds moisture and makes the cake soft. It blends well with the rich chocolate flavor. You might notice a slight texture, but it does not have a strong taste. To make the cake healthier, you can try these options: - Use whole wheat flour instead of all-purpose flour. - Substitute applesauce for half of the oil. - Reduce the sugar by 1/4 cup. - Add more nuts or seeds for healthy fats. These changes keep the cake tasty while making it a bit better for you. Bake the Chocolate Lover’s Zucchini Cake at 350°F (175°C). The cake will take about 30-35 minutes. Check for doneness by inserting a toothpick in the center. If it comes out clean or with a few moist crumbs, the cake is ready. Serve the cake warm or at room temperature. You can dust the top with powdered sugar for a nice look. Pair it with vanilla ice cream or whipped cream for extra delight. Add some chocolate shavings or a sprig of mint on top to impress your guests. For the full recipe, check out the Chocolate Lover’s Zucchini Cake section. You now have all the tools to make a delicious Chocolate Lover’s Zucchini Cake. We covered the key ingredients, step-by-step instructions, and helpful tips. With options for gluten-free and vegan diets, everyone can enjoy this treat. Store leftover cake properly to keep it fresh. Remember, adding nuts or spices can take the flavor to the next level. Get ready to share a slice or two with friends. Making this cake is fun, and it’s a great way to add veggies to dessert. Enjoy baking!

Are you ready to satisfy your chocolate cravings in a fun and healthy way? The Chocolate Lover’s Zucchini Cake is here to impress! You won’t even notice the veggies hiding …

Read more

Categories Desserts

Zucchini Brownies Delightful and Simple Recipe

July 18, 2025 by Chef Theo
To make my zucchini brownies, gather these simple ingredients: - 1 cup grated zucchini (about 1 medium zucchini) - 1/2 cup unsweetened applesauce - 1/3 cup vegetable oil - 1 teaspoon vanilla extract - 1 cup granulated sugar - 1/2 cup brown sugar, packed - 1 cup all-purpose flour - 1/2 cup unsweetened cocoa powder - 1/2 teaspoon baking powder - 1/2 teaspoon baking soda - 1/4 teaspoon salt - 1/2 cup semi-sweet chocolate chips - Optional: 1/4 cup chopped walnuts or pecans Grated zucchini adds moisture and nutrition to the brownies. Use a medium zucchini for the right amount. You don’t need to peel it. Just wash it well and grate it. For sweetness, I use both granulated and brown sugar. Granulated sugar gives a nice base, while brown sugar adds depth with its rich flavor. This mix creates a perfect balance. You can add chocolate chips for extra sweetness and gooeyness. If you like nuts, chopped walnuts or pecans give a nice crunch. Feel free to mix and match based on your taste. For the full recipe, check out the instructions in the next section. 1. Preheating and preparing the baking dish First, preheat your oven to 350°F (175°C). While it heats, get an 8x8 inch baking dish. You can grease it or line it with parchment paper. This step helps the brownies come out easily. 2. Creating the wet and dry mixes In a large bowl, mix the grated zucchini, applesauce, vegetable oil, and vanilla extract. Stir well until mixed. In a separate bowl, whisk together the flour, cocoa powder, baking powder, baking soda, and salt. This keeps your dry ingredients well blended. 3. Combining everything and baking tips Slowly add the dry mix to the wet mix. Stir gently until just combined. Be careful not to overmix. Then, fold in the chocolate chips and nuts if you want them. Pour the batter into your prepared dish. Spread it evenly with a spatula. Bake for 25-30 minutes. Use a toothpick to check doneness. If it comes out with a few moist crumbs, they're ready. Let them cool in the pan for 10 minutes. After that, move the brownies to a wire rack to cool completely. For more details, check the Full Recipe. How to properly grate zucchini To grate zucchini, use a box grater. Choose the side with large holes. Wash the zucchini first. Cut off both ends. Then, run it along the grater. Keep grating until you have one cup. Make sure to squeeze out extra moisture. This helps keep your brownies from being too wet. Avoiding overmixing for the perfect texture When mixing your batter, blend just until combined. Stir gently after adding dry ingredients. Overmixing can make your brownies tough. You want them soft and fudgy. If you see some flour bits, that’s okay. They will blend as you bake. Ways to test for doneness To check if your brownies are done, use a toothpick. Insert it in the center of the brownies. If it comes out with a few moist crumbs, they are ready. If it’s wet with batter, give them more time. Let them cool in the pan for about 10 minutes before moving them. Ideas for serving options Serve your brownies warm for the best taste. You can sprinkle powdered sugar on top. Drizzling melted chocolate also adds a nice touch. Both options make them look fancy and taste great. Pairing suggestions Enjoy these brownies with a scoop of vanilla ice cream. The cold ice cream melts slightly on the warm brownie. This creates a delightful mix of flavors. You can also try them with whipped cream or fresh berries. These additions give a fresh twist to your dessert! {{image_2}} You can make gluten-free zucchini brownies using different flours. Almond flour and coconut flour are great options. Both add nice flavor and texture. Almond flour gives a nutty taste, while coconut flour adds a hint of sweetness. When using these flours, you need to adjust other ingredients. Almond flour usually requires less liquid. So, you might need to reduce the applesauce a bit. For coconut flour, it absorbs more moisture, so add more liquid. A good rule is to add an extra egg or more applesauce. This keeps the brownies moist and tasty. For vegan zucchini brownies, you can replace eggs and dairy. Instead of eggs, use flaxseed meal or chia seeds. Mix 1 tablespoon of either with 2.5 tablespoons of water. Let it sit for a few minutes to thicken. For dairy, use almond milk or oat milk. These plant-based options work well. You can also use coconut oil instead of vegetable oil for a richer flavor. To keep the brownies moist, check the baking time. Overbaking can dry them out. Also, using ingredients like applesauce helps maintain moisture. You may even want to add a bit more applesauce for extra softness. For the full recipe, check out the details above. To keep your zucchini brownies fresh, use airtight containers. This helps prevent them from drying out. You can store the brownies at room temperature for about 3-4 days. If you want them to last longer, place them in the fridge. They can stay good for up to a week in the refrigerator. If you want to keep brownies for a long time, freezing is a great option. Cut the brownies into squares before freezing. Wrap each piece in plastic wrap. Then, place them in a freezer bag or container. They can stay fresh in the freezer for up to 3 months. When you're ready to enjoy them, just let them thaw at room temperature. For best taste, reheat the brownies in the oven for a few minutes. This makes them warm and gooey again, just like fresh from the oven. Remember, the key to great storage is keeping air out! Enjoy your delicious zucchini brownies with ease. For the full recipe, check out the Decadent Zucchini Brownies section. Can zucchini brownies be made ahead of time? Yes, you can make zucchini brownies ahead of time. Once they cool, store them in an airtight container. They stay fresh for about three days at room temperature. For longer storage, place them in the fridge for up to a week. How do I know when the brownies are done? To check if the brownies are done, insert a toothpick in the center. If it comes out with a few moist crumbs, they are ready. Overbaking can make them dry. So, keep an eye on the time, around 25-30 minutes should work. Is the zucchini flavor prominent in the brownies? No, the zucchini flavor is not strong. The cocoa powder and sugars mask it well. You get a rich chocolate taste instead. The zucchini adds moisture and keeps them soft. Can I use frozen zucchini instead? Yes, you can use frozen zucchini. Just thaw it and drain the excess water. This helps prevent the batter from being too wet. It works well in this recipe. What are some other healthy brownie alternatives? You can try black bean brownies or sweet potato brownies. Both are healthy and tasty options. They add fiber and nutrients while keeping the taste rich and chocolatey. How can I make these brownies lower in sugar? To lower the sugar, reduce the amount of granulated sugar. You can also substitute it with a natural sweetener like maple syrup or honey. Just remember to adjust the liquid ingredients if you do this. For instance, use less applesauce to balance it out. For the full recipe, check out the details above! Zucchini brownies can be a fun and tasty treat. Use grated zucchini, sugar, and optional add-ins for flavor. Follow the easy steps to bake them perfectly. Remember to mix carefully to avoid tough brownies. You can customize the recipe to be gluten-free or vegan with simple swaps. Store them well to keep them fresh. Try serving with powdered sugar or ice cream for extra yum! With these tips, you can enjoy a delicious twist on brownies. Enjoy baking and sharing your tasty creations!

Are you ready to whip up a batch of delicious Zucchini Brownies? This easy recipe combines moist zucchini with sweet chocolate goodness, creating a treat everyone will love. I’ll guide …

Read more

Categories Desserts

One-Pan Chicken Dinner Quick and Tasty Recipe

July 18, 2025 by Chef Theo
This dish is easy and quick to make. You will love the mix of flavors. It is perfect for a busy weeknight or a cozy dinner. The full recipe is simple and fun to prepare. - 4 chicken thighs, skin-on and bone-in - 1 cup baby potatoes, halved - 1 cup cherry tomatoes - 1 bell pepper, sliced (any color) - 4 cloves garlic, minced - 1 tablespoon fresh rosemary, chopped - 1 tablespoon fresh thyme, chopped - 2 tablespoons olive oil - Juice of 1 lemon - Zest of 1 lemon - Salt and pepper to taste These ingredients make a tasty and filling meal. The chicken thighs give rich flavor. The veggies add color and health. Fresh herbs like rosemary and thyme boost the taste. - 1 cup green beans - 1 onion, sliced - 1 teaspoon paprika - 1 teaspoon chili powder Feel free to mix in any of these options. Green beans add crunch. Onions bring sweetness. Spices can heat things up. Use what you have on hand and enjoy! First, gather your chicken thighs. Use skin-on and bone-in pieces for the best flavor. Rinse them under cold water, then pat them dry with paper towels. This step helps the skin get crispy. Place the thighs in a large bowl for marinating later. Next, make the marinade. In a separate bowl, mix olive oil, lemon juice, and lemon zest. Add minced garlic, chopped rosemary, thyme, salt, and pepper. Stir well to combine. Pour this marinade over the chicken thighs. Make sure each piece is covered. If you can, let it sit for 15 minutes. This adds great taste. Now, take a large oven-safe skillet. Start with halved baby potatoes. Spread them evenly across the bottom. Then add the cherry tomatoes and sliced bell pepper. Drizzle some olive oil over the veggies. Season them with salt and pepper. This helps bring out their flavors. Place the marinated chicken on top of the veggies in the skillet. Be sure to arrange them nicely. Then, transfer the skillet to your preheated oven. Bake for 30 to 35 minutes. The chicken should be golden and cooked through. Check that it reaches an internal temperature of 165°F. Once cooked, let it rest for a few minutes before serving. Enjoy your one-pan meal! Marinating is key to great taste. Use fresh herbs like rosemary and thyme for a burst of flavor. If you have time, let the chicken sit in the marinade for 15 minutes. This helps the meat soak up the good stuff. For even more flavor, try marinating overnight in the fridge. Just remember to cover it well. To cook chicken perfectly, aim for an internal temperature of 165°F (75°C). You can check this with a meat thermometer. When baking, place the chicken skin-side up. This allows the skin to get crispy. If you want extra crisp, broil for a few minutes after baking. Keep an eye on it so it doesn’t burn. Cleaning up can feel like a chore, but it doesn't have to be hard. Use the same skillet for cooking and serving. This cuts down on dishes. Let the skillet soak in warm, soapy water right after use. This helps food residue come off easier. For tough spots, use a gentle scrubber. Enjoy your meal without the stress of cleaning! {{image_2}} You can mix and match your veggies for this dish. Instead of baby potatoes, try sweet potatoes or carrots. They add a nice sweetness. If you want more greens, add broccoli or green beans. Zucchini works great too. Just cut them to the same size as the other veggies for even cooking. Get creative with your marinades! Instead of lemon, try balsamic vinegar or soy sauce. Garlic and herb blends add a tasty twist. You can also use yogurt for a creamy marinade. Just remember to keep the marinade balanced with some acid and fat. Spice it up with different herbs and spices. Instead of rosemary and thyme, use oregano and basil for a new flavor. You can also add a pinch of red pepper flakes for some heat. Try smoked paprika for a hint of smokiness. These small changes can make a big difference! After making your one-pan chicken dinner, you may have some tasty leftovers. To store them, let the dish cool down for about 30 minutes. Then, place the chicken and veggies in an airtight container. This keeps flavors fresh and prevents spills. You can store the leftovers in the fridge for up to three days. When you are ready to enjoy your leftovers, reheating is easy. You can use the microwave or the oven. For the microwave, place the chicken and veggies on a plate. Heat for about 2 to 3 minutes, checking to ensure it warms evenly. If you prefer the oven, preheat it to 350°F (175°C). Put the dish in for about 15 minutes. This method keeps the chicken crispy and delicious. If you want to save some for later, freezing is a great option. To freeze, make sure the chicken is cool. Then, wrap it tightly in plastic wrap or foil. Place it in a freezer-safe bag or container. This keeps it fresh for up to three months. When you're ready to eat, thaw it in the fridge overnight. Reheat as mentioned above, and enjoy! For the full recipe, check back to our earlier sections. You can serve this dish with many sides. Rice or quinoa pairs well. A fresh salad adds a nice crunch. You might also enjoy some crusty bread to soak up the juices. Feel free to mix and match! Yes, you can use boneless chicken. It cooks faster than bone-in chicken. Just check the cooking time, as it may reduce. Boneless chicken thighs or breasts work great in this recipe. The best way is to check the internal temperature. Use a meat thermometer. Chicken should reach 165°F (75°C) for safe eating. If you don’t have one, cut into the thickest part. The meat should be white, not pink. This dish lasts about 3 to 4 days in the fridge. Store it in an airtight container. Make sure to let it cool before sealing. Always check for any off smells before eating leftovers. You now have a full guide to making a tasty one-pan chicken dinner. The recipe covers all essential and optional ingredients. I included clear steps for prepping, marinating, and cooking the chicken. You learned tips for perfect flavor and cooking. Variations let you mix in your favorite veggies and spices. Finally, I covered storage and reheating, ensuring your dish tastes great later. Enjoy your cooking and share this easy recipe with friends!

Looking for a quick and tasty meal? I’ve got the perfect solution: a One-Pan Chicken Dinner! This simple recipe saves time without sacrificing flavor. You only need a few essential …

Read more

Categories Dinner

Chocolate Chip Cake Irresistible and Simple Recipe

July 18, 2025 by Chef Theo
To make the perfect chocolate chip cake, gather these ingredients: - Dry Ingredients: - 2 cups all-purpose flour - 1 ½ teaspoons baking powder - ½ teaspoon baking soda - ½ teaspoon salt - Wet Ingredients: - ¾ cup unsalted butter, softened - 1 cup granulated sugar - ¾ cup brown sugar, packed - 3 large eggs - 1 teaspoon vanilla extract - 1 cup buttermilk - Add-ins: - 1 ½ cups semi-sweet chocolate chips - ½ cup chopped walnuts (optional) - Powdered sugar for dusting (optional) Each ingredient plays a role in making this cake fluffy and moist. The butter and sugars create a rich base. The buttermilk adds a slight tang and keeps the cake tender. Chocolate chips give a sweet burst in every bite. You can add walnuts for a nice crunch or dust with powdered sugar for a pretty finish. For the full recipe, check out the detailed steps to create this delightful treat! 1. Preheat your oven to 350°F (175°C). This helps your cake rise nicely. 2. Prep your cake pans. Grease and flour two 9-inch round cake pans. You can also use parchment paper. 3. Mix dry ingredients. In a medium bowl, whisk together 2 cups of flour, 1 ½ teaspoons of baking powder, ½ teaspoon of baking soda, and ½ teaspoon of salt. Set this aside. 4. Cream butter and sugars. In a large bowl, beat ¾ cup of softened butter, 1 cup of granulated sugar, and ¾ cup of brown sugar until fluffy. This takes about 3-5 minutes. 5. Incorporate eggs and vanilla. Add 3 large eggs one at a time, mixing well after each. Then mix in 1 teaspoon of vanilla extract. 6. Alternate dry ingredients with buttermilk. Gradually mix in the dry ingredients with 1 cup of buttermilk. Start and end with the flour mixture. Mix until just combined. 7. Folding in chocolate chips and walnuts. Gently fold in 1 ½ cups of semi-sweet chocolate chips and ½ cup of chopped walnuts, if you like them. 8. Bake the cake. Divide the batter evenly between the pans. Bake for 25-30 minutes. Check with a toothpick; it should come out clean. 9. Cool the cakes. Let the cakes cool in the pans for 10 minutes. Then, remove them from pans and place them on wire racks to cool completely. For the full recipe, check the details listed above. Enjoy making your cake! To bake the best chocolate chip cake, keep your oven at the right temperature. An even heat is key. Preheat your oven to 350°F (175°C) before you start. It helps the cake rise and bake evenly. Use an oven thermometer to check if your oven is accurate. Measuring your ingredients can make a big difference. Use dry measuring cups for flour and sugar. Scoop the flour and level it off with a flat edge. For liquids, use a clear measuring cup with a spout. This way, you will get the right amounts every time. Presentation matters. To make your cake look great, stack the layers. Drizzle melted chocolate or ganache on top. It adds a nice touch of richness. You can also serve it with fresh berries or a dollop of whipped cream. This adds color and a fun flavor twist. For a simple finish, dust the top with powdered sugar. It gives a nice contrast to the chocolate. You can also add chocolate chips on top for a more decadent look. Sometimes cakes can turn out dry. If this happens, you can fix it. Try to add a bit of simple syrup. Mix equal parts sugar and water, heat until dissolved, and brush it on the cake layers. This will add moisture back into your cake. If your cake has a sunken middle, don’t panic. This often happens if the batter is too wet or if it hasn’t cooked long enough. Next time, check your oven temperature and bake a little longer. You can trim the sunken part and cover it with frosting. A little creativity can save the day. For the full recipe, check out the complete instructions above. {{image_2}} You can enjoy chocolate chip cake in many ways. If you want a vegan option, replace the eggs with flaxseed meal. Mix 1 tablespoon of flaxseed with 3 tablespoons of water for each egg. Use a plant-based butter to keep it dairy-free. For gluten-free chocolate chip cake, swap the all-purpose flour for a gluten-free blend. Make sure your baking powder is gluten-free too. This way, everyone can share in the joy of cake! Want to spice things up? Adding cinnamon gives your cake warmth and depth. A hint of espresso can wake up the chocolate flavor. Just a teaspoon of each can do wonders. You can also switch up the chocolate! Use dark chocolate for a richer taste or white chocolate for a sweet twist. Try mixing different types for even more fun. Toppings can change the whole cake vibe. Instead of regular frosting, try a cream cheese frosting for a tangy kick. You can also drizzle caramel or melted chocolate for extra sweetness. Seasonal fruits make great toppings too. Strawberries in spring or apples in fall can add freshness. Fresh berries on top look great and taste even better! For the full recipe of the chocolate chip cake, check the section above. Enjoy experimenting! To keep your chocolate chip cake fresh, store it in an airtight container. This method prevents dryness and keeps it moist. You can also wrap the cake tightly in plastic wrap. If you want to freeze the cake, slice it first. Wrap each slice in plastic wrap, then place them in a freezer-safe bag. This way, you can enjoy a slice anytime you crave it. The shelf life of your chocolate chip cake depends on storage. In the fridge, it lasts about five days. If you freeze it, the cake can be good for up to three months. Always check for signs of spoilage before eating. Look for mold, an off smell, or a change in texture. If you notice any of these signs, it’s best to toss it. Enjoy your cake fresh, and store it well to keep the flavor alive! How do I prevent my cake from sinking? To prevent a cake from sinking, ensure your oven is properly preheated. Avoid opening the oven door while baking. Make sure to measure your ingredients accurately, especially the baking powder. Also, mix the batter until just combined; overmixing can add air and lead to a collapse. What can I substitute for buttermilk? If you don't have buttermilk, you can use milk and vinegar. For one cup of buttermilk, mix one tablespoon of vinegar with enough milk to make one cup. Let it sit for five minutes. You can also use yogurt or sour cream mixed with water. Can I make this cake in advance? Yes, you can make this cake in advance. Bake it a day before and let it cool. Store it in an airtight container at room temperature. You can frost it the next day for a fresh taste. What is the best way to serve chocolate chip cake? Serve the cake at room temperature. You can dust it with powdered sugar or add whipped cream on top. For extra flavor, pair it with fresh berries or a scoop of ice cream. Can I use margarine instead of butter? You can use margarine instead of butter, but it may change the flavor slightly. Use the same amount as the recipe calls for. What is a good alternative for granulated sugar? A good alternative to granulated sugar is coconut sugar or brown sugar. You can also use honey, but reduce the liquid in your recipe slightly. You now have all the steps, tips, and variations to make an amazing chocolate chip cake. From gathering the right ingredients to keeping it fresh, I covered it all. Remember to check your cake for doneness and experiment with flavors. Feel free to adapt the recipe to fit your needs. Whether you enjoy it as is or with fun toppings, this cake is sure to please. Happy baking and enjoy your delicious creation!

If you love chocolate, you’re in for a treat! This Chocolate Chip Cake recipe is simple and delicious. I’ll guide you through every step, from gathering ingredients to baking instructions. …

Read more

Categories Desserts

Cherry Almond Cake Delightfully Sweet and Simple Recipe

July 18, 2025 by Chef Theo
- 1 cup all-purpose flour - 1/2 cup almond flour - 1 cup granulated sugar - 1/2 cup unsalted butter, softened - 2 large eggs - 1/2 cup buttermilk - 1 teaspoon almond extract - 1 teaspoon vanilla extract - 1 teaspoon baking powder - 1/2 teaspoon baking soda - 1/4 teaspoon salt - 1 cup fresh or frozen cherries, pitted and halved - 1/4 cup sliced almonds (plus more for topping) - Powdered sugar for dusting (optional) The cherry almond cake shines with its simple yet rich ingredients. Each one plays a role. Flour gives the cake structure. Almond flour adds a nice nutty flavor and moistness. Granulated sugar balances the flavors and gives a sweet touch. Butter makes the cake rich and tender. Eggs help bind everything together. They also add a lovely golden color. Buttermilk gives the cake a slight tang and makes it soft. Almond and vanilla extracts enhance the cake's flavor, making it fragrant and inviting. Baking powder and baking soda help the cake rise, creating a light texture. Salt enhances all the flavors, making each bite satisfying. Cherries add a burst of sweetness and juiciness. The sliced almonds on top give a nice crunch and look pretty. You can dust powdered sugar on top for a sweet finish, if you like. Using fresh ingredients makes a big difference. Fresh cherries taste better than canned ones. They bring a bright flavor to your cake. I recommend using ripe, juicy cherries for the best taste. Frozen cherries work too, but be sure to thaw and drain them first. For a complete guide, check the Full Recipe. It will help you gather all you need to create this delightful treat! Start by gathering all your ingredients. This makes the process easier. Preheat your oven to 350°F (175°C). Next, grease a 9-inch round cake pan. You can also use parchment paper to line it. This helps the cake come out easily. In a large bowl, cream together the softened butter and sugar. Mix until it’s light and fluffy. Add the eggs, one at a time. Beat well after each egg. Then mix in the buttermilk, almond extract, and vanilla extract. Keep mixing until everything is well combined. In a separate bowl, whisk together the all-purpose flour, almond flour, baking powder, baking soda, and salt. Slowly add this dry blend to the wet ingredients. Stir gently until just combined. Avoid overmixing; this keeps the cake light. Gently fold in the cherry halves and sliced almonds. Save a few cherries and almonds for the top. This adds a nice touch to your cake. Pour the batter into the prepared cake pan. Smooth the top with a spatula. Now, sprinkle the reserved cherries and sliced almonds on top. Place the cake in the oven and bake for 30-35 minutes. Use a toothpick to check if it’s done. It should come out clean. Once baked, remove the cake and let it cool for 10 minutes in the pan. Then, transfer it to a wire rack to cool completely. When it’s cooled, dust the top with powdered sugar if you like. Now, you’re ready to slice and serve this delicious cherry almond cake! For the full recipe, see the ingredients list above. To make your cherry almond cake soft and moist, follow a few key steps. First, use room temperature butter and eggs. This helps them mix better. Second, don’t overmix the batter. Stir just until combined to keep the cake light. Lastly, check your oven temperature. An oven thermometer can help ensure accuracy. Avoid these mistakes for the best results. First, don’t skip the baking powder and baking soda. They help the cake rise. Second, be sure to pit the cherries well. Any pits can ruin the enjoyment of each slice. Lastly, remember to let the cake cool before serving. This helps improve the texture. When serving your cherry almond cake, presentation matters! Slice the cake and place it on decorative plates. Add a sprig of mint or a few extra cherries on the side for color. If you want a sweet touch, dust the top with powdered sugar. This makes it look even more inviting. For a fun twist, serve with whipped cream or vanilla ice cream on the side. Enjoy the delightful flavors! You can find the full recipe above to make this treat at home. {{image_2}} To make a gluten-free cherry almond cake, swap out the all-purpose flour. Use a gluten-free flour blend instead. It works well and tastes great. Mix the flour blend with almond flour as before. This keeps the cake light and fluffy. Make sure your baking powder is gluten-free too. For a dairy-free cherry almond cake, you can replace the butter. Use coconut oil or a vegan butter substitute. Buttermilk can be swapped with plant-based milk, like almond or soy milk, mixed with a bit of vinegar. This will mimic the tangy flavor of buttermilk. Feel free to switch up the flavors! You can add lemon zest for a zesty twist. Try mixing in some orange zest for a bright flavor. If you love chocolate, fold in some cocoa powder. You can also mix in different fruits like blueberries or peaches. The possibilities are endless! To keep your Cherry Almond Cake fresh, store it in an airtight container. This method helps prevent the cake from drying out. If you do not have a container, wrap the cake tightly in plastic wrap. Store it at room temperature for up to three days. If you want to enjoy it later, the fridge works too. Just remember, the cake may dry out a bit. Freezing this cake is easy. First, let the cake cool completely. Then, slice it into pieces. Wrap each piece in plastic wrap, and then place them in a freezer-safe bag. This method keeps the cake fresh for up to three months. When you crave a slice, just thaw it in the fridge overnight or at room temperature for a few hours. To enjoy your Cherry Almond Cake warm, preheat your oven to 350°F (175°C). Place the slice on a baking sheet and cover it with foil. Heat for about 10 minutes. This warms the cake without drying it out. You can also use the microwave. Heat on medium power for about 15-20 seconds. Just be careful not to overheat; you want it warm, not hot! You can create different flavors with your Cherry Almond Cake. Try adding lemon zest for a bright twist. A swirl of chocolate can make it rich and fun. To make it more nutty, add extra almond flour. You can also mix in some coconut flakes for a tropical vibe. Each change adds a new taste and texture. Enjoy experimenting! Yes, you can use other fruits in this cake. Raspberries, blueberries, or chopped peaches work well. Each fruit brings its own flavor. If you use juicy fruits, cut back on the buttermilk slightly. This helps keep the cake from getting too wet. You can mix and match to find your favorite. To check if your cake is done, insert a toothpick in the center. If it comes out clean, the cake is ready. You can also gently press the top; it should spring back. If the cake looks golden and pulls away from the sides, it’s likely done. For a lovely look, dust the top with powdered sugar. You can also place whole cherries on top. Adding sliced almonds gives a nice crunch. A sprig of mint adds color and freshness. These simple ideas make your cake pretty and inviting. This cherry almond cake is a treat for your taste buds. It combines sweet cherries with the rich flavor of almond. The cake is moist and fluffy, making it perfect for any occasion. Each bite feels like a hug, thanks to the blend of flavors. You can enjoy it with a dusting of powdered sugar or a dollop of whipped cream. You will need about 15 minutes to prepare the cake. The baking time is around 30 to 35 minutes. In total, you will spend about 50 minutes from start to finish. This recipe serves 8 people, making it ideal for family gatherings or small parties. Each slice offers a delicious mix of cherries and almonds, leaving everyone wanting more. You can easily double the recipe if you need more servings. Check out the Full Recipe for all the steps and tips! In this post, we explored the ingredients and steps to make a delicious Cherry Almond Cake. We covered key flavors, tips for perfect texture, and common mistakes to avoid. Remember, fresh ingredients matter most for great taste. I hope you feel confident to try this recipe. With some practice, you will bake a cake that is sure to impress! Enjoy your baking journey.

If you love sweet cakes and simple recipes, you’re in for a treat! This Cherry Almond Cake is both delightful and easy to make. With a mix of bright cherries …

Read more

Categories Desserts

Crockpot Cheesy Chicken Broccoli Rice Simple Delight

July 18, 2025 by Chef Theo
- 1 lb boneless, skinless chicken breasts - 2 cups broccoli florets (fresh or frozen) - 1 cup uncooked brown rice - 4 cups chicken broth - 1 cup shredded cheddar cheese - 1/2 cup cream cheese, softened - 1 teaspoon garlic powder - 1 teaspoon onion powder - Salt and pepper to taste - 2 tablespoons olive oil (optional) To make this dish shine, you need fresh and simple ingredients. Boneless chicken breasts serve as the main protein. They cook well in the crockpot and stay juicy. Broccoli adds color and nutrition, while brown rice gives a hearty base. For flavor, chicken broth is key. It keeps everything moist and tasty. Cream cheese and cheddar cheese bring the creamy goodness. Garlic and onion powders add depth, and salt and pepper tie it all together. If you want to add extra flavor, a bit of olive oil can work wonders too. You can find the full recipe [here](#). Gather your ingredients, and let’s get cooking! Start by deciding if you want to sear the chicken. Searing adds great taste. In a skillet, heat olive oil over medium heat. Cook the chicken for 3 to 4 minutes on each side until it is lightly brown. If you are short on time, you can skip this step. Next, place the chicken in the bottom of the crockpot. Add the uncooked brown rice evenly over the chicken. Then, layer the broccoli florets on top of the rice. This order helps all the flavors mix well. Now it’s time to make the broth. In a bowl, combine 4 cups of chicken broth with 1 teaspoon of garlic powder and 1 teaspoon of onion powder. Add salt and pepper to taste. Stir the mixture well to blend the flavors. Pour this broth mix over the chicken, rice, and broccoli in the crockpot. This will soak into the rice as it cooks. Set your crockpot to cook on low for 4 to 6 hours or on high for 2 to 3 hours. The chicken should be cooked through, and the rice will be tender. When done, take the chicken out and shred it with two forks. Return the shredded chicken to the pot. Stir in the cream cheese and 1 cup of shredded cheddar cheese. Mix it all until it becomes creamy and well combined. Taste and adjust the seasoning with salt and pepper as needed. Enjoy your delicious cheesy chicken broccoli rice! For the complete recipe, check out the Full Recipe section. Searing the chicken adds rich flavor. It creates a nice crust that locks in juices. If you’re in a hurry, you can skip this step. The dish will still taste great without it. After cooking, always taste the dish. You might want to add more salt or pepper. Adjusting the seasoning makes a big difference. This cheesy chicken broccoli rice pairs well with simple sides. A fresh salad is a great choice. You can also serve it with crusty bread for dipping. For presentation, use a colorful bowl. A sprinkle of cheese and fresh parsley adds flair. A lovely plate makes the meal feel even more special. {{image_2}} You can easily change this dish by swapping out some ingredients. - Using different cheeses: Try mozzarella for a milder taste, or pepper jack for some heat. Each cheese gives a new twist to the dish. - Substituting brown rice with white rice or quinoa: White rice cooks faster than brown rice. Quinoa adds a nutty flavor and boosts protein. Both options work well in this recipe. Want to add more nutrition and flavor? Toss in some extra veggies! - Bell peppers: These add sweetness and crunch. Chop them up and mix them in with the broccoli. - Carrots: Slice them thin and add them for a pop of color and earthiness. They also soften nicely in the crockpot. These swaps and extras can make your meal unique every time you make it. For more detailed instructions, check out the Full Recipe. To keep your Crockpot Cheesy Chicken Broccoli Rice fresh, follow these steps: - Cool Down: Let the dish cool to room temperature first. - Use Airtight Containers: Store leftovers in airtight containers. This keeps moisture in and air out. - Refrigerate: Place the containers in the fridge. Enjoy leftovers within 3 to 4 days. - Freezing: You can freeze leftovers too. Use freezer-safe containers or bags. They last for up to 3 months. When it’s time to enjoy your leftovers, here’s how to reheat them: - Microwave: Place a serving in a microwave-safe bowl. Cover with a lid or microwave-safe wrap. Heat on medium power for 2-3 minutes, stirring halfway through. - Stovetop: Heat in a skillet over medium heat. Add a splash of water or broth to help it warm up nicely. Stir until heated through. These methods keep the dish creamy and cheesy, just like when you first made it. For more tips, check out the Full Recipe! Yes, you can use frozen chicken. Just add about an hour to the cooking time. If you use frozen chicken, it will cook well in the crockpot. Make sure to check if it is fully cooked before serving. Always aim for an internal temperature of 165°F. This way, you can enjoy a safe and tasty meal. To make this dish low-carb, swap the brown rice for cauliflower rice. Cauliflower rice is a great substitute. It has fewer carbs and still adds texture. You can also cut back on the cream cheese for a lighter option. This change keeps the dish creamy while lowering the carbs. If you want to substitute cream cheese, try sour cream or Greek yogurt. Both give a creamy texture. You can also use ricotta cheese for a different flavor. These options keep the dish delicious and rich. Make sure to use the same amount to keep the balance right. This blog post covers a hearty and tasty Crockpot Cheesy Chicken Broccoli Rice dish. We explored the main and additional ingredients that make it shine. You learned how to prepare, cook, and serve it perfectly. Plus, we shared tips to enhance flavor and texture. Remember, you can customize this dish to fit your taste with different cheeses or veggies. I hope you feel inspired to try this simple recipe. Enjoy your cooking journey and savor every bite.

Welcome to your new favorite dish: Crockpot Cheesy Chicken Broccoli Rice! This simple delight combines tender chicken, rich cheese, and healthy broccoli in one easy meal. Imagine coming home to …

Read more

Categories Dinner

Zucchini Chocolate Chip Muffins Fresh and Tasty Snack

July 18, 2025 by Chef Theo
To make the best zucchini chocolate chip muffins, you need a few key items. Here’s a quick list: - 1 cup grated zucchini (squeezed of excess moisture) - 1 cup all-purpose flour - 1/2 cup whole wheat flour - 1/2 cup granulated sugar - 1/4 cup brown sugar These ingredients create a nice, moist base for the muffins. Grated zucchini adds moisture and nutrition. The blend of all-purpose and whole wheat flour gives a lovely texture. The sugars provide sweetness and help with browning. Next, we add some more ingredients to enhance flavor and moisture: - 1/2 cup unsweetened applesauce - 2 large eggs - 1 teaspoon vanilla extract - 1 teaspoon baking soda - 1/2 teaspoon baking powder - 1/2 teaspoon ground cinnamon - 1/4 teaspoon salt Applesauce is a great way to keep the muffins moist without added fat. Eggs help bind everything together. The baking soda and baking powder give the muffins a nice rise. Cinnamon adds warmth, and salt balances the sweetness. For a little extra fun, consider these optional ingredients: - 1 cup semi-sweet chocolate chips - 1/4 cup chopped walnuts or pecans Chocolate chips make these muffins a treat! Nuts add crunch and nuttiness. You can mix and match depending on your taste. Check out the Full Recipe for all the details you need to start baking! First, preheat your oven to 350°F (175°C). This step is key for even baking. While it heats, prepare your muffin tin. You can line it with paper liners or spray it with non-stick spray. This keeps the muffins from sticking and makes cleanup easy. Next, grab a large mixing bowl. Combine 1 cup of grated zucchini, 1/2 cup of unsweetened applesauce, 2 large eggs, and 1 teaspoon of vanilla extract. Whisk these ingredients together until they blend well. This mixture gives the muffins moisture and flavor. In a separate bowl, mix the dry ingredients. Use 1 cup of all-purpose flour, 1/2 cup of whole wheat flour, 1/2 cup of granulated sugar, and 1/4 cup of brown sugar. Add 1 teaspoon of baking soda, 1/2 teaspoon of baking powder, 1/2 teaspoon of ground cinnamon, and 1/4 teaspoon of salt. Stir these together until fully combined. This blend provides structure and sweetness. Now, gently add the dry mixture to the wet ingredients. Use a spatula to fold them together, being careful not to overmix. Overmixing can make the muffins tough. Once combined, fold in 1 cup of semi-sweet chocolate chips. If you like nuts, you can add 1/4 cup of chopped walnuts or pecans at this stage. Using a scoop or spoon, fill each muffin cup about two-thirds full. This allows room for the muffins to rise. Bake them in the preheated oven for 18-20 minutes. To check for doneness, insert a toothpick into the center of a muffin. If it comes out clean, they are ready. After baking, let the muffins cool in the tin for about 5 minutes. Then, transfer them to a wire rack to cool completely. For serving, enjoy them warm. You can dust them with powdered sugar or add a dollop of whipped cream for a special touch. For the full recipe, you can refer back to the earlier section! To get the best muffin texture, avoid overmixing. When you mix too much, the muffins can turn out dense. Mix just until the dry ingredients are wet. This keeps them light and fluffy. Moisture is key in baking. For these muffins, the grated zucchini adds moisture. Make sure to squeeze out excess moisture before mixing. This helps keep the batter from being too wet. You can adjust the sweetness in your muffins. If you like them sweeter, add a bit more sugar. You can also use honey or maple syrup for a fun twist. Adding spices can really change the flavor. Try cinnamon, nutmeg, or even a dash of cardamom. Flavor extracts, like almond or orange, can add a unique touch too. These muffins are perfect on their own. You can also enjoy them with a smear of butter or cream cheese. They taste great warm with a cup of coffee or tea. Want something special? Serve them with whipped cream on top or a scoop of ice cream. This makes a tasty treat for breakfast or dessert. For the full recipe, check out the [Full Recipe] section. {{image_2}} You can make Zucchini Chocolate Chip Muffins even healthier. Try replacing sugar with natural sweeteners like honey or maple syrup. These options add sweetness without refined sugar. You can also substitute applesauce with plain yogurt. This swap adds creaminess and protein to your muffins. Want to mix things up? Add different types of chocolate chips! Dark chocolate or white chocolate can change the taste. You can also incorporate fruits like blueberries or spices like nutmeg. These additions bring new flavors and keep things exciting. If you need gluten-free muffins, use almond flour or gluten-free flour blends. These options work well and keep the muffins tasty. For a vegan version, replace the eggs with flaxseed meal mixed with water. You can also use a plant-based yogurt instead of applesauce. These changes make the muffins fit for many diets. Try these variations to create your perfect Zucchini Chocolate Chip Muffins. For the full details, check out the Full Recipe. To keep your zucchini chocolate chip muffins fresh, store them in an airtight container. If you plan to eat them within a couple of days, room temperature works well. Just place them on the counter, away from direct sunlight. For longer storage, the fridge is a better choice. It helps prevent mold and keeps them moist. Make sure to wrap them well before putting them in the fridge. Freezing is a great way to save muffins for later. First, let them cool completely. Then, wrap each muffin tightly in plastic wrap. Place the wrapped muffins in a freezer-safe bag or container. Remember to label it with the date. To thaw, simply take one out and let it sit at room temperature for a few hours. You can also heat them in the microwave for a quick treat. When stored properly, zucchini chocolate chip muffins can last about 3 days at room temperature. In the fridge, they remain fresh for about a week. If you freeze them, they can last up to 3 months. Just remember to check for any signs of freezer burn before enjoying a frozen muffin. These tips ensure you enjoy your muffins at their best! Yes, you can use frozen zucchini. Here are some pros and cons: - Pros: - Frozen zucchini is ready to use. - It saves prep time. - Cons: - Frozen zucchini has more water content. - It can affect the muffin's texture. If you use frozen zucchini, squeeze out extra moisture before adding it to the mix. If you need an egg substitute, you have several options: - Unsweetened applesauce: Use 1/4 cup for each egg. - Mashed banana: Use 1/4 cup for each egg. - Flaxseed meal: Mix 1 tablespoon of flaxseed meal with 2.5 tablespoons of water. Let it sit for 5 minutes. These alternatives work well and keep the muffins moist. To check if your muffins are done, use a toothpick. - Insert the toothpick into the center of a muffin. - If it comes out clean or with a few crumbs, the muffins are ready. This simple test helps you avoid underbaking or overbaking your tasty treats. Zucchini chocolate chip muffins are a delightful treat. We covered essential ingredients like zucchini, flour, and sugars. You learned how to mix, bake, and cool your muffins to perfection. Remember to avoid overmixing for the best texture and to explore flavor variations. Storing your muffins well keeps them fresh longer. Enjoy these muffins as a tasty snack or breakfast option. With a little creativity, you can make these muffins your own. Happy baking!

Looking for a tasty snack that’s both delicious and a bit healthy? Zucchini chocolate chip muffins are the perfect treat! These muffins blend fresh zucchini with the sweet taste of …

Read more

Categories Desserts

Spicy Dilly Garlic Beans Quick and Tasty Recipe

July 18, 2025 by Chef Theo
- Fresh green beans: Look for bright green, firm beans. Trim the ends to prep them well. - Aromatics: Garlic brings a warm flavor. Minced garlic cooks quickly and adds depth. Dill gives a fresh, herbal note to the dish. - Spice level: Red pepper flakes give heat. Adjust the amount based on your spice preference. Start with a teaspoon and add more if you like it spicier. - Extra spices or herbs: Consider adding a pinch of cumin or smoked paprika for an extra layer of flavor. Fresh herbs like parsley or cilantro can also brighten up the dish. - Variations using different types of vinegar: You can swap apple cider vinegar for white wine vinegar or rice vinegar. Each one will change the taste slightly. - Sweetness balance: If you want, use honey or maple syrup instead of sugar. This adds a natural sweetness and balances the heat and acidity. Start by blanching the green beans. This step is key. Blanching helps keep the beans bright and crisp. To do this, bring a pot of salted water to a boil. Add the trimmed green beans and cook for 3-4 minutes. You want them tender but still firm. After blanching, drain the beans. Now, create an ice bath. Fill a bowl with ice water. Transfer the hot beans into the ice bath. This stops the cooking and locks in the bright green color. Next, we sauté the garlic. Heat olive oil in a large skillet over medium heat. Add the minced garlic and cook for about 1 minute. Stir it often to avoid burning. You want the garlic to be fragrant, not brown. Now, add the blanched green beans to the skillet. Sauté them for 2-3 minutes. Make sure the beans are well-coated in the garlic oil. This step helps them absorb that delicious flavor. Then, it's time to combine the flavors. Sprinkle in dill weed, red pepper flakes, salt, pepper, and sugar. Toss everything to mix well. Cook for another 2 minutes. This allows the spices to blend with the beans. Now, adjust the seasoning. Taste the beans and tweak the flavors. You can add more salt, pepper, or red pepper flakes for extra heat if you like. For presentation, serve the spicy dilly garlic beans on a vibrant platter. Garnish with fresh dill and lemon slices. This adds a nice touch and makes the dish pop. For the full recipe, check out the detailed instructions. Enjoy your cooking! - Overcooking green beans: If you cook green beans too long, they lose their crunch. They may turn mushy and dull in color. Aim for a bright green hue. Blanching helps keep them firm and vibrant. - Incorrect seasoning: Balance is key when seasoning. Too much salt can overpower the dish. Taste as you go to ensure every flavor shines. A little sugar can balance the heat from the red pepper flakes. - Recommendations for marinating: Marinating your green beans adds depth. Try soaking them in a mix of olive oil, vinegar, and garlic for a few hours. This brings out the flavors and makes them more tasty. - Using fresh vs. dried herbs: Fresh herbs give a bright flavor. They can elevate your dish with vibrant notes. Dried herbs are more concentrated and easy to store. Use fresh dill if you can, but dried dill works well too, especially if you are in a pinch. {{image_2}} You can change the heat of spicy dilly garlic beans. For mild beans, use less red pepper flakes. For medium, stick to the original amount. If you like it hot, add more flakes. You can also try other spices. Consider adding smoked paprika for a smoky twist or cayenne for extra heat. You can take this dish global too. For a Mexican touch, use cilantro instead of dill. If you want an Asian flavor, add sesame oil and ginger. These changes kick up taste and keep things fun! Spicy dilly garlic beans pair well with meats like grilled chicken or steak. They add a nice crunch and flavor. You can also serve them with fish for a lighter meal. Want a fresh side dish? Toss the beans with cherry tomatoes and feta for a salad. This makes a colorful plate that tastes great. You can even use the beans in wraps or sandwiches for a crunchy bite. The options are endless! To keep your spicy dilly garlic beans fresh, store them in the fridge. Use an airtight container to prevent moisture loss. They will last for about 3 to 5 days. Before serving, check for any off smells or discoloration. If they look good, just give them a quick reheat in a skillet or microwave. You can freeze spicy dilly garlic beans for later use. First, let them cool completely after cooking. Then, spread them out on a baking sheet in a single layer. Freeze them for about 1 to 2 hours. Once frozen, transfer them to freezer bags. Remove as much air as possible to prevent freezer burn. When you want to use thawed beans, take them out of the freezer and place them in the fridge overnight. You can add them to stir-fries, salads, or serve them as a side dish. Thawed beans can also be reheated in a skillet with a splash of olive oil. They will still taste great in your meals! Green beans are low in calories and high in vitamins. They contain Vitamin C, which helps your immune system. They also have Vitamin K, good for bone health. Additionally, green beans provide fiber, which aids digestion. A cup of cooked green beans has about 44 calories and 4 grams of fiber. This makes them a great choice for a healthy diet. Yes, you can easily make this recipe vegan. Instead of using olive oil, try avocado oil for a great taste. You can also swap apple cider vinegar for any vinegar you like, such as rice vinegar. If you want, you can add some nutritional yeast for a cheesy flavor. This will keep your dish tasty while keeping it plant-based. To make this recipe for meal prep, simply double the ingredients. You can store the beans in airtight containers. They will stay fresh in the fridge for about 4 to 5 days. When you reheat them, add a splash of lemon juice to brighten the flavor. This way, you can enjoy this dish all week long. You can find the full recipe for Spicy Dilly Garlic Beans [here](#). The recipe has all the details you need, from ingredients to step-by-step instructions. Spicy Dilly Garlic Beans offer fresh flavors with simple steps. We covered essential ingredients and how to enhance them. Your green beans need proper prep for the best results. I shared tips to avoid common mistakes and ways to adjust spice levels for every taste. Use your creativity with different herbs or serving suggestions. You can store them long-term or enjoy them fresh. Dive into this tasty recipe and make it your own. Happy cooking!

Get ready to spice up your meals with my quick and tasty recipe for Spicy Dilly Garlic Beans! This dish packs a punch with fresh green beans, garlic, and dill, …

Read more

Categories Appetizers

Savory Garlic Cauliflower and Mushroom Skillet Delight

July 17, 2025 by Chef Theo
Cooking great meals starts with fresh, quality ingredients. Here’s what you need for the Savory Garlic Cauliflower and Mushroom Skillet: - 1 medium cauliflower, cut into florets - 8 oz (225g) mushrooms, sliced (cremini or button) - 4 cloves garlic, minced - 2 tablespoons olive oil - 1 tablespoon unsalted butter - 1 teaspoon dried thyme - 1/2 teaspoon smoked paprika - Salt and pepper to taste - 2 tablespoons fresh parsley, chopped - Zest of 1 lemon Each ingredient plays a key role. The cauliflower brings a nice crunch. Mushrooms add a savory depth. Garlic gives a punch of flavor, while thyme and paprika bring warmth. Olive oil and butter create a rich base. Lemon zest adds brightness and freshness. Finally, parsley finishes the dish with color and taste. When you gather these ingredients, focus on freshness. It makes a big difference in flavor. For the best results, choose vibrant cauliflower and firm mushrooms. This dish shines with simple, high-quality components. For the full recipe, follow the detailed instructions for cooking. Enjoy crafting this tasty meal! - Rinse and cut the cauliflower into florets. - Clean and slice the mushrooms evenly. First, wash the cauliflower well under cold water. This step removes dirt and keeps it fresh. After rinsing, chop it into small florets. Aim for uniform pieces so they cook evenly. Next, grab your mushrooms. Choose cremini or button mushrooms for the best flavor. Wipe them with a damp cloth to clean. Then, slice them evenly. Even slices help them cook at the same rate. - Heat the skillet with oil and butter. - Sauté cauliflower and mushrooms in succession. Heat a large skillet over medium heat. Add two tablespoons of olive oil and one tablespoon of unsalted butter. Wait for the butter to melt and bubble. This mix gives a rich flavor to the dish. Once the skillet is hot, add the cauliflower florets. Sauté them for about 5 to 7 minutes. Stir occasionally to avoid sticking. You want them to get a nice golden color. After the cauliflower softens, it’s time for the mushrooms. Add them to the skillet and cook for another 5 minutes. They will release moisture and become tender. - Incorporate garlic and seasonings. - Finish with lemon zest and fresh parsley. Now, it’s time to add the magic. Toss in four cloves of minced garlic, one teaspoon of dried thyme, and half a teaspoon of smoked paprika. Season with salt and pepper to taste. Sauté for 2 to 3 minutes. Make sure not to burn the garlic; it can turn bitter. Once the garlic is fragrant, remove the skillet from heat. Add the zest of one lemon and two tablespoons of chopped fresh parsley. This adds brightness and freshness to the dish. For the full recipe, check out the complete details. Enjoy your savory garlic cauliflower and mushroom skillet! To achieve the perfect sauté, use a large skillet. Heat the olive oil and butter well before adding the vegetables. This helps them cook evenly. Stir the cauliflower frequently so it browns nicely. Cook it for about 5 to 7 minutes until it gets tender. Do not burn the garlic. Add it after the cauliflower and mushrooms have cooked a bit. Garlic cooks fast and can turn bitter if overcooked. Sauté it for just 2 to 3 minutes until you smell its great aroma. You can add spices to boost the taste. Try adding a pinch of red pepper flakes for heat. A dash of cumin can give it a warm flavor. Experiment until you find your favorite mix. Using fresh herbs enhances the dish's flavor. Chopped basil or thyme can brighten the taste. Fresh parsley adds color and freshness. Always add herbs near the end of cooking for the best flavor. This dish pairs well with rice or quinoa. A side salad can add a nice crunch. You can also serve it with crusty bread to soak up the flavors. For plating, use a large, shallow dish. This helps show off the colorful veggies. Sprinkle extra parsley on top for a great look. Zest some lemon over the top for a bright finish. Try the Full Recipe for a delightful cooking experience! {{image_2}} You can easily switch up the mushrooms in this dish. Try using shiitake, portobello, or oyster mushrooms. Each type adds its own flavor and texture. For a fun twist, mix different mushrooms together. You can also add seasonal veggies. Think about bell peppers in summer or kale in winter. These changes keep the dish fresh and exciting. To make this recipe vegan, swap the butter for more olive oil. This keeps it rich and tasty without any animal products. You can also make it gluten-free by ensuring your mushrooms and seasonings are certified gluten-free. This way, everyone can enjoy this delicious meal without worry. Herbs and spices can take this skillet to new heights. Try adding basil, rosemary, or even a pinch of red pepper flakes for heat. If you want to add protein, consider chicken, shrimp, or tofu. Simply cook them in the skillet before the vegetables. This adds a hearty element and makes the dish even more filling. For the Full Recipe, check out the detailed steps to make your own Savory Garlic Cauliflower and Mushroom Skillet. To keep your savory garlic cauliflower and mushroom skillet fresh, store leftovers right away. Place the dish in an airtight container. This helps to keep moisture in and air out. Refrigerate within two hours of cooking. Proper cooling is key to safety. Use a shallow container to cool quicker. This method helps maintain the flavor and texture. When you are ready to enjoy your leftovers, you can reheat them in two ways. The skillet method works best for even heating. Heat a splash of olive oil in the skillet. Add the cauliflower and mushrooms. Stir them often until warm. This keeps them from drying out. If you are short on time, use the microwave. Place the dish in a microwave-safe bowl. Heat it in short bursts, stirring in between. This will help heat evenly. Keep an eye on the time to avoid overcooking. Freezing your garlic cauliflower and mushroom skillet is easy. First, let the dish cool completely. Spoon the mixture into a freezer-safe container. Leave some space at the top for expansion. Seal tightly to prevent freezer burn. This dish can last in the freezer for up to three months. When you want to eat it, thaw in the fridge overnight. This method keeps the texture better. Reheat as mentioned before for best results. Enjoy this tasty dish even later! For the complete recipe, check out the Full Recipe section. Cooking cauliflower in the skillet takes about 10 to 12 minutes. First, sauté the florets for 5 to 7 minutes until they start to brown. Next, add the mushrooms and cook for another 5 minutes until tender. Yes, you can use frozen cauliflower. However, it’s best to thaw it first. Squeeze out any excess water before adding it to the skillet. This helps keep the dish from becoming too watery. You can use any cooking oil you like. Some good options are avocado oil or canola oil. Both provide a nice flavor and work well with the ingredients in this dish. To prepare this dish ahead of time, cook it as directed. Let it cool completely and store it in an airtight container. You can refrigerate it for up to three days. Just reheat it in the skillet before serving. For the full recipe, click here. This blog post covered a tasty cauliflower and mushroom dish. We discussed ingredients, cooking steps, and flavor tips. You learned how to customize the recipe for your tastes. I shared storage advice and answered key questions for your kitchen needs. Experimenting with this dish can spark your creativity. Enjoy the process and make it yours! Cooking is fun, and good food brings joy to every meal.

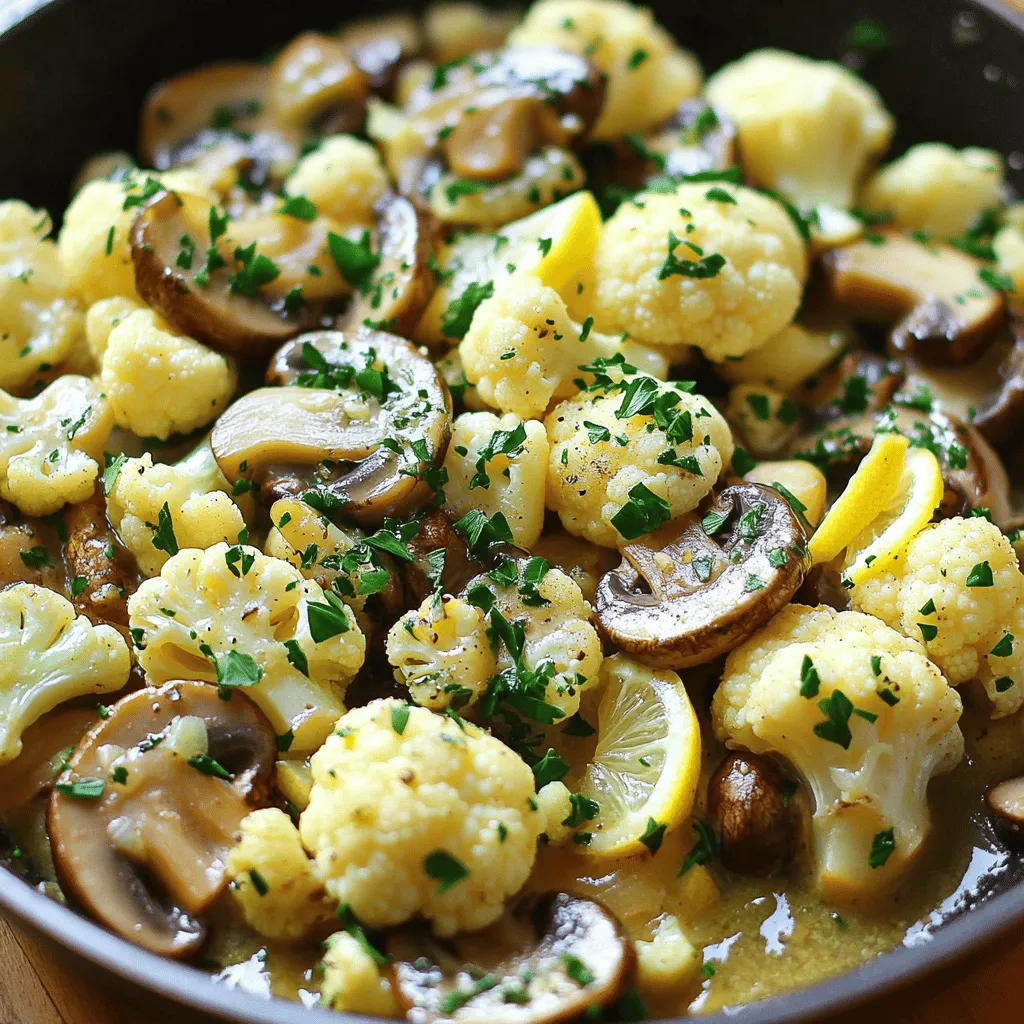
Are you ready to elevate your veggie game? This Savory Garlic Cauliflower and Mushroom Skillet Delight is a simple yet flavorful dish that will make your taste buds dance. With …

Read more

Categories Dinner
Older posts
Newer posts
← Previous Page1 … Page15 Page16 Page17 … Page94 Next →

TOASTED RECIPES

Where ideas are warm, crisp, and ready to serve! 🍞

PAGES

Home About Contact Privacy Policy Terms & Conditions Cookie Policy GDPR Policy Copyright Policy Disclaimer

CATEGORIES

Appetizers Desserts Salads Breakfast Dinner

Contact

  • Pinterest
  • Mail
Copyright © 2025 Toasted Recipes. All rights reserved.