Skip to content
toastedrecipes.com
  • Home
  • Appetizers
  • Desserts
  • Salads
  • Breakfast
  • Dinner
  • Privacy Policy
  • Contact
  • About

Chef Theo

Cheesy Bean and Rice Burritos Delicious and Easy Meal

July 21, 2025 by Chef Theo
Cooking tasty Cheesy Bean and Rice Burritos starts with simple ingredients. Here’s what you need: - 1 cup cooked rice (white or brown) - 1 can (15 oz) black beans, rinsed and drained - 1 cup shredded cheddar cheese (or a cheese blend) - 1/2 cup corn kernels (canned or frozen) - 1 small red onion, diced - 2 cloves garlic, minced - 1 teaspoon ground cumin - 1 teaspoon chili powder - Salt and pepper to taste - 4 large flour tortillas - 1/4 cup fresh cilantro, chopped (optional) - 1 avocado, sliced (for serving) - Salsa or hot sauce (for serving) These ingredients come together to create a warm, cheesy, and flavorful dish. The black beans give protein, while the rice adds heartiness. The spices bring great taste, and cheese ties it all together. You can easily adjust these ingredients to fit your taste. If you want a kick, try adding jalapeños or a sprinkle of cayenne. You can find the Full Recipe for step-by-step guidance on how to use these ingredients effectively. 1. Sautéing the aromatics (onion and garlic) Begin by heating a bit of olive oil in a large skillet over medium heat. Add the diced red onion and minced garlic. Cook them for about 3-4 minutes. You want them fragrant and soft. This step builds a great base for flavor. 2. Combining rice and beans Next, stir in the cooked rice, rinsed black beans, and corn. Add ground cumin, chili powder, and salt and pepper. Mix everything well. Cook this mixture for another 5 minutes. This allows the flavors to blend nicely. 3. Folding in cheese and cilantro Remove the skillet from the heat. Fold in half of the shredded cheese and cilantro, if you like. Make sure everything is mixed evenly. The cheese will start to melt from the heat. 1. Laying out tortillas Grab your flour tortillas and lay them flat on a clean surface. This is where the fun begins! 2. Filling and rolling burritos Spoon a generous amount of the bean and rice mixture onto the center of each tortilla. Sprinkle the rest of the cheese on top. Fold in the sides of the tortilla first, then roll it up tightly from the bottom. Tuck it in as you go to keep all the goodness inside. 1. Preheating the skillet Preheat a non-stick skillet or griddle over medium heat. This step is key for getting that perfect crisp. 2. Cooking until crispy Place the burritos seam-side down in the skillet. Cook them for about 2-3 minutes on each side. You want them golden brown and crispy, with the cheese melted inside. After cooking, let them cool for a minute before slicing in half. For the full recipe, make sure to check the detailed instructions. Enjoy your delicious burritos! For a unique twist, try different beans. Pinto or kidney beans work great too. You can even use lentils for a fun change. Each bean adds its own flavor and texture. When it comes to cheese, you have options. Monterey Jack or pepper jack adds a nice kick. For a lighter choice, use a low-fat cheese blend. This keeps your burrito tasty without the extra calories. To get crispy tortillas, heat your skillet well. A non-stick pan works best. Cook the burritos seam-side down first. This seals them and keeps the filling inside. If you have leftover filling, store it in an airtight container. It stays fresh for up to three days. You can use it in salads or as a dip. Just heat it up for a quick meal. Make your burrito meal complete with sides. Serve with a fresh salad or tortilla chips. You can also pair it with a bowl of soup for a cozy touch. For garnishing, sprinkle extra cilantro on top. A slice of avocado adds creaminess. Try drizzling lime juice over the burrito for a zesty kick. These simple touches make a big difference. {{image_2}} You can easily add more veggies to your cheesy bean and rice burritos. Consider bell peppers, zucchini, or spinach. These vegetables boost flavor and nutrition. If you want to keep it vegan, try vegan cheese. Many brands offer great options that melt well. This way, everyone can enjoy a tasty, cheesy burrito. For a heartier meal, add ground meat or tofu. Ground beef or turkey works great. If you prefer plant-based, use crumbled tofu. Both options give you extra protein. You can also try chorizo for a spicy kick. It adds rich flavor and makes each bite exciting. Changing spices can transform your burritos. Try adding smoked paprika, oregano, or taco seasoning for a twist. You can also use different sauces, like enchilada sauce or salsa verde. Each choice brings a new taste. Don’t forget about the influence of different cuisines! A Tex-Mex flair is fun, but you can also explore flavors from other cultures. This creativity keeps your meals fresh and interesting. To store leftovers properly, let the burritos cool first. Wrap each burrito in plastic wrap or foil. Place them in an airtight container. This keeps them fresh and tasty. They stay good in the fridge for about 3 to 4 days. To freeze burritos, wrap each one tightly in foil or plastic wrap. Place them in a freezer-safe bag. They last up to 3 months in the freezer. When you want to eat them, take one out and thaw it in the fridge overnight. To reheat, unwrap the burrito and place it on a plate. Microwave for 1 to 2 minutes, or until hot. You can also bake them at 350°F (175°C) for 15-20 minutes. This makes the tortilla crispy again. Preparing in advance helps save time on busy days. You can make a big batch of the filling and store it in the fridge. Portion it out for easy meals. This way, you can fill and wrap the burritos when you need them. You can also assemble the burritos and then freeze them. This means you have a quick meal ready to go. Just remember to label them with the date. Enjoy your Cheesy Bean and Rice Burritos anytime! For the full recipe, check out the section above. You can easily make burritos without tortillas. Lettuce wraps are a great choice. Use large leaves from romaine or butter lettuce. They are fresh and crunchy. You can also use rice paper wraps. They are thin and great for holding fillings. If you want something more filling, try using thin flatbreads or pita pockets. Each option gives a fun twist to your burrito! Yes, you can make these burritos ahead of time. Prepare the filling as shown in the Full Recipe. Once cooled, store it in an airtight container in the fridge. You can assemble the burritos later. If you want, you can wrap them in foil. This keeps them fresh for about three days. To reheat, just warm them in a skillet or microwave. They make quick meals for busy days! You can add many fun ingredients! Here are some tasty options: - Sliced jalapeños for heat - Diced bell peppers for crunch - Chopped spinach or kale for greens - Sour cream or Greek yogurt for creaminess - Fresh tomatoes or guacamole for extra flavor - Different types of cheese like pepper jack or feta Mix and match to create your perfect burrito! This blog post covered how to make delicious burritos with easy steps. We looked at the ingredients, including rice, beans, and cheese. I shared tips for making them crispy and fun ways to customize your burritos. You can also store or freeze leftovers for future meals. Making burritos is simple and rewarding. With a few tweaks, you can create many tasty dishes. Enjoy your cooking adventures and share your favorite versions with friends!

Are you ready to whip up a delicious meal that’s quick and easy? Try my Cheesy Bean and Rice Burritos! With just a few simple ingredients, you can create a …

Read more

Categories Dinner

Pumpkin Chocolate Chip Cupcakes Irresistible Delight

July 21, 2025 by Chef Theo
When you want to make pumpkin chocolate chip cupcakes, you need to gather a few key ingredients. Each item plays a role in creating that perfect blend of flavor and texture. Here’s what you will need: - 1 cup pumpkin puree - 1 cup granulated sugar - 1/2 cup brown sugar - 1/2 cup vegetable oil - 2 large eggs - 1 teaspoon vanilla extract - 1 1/2 cups all-purpose flour - 1 teaspoon baking soda - 1/2 teaspoon baking powder - 1/2 teaspoon salt - 1 teaspoon ground cinnamon - 1/2 teaspoon ground nutmeg - 1/4 teaspoon ground ginger - 1 cup semi-sweet chocolate chips - Optional: Cream cheese frosting for topping Each ingredient brings something special to the cupcakes. The pumpkin puree adds moisture and a lovely flavor. The sugars help balance the spice and sweetness. The eggs give structure, while the flour creates a tender crumb. The spices add warmth and depth, and the chocolate chips bring in sweetness and a rich texture. For a little extra fun, I suggest adding cream cheese frosting on top. It makes each bite even more delightful. If you want the full details on how to prepare these tasty treats, check out the Full Recipe. - Preheat your oven to 350°F (175°C) and line a cupcake pan with cupcake liners. - In a large mixing bowl, combine the pumpkin puree, granulated sugar, brown sugar, and vegetable oil. Mix until smooth. - In another bowl, whisk together the all-purpose flour, baking soda, baking powder, salt, cinnamon, nutmeg, and ginger. - Gradually add the dry ingredients to the wet mixture. Stir until just combined. - Fold in the chocolate chips gently. This keeps them from sinking. - Divide the batter evenly among the cupcake liners, filling each about two-thirds full. - Bake in the preheated oven for 18-20 minutes. Check doneness with a toothpick. If it comes out clean, they are done. - Once baked, remove the cupcakes from the oven. Let them cool in the pan for 5 minutes. Then transfer them to a wire rack to cool completely. For a special treat, top with cream cheese frosting after they cool. This recipe is a true delight! You can find the complete recipe in the [Full Recipe]. - Avoiding overmixing the batter: Mix until you see no dry flour. Overmixing makes cupcakes tough. Keep it light and gentle. - Checking doneness with a toothpick: Insert a toothpick in the center. If it comes out clean, they are done. If it has batter, bake longer. - Ideas for topping with cream cheese frosting: Cream cheese frosting adds a rich taste. Spread it on top or pipe it for flair. - Presentation tips for a festive look: Dust with cinnamon for elegance. Add a candy pumpkin for fun. This makes your cupcakes pop! - Importance of measuring ingredients accurately: Use measuring cups and spoons. Too much or too little can ruin the cupcakes. Precision is key for great results. - Baking time adjustments for different ovens: Ovens can vary in heat. Check your cupcakes a few minutes early. Adjust baking time for perfect cupcakes every time. For the full recipe, check out the details above! {{image_2}} You can make these cupcakes even better with different flavors. Try adding extra spices like allspice or cloves. These will bring warmth and depth to your cupcakes. If you love chocolate, switch to dark chocolate chips for a richer taste. Dark chocolate pairs nicely with the pumpkin flavor, giving a bold twist. Need a gluten-free option? Use a 1-to-1 gluten-free flour blend in place of all-purpose flour. This will keep the texture smooth and delicious. If you want a vegan twist, replace the eggs with flax eggs. Mix 1 tablespoon of ground flaxseed with 2.5 tablespoons of water for each egg. For dairy, use almond milk or coconut milk. Both work well in this recipe. Want to change the size? You can bake mini cupcakes instead. Just fill the liners halfway and reduce the baking time to 12-15 minutes. If you prefer a cake, pour the batter into a cake pan. Bake for about 30-35 minutes, or until a toothpick comes out clean. Adjust the frosting amount based on your serving style. For the full recipe and more tips, check out the [Full Recipe]. To keep your pumpkin chocolate chip cupcakes fresh, store them in an airtight container. This method helps prevent them from drying out. You can also use plastic wrap if you don’t have a container. They will stay good at room temperature for up to three days. If you want to keep them fresh for longer, put them in the fridge. They can last about a week in the fridge. If you want to save some cupcakes for later, freezing is a great option. First, let the cupcakes cool completely. Then, wrap each cupcake tightly in plastic wrap. After that, place them in a freezer-safe bag. They can last up to three months in the freezer. When you’re ready to eat them, take out the cupcakes and let them thaw at room temperature for a few hours. This keeps them moist and tasty. If you want a warm cupcake, reheating is easy. Preheat your oven to 350°F (175°C). Place the cupcake on a baking sheet and heat for about 5-10 minutes. You can also use the microwave. Heat on low for about 10-15 seconds. Just be careful not to overheat them, as they can get dry. Enjoy them warm for a delightful treat. For the full recipe, don’t forget to check the earlier sections! To keep your cupcakes fresh, use an airtight container. Place them at room temperature if you will eat them in a few days. If you want to store them longer, put them in the fridge. They stay good for up to a week this way. If you need to store them for a long time, freeze them. Wrap each cupcake tightly in plastic wrap before freezing. They can last for about three months in the freezer. Yes, you can use fresh pumpkin! Just roast a pumpkin and scoop out the flesh. Make sure to puree it until smooth. This gives your cupcakes an amazing flavor. Fresh pumpkin can be a bit wetter than canned, so use less liquid in the recipe. One cup of fresh pumpkin works well in place of canned. To make these cupcakes richer, try adding more chocolate chips. You could also mix in some chopped nuts for a nice crunch. Another option is to add a splash of coffee to the batter. This enhances the chocolate flavor. For extra creaminess, top them with cream cheese frosting. You could even swirl in some caramel for a sweet surprise. There are many great toppings for these cupcakes! Cream cheese frosting is a classic choice. You could also use whipped cream for a light touch. For a twist, try a chocolate ganache drizzle. Sprinkling nuts or mini chocolate chips on top adds fun texture. You can even add cinnamon sugar for extra flavor. Each topping can change the cupcake experience! You now have a complete guide to making delicious pumpkin chocolate chip cupcakes. We covered all the essential ingredients, step-by-step instructions, and helpful tips. You learned how to avoid common mistakes and even explore tasty variations. Remember, the key to great cupcakes is in the details. Whether you top them with cream cheese frosting or save them for later, these cupcakes are worth the effort. Enjoy baking these treats and sharing them with friends and family!

Get ready for a sweet treat that combines the warmth of pumpkin with delightful chocolate! In this guide, I’ll show you how to make Pumpkin Chocolate Chip Cupcakes that will …

Read more

Categories Desserts

Easy Calzone Recipe Simple and Delicious Meal Option

July 21, 2025 by Chef Theo
When making a calzone, you need a few key ingredients. These will give you that tasty, cheesy delight that everyone loves. Here’s what you need: - 1 batch of pizza dough (store-bought or homemade) - 1 cup ricotta cheese - 1 cup shredded mozzarella cheese - 1/2 cup grated Parmesan cheese - 1/2 cup diced bell peppers (any color) - 1/2 cup chopped spinach (fresh or frozen) - 1/4 cup sliced black olives - 1 teaspoon dried oregano - 1 teaspoon garlic powder - 1/2 teaspoon red pepper flakes (optional for heat) - 1 egg, beaten (for egg wash) - Marinara sauce for dipping I recommend using equal parts ricotta and mozzarella. This mix gives a creamy and stretchy texture. The Parmesan adds a nice salty kick. For veggies, feel free to mix in your favorites. Bell peppers and spinach work well, but you can try others. You can customize your calzone easily. Want meat? Try pepperoni or sausage. Love mushrooms? Toss them in! You can also swap cheeses. Goat cheese or cheddar can change the flavor. Be creative with what you have at home. Preheating the Oven Start by preheating your oven to 425°F (220°C). This ensures your calzone bakes evenly and crisps up nicely. Preparing the Baking Sheet Next, line a baking sheet with parchment paper. This helps prevent sticking and makes cleanup easy. Rolling Out the Pizza Dough On a floured surface, roll out the pizza dough. Aim for a large circle, about 12 inches wide. Make it thin, but not too thin, or it may break. Filling the Dough In a mixing bowl, combine the cheeses and veggies. Use ricotta, mozzarella, Parmesan, bell peppers, spinach, and olives. Add oregano, garlic powder, and red pepper flakes for extra flavor. Mix well until everything is combined. Spoon this mixture onto one half of the dough circle. Leave a small border along the edge for sealing. Sealing the Calzone Carefully fold the other half of the dough over the filling. Press the edges firmly to seal. You can use a fork to crimp the edges. This adds a nice touch and keeps the filling inside. Baking Instructions (Time and Temperature) Place the calzone on the baking sheet. Brush the top with beaten egg for a golden finish. Cut a few small slits on top for steam to escape. Bake for 15-20 minutes until golden brown and bubbly. Let it cool for a few minutes before slicing. Serve it warm with marinara sauce for dipping. Enjoy your cheesy veggie explosion calzone! For the full recipe, check out the detailed instructions above. To make a great calzone, keep a few tips in mind. - Preventing Dough from Sticking: Use enough flour on your work surface. This helps the dough roll out easily. If it sticks, gently lift it and add more flour underneath. You want a smooth surface for rolling. - Tips for Even Baking: Make sure your oven is fully preheated. This step is key for even baking. Place your calzone in the center of the oven. This allows hot air to circulate around it. If you bake too close to the sides, it may cook unevenly. Calzones are fun because you can fill them with many options. - Adding Different Fillings: You can swap in any veggies or meats you like. Try mushrooms, zucchini, or pepperoni. Be creative with flavors! Just remember not to overfill. This keeps them easy to seal and bake. - Vegetarian vs. Meat Options: For a veggie calzone, use ricotta, spinach, and bell peppers. For meat lovers, add sausage or ham. You can mix and match to suit everyone’s taste. {{image_2}} You can make your calzone even more fun with different flavors. Here are two tasty options: - Italian Meat Calzone: Add cooked sausage, pepperoni, or ham to your filling. Mix these meats with ricotta and mozzarella cheese. This gives a hearty taste and a protein boost. - Mediterranean Veggie Calzone: For a lighter choice, use ingredients like feta cheese, zucchini, and sun-dried tomatoes. Add fresh herbs like basil and oregano. This calzone bursts with fresh flavors. Dipping sauces can make your calzone even better. Here are some great options: - Alternative Sauces for Serving: Try ranch dressing, pesto, or garlic butter as dips. Each sauce adds a new twist to your calzone experience. - Homemade Marinara Recipe: You can also make your own sauce. Here’s a quick way: - Ingredients: - 1 can of crushed tomatoes - 1 teaspoon dried oregano - 1 teaspoon garlic powder - Salt and pepper to taste - Instructions: 1. In a pot, combine crushed tomatoes, oregano, and garlic powder. 2. Heat over medium heat for about 10 minutes. 3. Season with salt and pepper. This sauce pairs perfectly with your cheesy veggie explosion calzone. Enjoy the dip! - Storing Leftover Calzones After you enjoy your calzones, let them cool. Place them in an airtight container. You can keep them in the fridge for up to three days. If you want to save space, wrap each calzone in plastic wrap before putting them in the container. This keeps them fresh and tasty. - Best Practices for Reheating When you are ready to eat your leftover calzones, you can reheat them easily. Preheat your oven to 350°F (175°C). Place the calzones on a baking sheet. Heat them for about 10-15 minutes. This helps keep the crust crispy. You can also use a microwave, but the crust may get soft. If you use a microwave, heat in short bursts to avoid overcooking. - How to Freeze Cooked Calzones If you want to save your calzones for later, freezing is a good option. Let the calzones cool completely. Wrap each one in plastic wrap and then in aluminum foil. This double wrap prevents freezer burn. Label them with the date. You can freeze them for up to three months. - Thawing and Cooking Frozen Calzones To enjoy your frozen calzones, take them out of the freezer. Let them thaw in the fridge overnight. If you’re in a hurry, you can thaw them in the microwave using the defrost setting. Once thawed, preheat your oven to 350°F (175°C) and bake for about 15 minutes. Check to make sure they are heated through. You can follow the same steps for cooking directly from frozen but add 10-15 extra minutes to the baking time. For a full recipe of cheesy goodness, check out the [Full Recipe]. How do I know when my calzone is done? You can tell when your calzone is done by its color. It should be golden brown. You can also look for bubbles in the dough. The cheese inside should be melted and hot. To be sure, you can use a food thermometer. The inside should reach 165°F (74°C) for safety. Can I use store-bought pizza dough? Yes, you can use store-bought pizza dough. It saves time and works great. Many people enjoy the taste and texture of store-bought dough. Just make sure to follow the package instructions for rolling and baking. What vegetables work best for calzone filling? Many vegetables suit calzones well. My favorites include bell peppers, spinach, and mushrooms. You can also add onions, zucchini, or even artichokes. Just remember to chop them small. This helps them cook evenly and fit well inside the calzone. What to serve with calzones? Calzones pair well with marinara sauce for dipping. You can also serve a fresh salad on the side. A simple green salad or Caesar salad works great. Garlic bread or cheesy breadsticks can make a tasty addition too. Can calzones be made ahead of time? Yes, you can make calzones ahead of time. Prepare them, then store them in the fridge for up to 24 hours. You can also freeze them for later. Just bake them straight from the freezer, adding a few extra minutes to the cooking time. Enjoy this easy calzone recipe as a simple and delicious meal option. Check out the Full Recipe for more details! Making calzones is fun and tasty. We covered important aspects, like ingredients, baking steps, and tips. Remember, you can customize your calzone with fillings you love. Store leftovers in the fridge or freeze them for later. With the right techniques, you'll enjoy perfect calzones every time. Try different sauces to enhance the flavor. Now, get creative in your kitchen and enjoy your delicious calzones!

Looking for a simple meal that delights everyone? This easy calzone recipe is your answer! I’ll guide you through tasty ingredients, quick steps, and fun tips to create the perfect …

Read more

Categories Dinner

Creamy Vegan Tomato White Bean Stew Recipe Delight

July 21, 2025 by Chef Theo
To make creamy vegan tomato white bean stew, gather these ingredients: - 1 tablespoon olive oil - 1 medium onion, diced - 3 cloves garlic, minced - 2 medium carrots, diced - 1 red bell pepper, diced - 1 can (14 oz) crushed tomatoes - 1 can (15 oz) white beans (cannellini or great northern), drained and rinsed - 2 cups vegetable broth - 1 cup coconut milk (canned for creaminess) - 1 teaspoon dried basil - 1 teaspoon dried oregano - Salt and pepper to taste - Fresh basil leaves for garnish This stew is not just tasty; it’s also good for you. One serving has: - Calories: 250 - Protein: 10g - Carbohydrates: 35g - Dietary Fiber: 8g - Fat: 10g - Sodium: 300mg This dish provides a solid mix of nutrients. The beans add protein and fiber. The veggies bring vitamins and minerals. Coconut milk gives it a rich taste without dairy. You can easily swap ingredients to fit your needs: - Use avocado oil instead of olive oil for a different flavor. - If you don’t have white beans, try black beans or chickpeas. - Use low-sodium vegetable broth for a healthier option. - Omit the coconut milk for a lighter stew. - For gluten-free, ensure your broth is gluten-free. These changes ensure everyone can enjoy this stew. Whether you’re vegan, gluten-free, or just looking for a tasty meal, you can adjust this recipe. You can find the full recipe for creamy vegan tomato white bean stew to guide you through. To make this creamy vegan tomato white bean stew, follow these steps: 1. Heat 1 tablespoon of olive oil in a large pot over medium heat. 2. Add 1 medium diced onion and sauté for 3 to 4 minutes. Wait until it is translucent. 3. Next, stir in 3 minced garlic cloves, 2 diced carrots, and 1 diced red bell pepper. Cook for another 5 to 7 minutes. The veggies should start to soften. 4. Pour in 1 can of crushed tomatoes and 1 can of drained white beans. Add 2 cups of vegetable broth, 1 teaspoon of dried basil, and 1 teaspoon of dried oregano. 5. Mix everything well and bring it to a gentle simmer. Let it cook for 15 minutes. Stir occasionally. 6. After 15 minutes, lower the heat. Stir in 1 cup of coconut milk. Allow it to heat for 5 to 10 minutes. 7. Season with salt and pepper to taste, adjusting as needed. 8. Give the stew a gentle stir and remove it from heat. To get the right texture in your stew, consider these tips: - Make sure to sauté the onion until it is soft. This adds depth to the flavor. - Avoid overcooking the vegetables. They should be tender but not mushy. - Stir in the coconut milk gently to keep the creamy texture. - If you want a thicker stew, mash some of the white beans while cooking. For a quick meal, plan ahead: - Chop all vegetables before starting. This saves time. - Set a timer for each cooking step to stay on track. - While the stew simmers, clean up the kitchen. This keeps your space tidy. - Enjoy this meal in just 35 minutes with prep and cooking combined! For the full recipe and more details, you can refer to the Full Recipe section. To boost the creaminess of your stew, use full-fat coconut milk. This gives a rich flavor. You can also blend a portion of the stew. This method adds a smooth texture. Just scoop out a cup of the stew and blend it until creamy. Stir it back into the pot. Add fresh herbs for a pop of flavor. Try thyme or even a bay leaf. You can also squeeze in some lemon juice for brightness. If you like heat, add a pinch of red pepper flakes. These spices awaken the flavors and make the stew more exciting. One common mistake is cooking the garlic too long. It can burn and taste bitter. Always add garlic after the onions are soft. Another mistake is not seasoning enough. Taste as you go! Adjust salt and pepper to suit your taste. Lastly, don’t skip the coconut milk; it really adds creaminess. For the full recipe, check out the Full Recipe section. {{image_2}} You can easily swap ingredients in this stew. If you don’t have white beans, use chickpeas instead. They add a nice texture and flavor. For a bright twist, try adding zucchini or spinach. These veggies cook quickly and blend well. If you want a different base, swap coconut milk with almond milk. This keeps the stew creamy but light. Herbs and spices can change the whole flavor of the dish. Add a pinch of red pepper flakes for heat. If you love a smoky flavor, include some smoked paprika. Fresh herbs like thyme or parsley also work great. You can even toss in a bay leaf while it simmers. It adds depth to the stew. Experiment and find your favorite mix! Serving this stew can be fun and creative. I love to serve it in deep bowls. Garnish with fresh basil leaves for a pop of color. Crusty bread pairs perfectly and soaks up the stew. Try it with a side salad for a light meal. You can even serve it over rice or quinoa for a heartier option. Each method offers a unique dining experience. For more ideas, check out the Full Recipe. To keep your creamy vegan tomato white bean stew fresh, store it in an airtight container. Make sure the stew cools down before sealing it. This helps prevent moisture build-up. The stew lasts up to five days in the fridge. Always label your container with the date. This way, you know when to use it. Freezing is a great option if you want to save some stew for later. First, let the stew cool completely. Then, pour it into freezer-safe containers. Leave some space at the top for expansion. You can freeze it for up to three months. When you’re ready to eat, thaw it in the fridge overnight before reheating. Reheating is simple! You can use the stove or microwave. If using the stove, pour the stew into a pot. Heat on low and stir often until warm. If you use a microwave, place the stew in a microwave-safe bowl. Heat in short intervals, stirring in between. This ensures even heating and keeps it creamy. Enjoy your delicious meal again! Yes, you can make this stew ahead of time. It tastes even better after sitting for a day. Store it in an airtight container in the fridge. The flavors meld together, making each bite rich and tasty. You can also freeze it for later. Just let it cool, then pour it into freezer-safe bags. When you’re ready, thaw it overnight in the fridge. Reheat on the stove or in the microwave. This stew pairs well with many sides. I recommend crusty bread for dipping. You can also serve it with a fresh salad. A simple green salad with a light vinaigrette works great. If you want more carbs, try it with rice or quinoa. These options add balance and make it a full meal. Absolutely! While white beans are great, feel free to swap them out. You can use black beans, kidney beans, or even chickpeas. Each type changes the flavor a bit, but they all work well. Just make sure to drain and rinse canned beans before adding them to the stew. This keeps the dish fresh and tasty. For the full recipe, check out the detailed steps above! This article covered the key points for making a tasty stew. We explored the right ingredients, nutritional facts, and good substitutions. You learned step-by-step cooking instructions and tips for the best texture. We shared ideas for flavor and common mistakes to avoid. Storage info and reheating guidelines were also important. Always feel free to try new ingredient swaps or serving ideas to make the stew your own. Enjoy making this stew your special way!

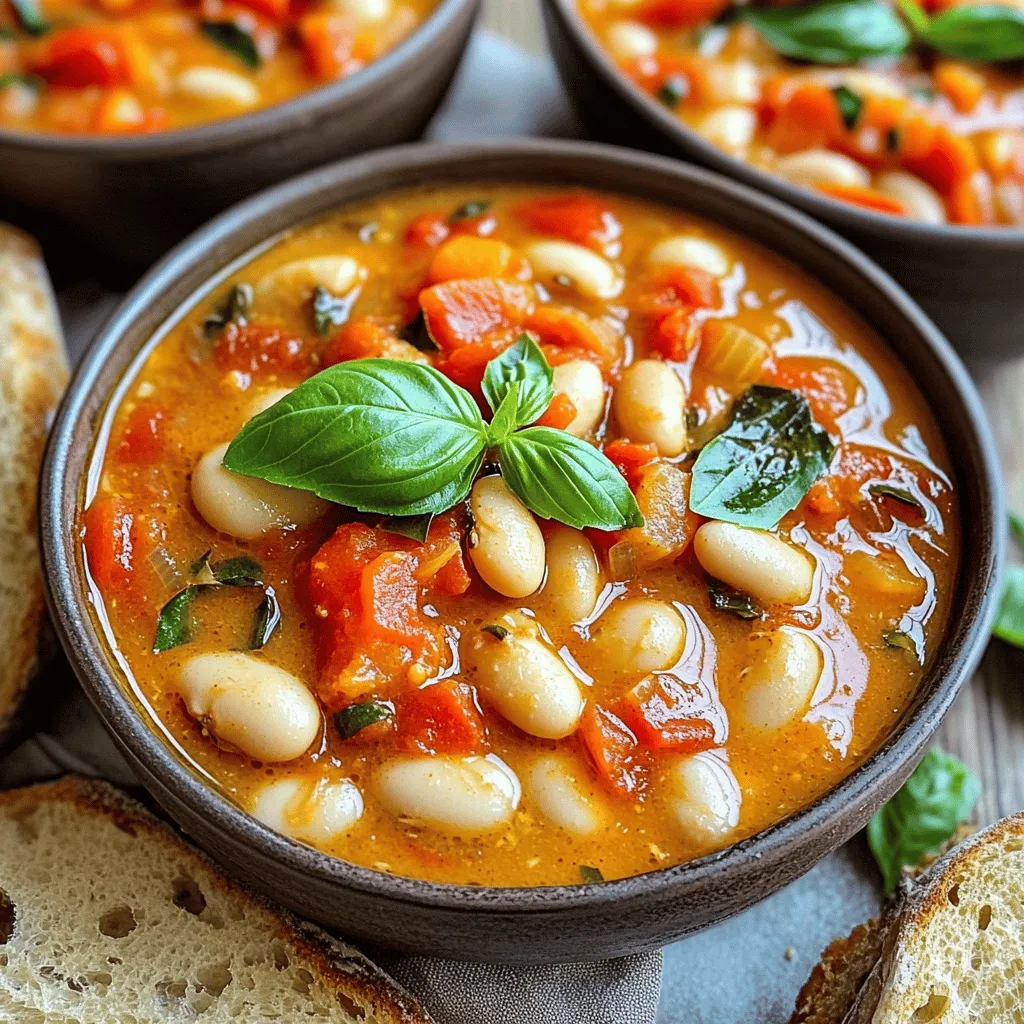
Are you ready to warm up with a delicious bowl of Creamy Vegan Tomato White Bean Stew? This hearty dish combines creamy beans and rich tomatoes for a comforting meal. …

Read more

Categories Dinner

California Turkey Club Wrap Tasty and Quick Meal

July 21, 2025 by Chef Theo
To make the California Turkey Club Wrap, gather some simple ingredients. This recipe is quick and easy. You can make it in just 10 minutes. It serves four people, making it perfect for a family meal or a quick lunch. - Whole Wheat Tortillas: These tortillas give you fiber and keep you fuller longer. - Turkey Breast: This lean meat is high in protein and very low in fat. - Cheddar Cheese: It adds a creamy taste and calcium for strong bones. - Avocado: This fruit is rich in healthy fats and adds a nice creaminess. - Tomato: Fresh tomatoes provide vitamins and add a juicy flavor. - Romaine Lettuce: This leaf gives a nice crunch and is packed with nutrients. - Mayonnaise: It adds moisture and flavor, making the wrap tasty. - Dijon Mustard: This adds a tangy kick that brightens the wrap. - Lemon Juice: This freshens the taste and balances the flavors. - Salt and Pepper: These simple spices enhance all the flavors. - Jalapeños (optional): They add heat and excitement if you like spicy food. You can customize your wrap by adding some fun extras. Here are a few ideas: - Sliced cucumbers: They add crunch and freshness. - Red onion: This gives a nice bite and flavor. - Spinach: This leafy green can replace romaine for a different taste. - Pesto: Spread some on the tortilla for a herby twist. - Sliced bell peppers: They add color and sweetness. With these ingredients and ideas, you can create your own perfect California Turkey Club Wrap. Enjoy the mix of flavors and textures! To make the spread, you need just a few simple ingredients. Grab a small bowl. Add the mayonnaise, Dijon mustard, lemon juice, salt, and pepper. Mix these items well. This spread adds a creamy and tangy flavor to the wrap. Set it aside for later. Start with a whole wheat tortilla. Lay it flat on a clean surface. Take a spoon and spread about 1 tablespoon of the mayo-Dijon mix evenly across the tortilla. Next, place 2 ounces of sliced turkey breast right in the center. On top of the turkey, add one slice of cheddar cheese. Then, layer a few slices of avocado and tomato. Next, grab a romaine leaf and place it over the veggies. If you like a little heat, add some sliced jalapeños. Now it’s time to wrap it up! Fold the sides of the tortilla inward. Then roll the tortilla tightly from the bottom to the top. Repeat this with the other tortillas and ingredients. When rolling the wrap, make sure to keep it tight. This helps the filling stay inside. After rolling, you can slice each wrap in half diagonally. This way, they look great on a platter. For a nice touch, arrange the wraps with the cut sides facing up. You can also garnish with extra avocado and tomato wedges around the edges. Enjoy your California Turkey Club Wrap! To make your California Turkey Club Wrap tasty, start with fresh ingredients. Use ripe avocados for creaminess and great flavor. Look for bright red tomatoes that are firm but slightly soft. For turkey, choose freshly sliced deli meat. Whole wheat tortillas should be soft and pliable. Check the expiration dates on all items. Fresh ingredients boost the taste and health of your meal. If you have leftover wraps, wrap them tightly in plastic wrap or foil. This helps keep them fresh. You can also place them in an airtight container. Store them in the fridge for up to two days. If you want to save them longer, consider freezing them. Just remember to thaw them in the fridge before eating. For a crispy wrap, try toasting it in a pan. Heat a skillet over medium heat. Add a small amount of oil or butter to the pan. Place the wrap in the pan and cook for about two minutes on each side. This will give your wrap a nice golden brown color and a satisfying crunch. You can also use a panini press for similar results. Enjoy the crispiness with each bite! {{image_2}} You can switch up the turkey in the California Turkey Club Wrap. Try chicken, ham, or even roast beef. These meats give a different taste but keep the wrap fun. You can also use deli meats like salami or pastrami for a tasty twist. Each meat adds its own flavor and texture. If you like spicy food, add some chorizo for a kick. If you want a meat-free wrap, go for a vegetarian option. Replace turkey with grilled vegetables like zucchini, peppers, or mushrooms. You can also use hummus or a bean spread for protein. For a vegan wrap, skip the cheese and use avocado for creaminess. You can add spinach or kale for extra nutrients. These swaps keep the wrap fresh and delicious. The sauce can make or break your wrap. Consider using pesto, chipotle mayo, or ranch dressing. Each sauce offers a unique flavor experience. You can also try avocado spread instead of mayo for a creamy texture. If you want heat, add some spicy aioli or Sriracha. Experiment with different spreads to find your favorite. Each variation can change the whole vibe of your California Turkey Club Wrap. To keep your California Turkey Club Wrap fresh, store it in the fridge. Place the wrap in an airtight container or wrap it tightly in plastic wrap. This helps prevent it from drying out. Enjoy the wraps within three days for the best taste. If you notice any changes in color or smell, it’s best to toss them. You can freeze California Turkey Club Wraps for later use. Wrap each one in plastic wrap, then place them in a freezer bag. This keeps them fresh and tasty. When you're ready to eat, remove them from the bag. Let them thaw in the fridge overnight. You can also microwave them for a quick meal. To reheat your wraps, use a microwave or a skillet. If using a microwave, place the wrap on a plate. Heat for 30 seconds, then check if it's warm enough. If it needs more time, heat in 15-second bursts. For a crispy finish, use a skillet. Warm the wrap on medium heat for about 2-3 minutes on each side. This makes it hot and tasty without losing its crunch. Yes, you can make these wraps ahead of time. Prepare the wraps and store them in the fridge. Wrap them tightly in plastic wrap or foil. This keeps them fresh. You can make them up to a day in advance. Just remember to add the avocado right before serving to keep it green. Many sides go great with these wraps. Here are some tasty options: - Baked sweet potato fries - A fresh green salad - Crunchy veggie sticks with dip - Fruit salad for a sweet touch These sides add color and flavor to your meal. To make gluten-free wraps, use gluten-free tortillas. Many stores sell these. Check the label to be sure they are safe. You can also add extra veggies or proteins inside the wrap. This gives you more flavor and keeps your meal fun. Enjoy your meal without worry! In this article, we explored the California Turkey Club Wrap, covering its key ingredients, preparation, and storage tips. You learned how to assemble the wrap and discovered cooking techniques to enhance crispiness. Variations cater to different tastes, whether you prefer meat, vegetarian options, or unique sauces. Remember, organizing your wraps ahead saves time. With proper care, leftovers can last. Enjoy experimenting with flavors and ingredients to find your favorite version. Creating these wraps is simple and fun. Explore, and make each bite a new experience!

Looking for a quick and tasty meal? The California Turkey Club Wrap is your answer! It combines fresh turkey, crisp veggies, and a flavorful spread, perfect for lunch or dinner. …

Read more

Categories Dinner

Pumpkin Scones Delightful and Easy Recipe Guide

July 20, 2025 by Chef Theo
Here’s what you need to make pumpkin scones: - 2 cups all-purpose flour - 1/2 cup brown sugar, packed - 1 tablespoon baking powder - 1/2 teaspoon baking soda - 1 teaspoon ground cinnamon - 1/2 teaspoon ground nutmeg - 1/4 teaspoon ground ginger - 1/4 teaspoon salt - 1/2 cup unsalted butter, cold and cubed - 1/2 cup canned pumpkin puree - 1/4 cup heavy cream - 1 large egg - 1/2 teaspoon vanilla extract These ingredients create a rich, flavorful base for your scones. The pumpkin puree gives moisture and a lovely color. The spices add warmth and depth. You can customize your scones with these fun options: - 1/4 cup chopped nuts (such as walnuts or pecans) for added crunch - Chocolate chips for a sweet twist - Dried cranberries for tartness Feel free to mix and match! Each add-in brings its own joy to the scone. You can also experiment with different spices or zest of an orange for a fresh touch. If you have dietary needs, here are some swaps you can try: - Use gluten-free flour for a gluten-free option. - Substitute coconut oil for butter for a dairy-free choice. - Replace heavy cream with almond milk for a lighter option. These substitutes won’t change the flavor too much. You can still enjoy pumpkin scones no matter your diet. Check the [Full Recipe] for more details on how to make these tasty treats! Start by preheating your oven to 425°F (220°C). Line a baking sheet with parchment paper. In a large bowl, mix together the dry ingredients. Combine 2 cups of all-purpose flour, 1/2 cup of brown sugar, 1 tablespoon of baking powder, 1/2 teaspoon of baking soda, 1 teaspoon of ground cinnamon, 1/2 teaspoon of ground nutmeg, 1/4 teaspoon of ground ginger, and 1/4 teaspoon of salt. Whisk until everything blends well. Next, add 1/2 cup of cold, cubed unsalted butter to the bowl. Use your fingers or a pastry cutter to mix the butter into the flour mixture. Do this until it looks like coarse crumbs. In another bowl, stir together 1/2 cup of canned pumpkin puree, 1/4 cup of heavy cream, 1 large egg, and 1/2 teaspoon of vanilla extract. Mix until smooth and creamy. Pour the wet ingredients into the dry mixture. Gently mix until just combined. Be careful not to overmix. If you want, you can fold in 1/4 cup of chopped nuts for a nice crunch. Lightly flour a clean surface. Turn out the dough and pat it into a circle about 1 inch thick. Cut it into wedges or use a biscuit cutter. Place the shaped scones on the prepared baking sheet, making sure to space them evenly. Bake them for 15 to 20 minutes. They should turn golden brown. To check if they’re done, insert a toothpick. It should come out clean. While your scones bake, prepare the glaze. In a bowl, mix 1 cup of powdered sugar with 1 to 2 tablespoons of milk. Keep mixing until the glaze is smooth and drizzles easily. After the scones have cooled for a few minutes, drizzle the glaze on top. To make your scones pop, sprinkle a little cinnamon or some pumpkin seeds on top. You can find the Full Recipe for this delightful treat to guide you through every step! To get soft and fluffy pumpkin scones, mix gently. Overworking the dough makes them tough. The key is to stop mixing once combined. When you fold in the wet ingredients, do it lightly. Use cold butter to create that flaky texture. I like to cut the butter into small cubes. This helps it blend well with the flour. One mistake is not measuring ingredients accurately. Use dry measuring cups for flour and sugar. Also, make sure your baking powder is fresh. Old baking powder can lead to flat scones. Another common error is skipping the chilling step. If you chill the dough for 15 minutes, it helps with the rise. Lastly, avoid opening the oven door too soon. This can cause the scones to sink. Serve pumpkin scones warm for the best taste. They go well with a hot cup of tea or coffee. You can also add a dollop of whipped cream on top. For a fun twist, try adding a sprinkle of cinnamon sugar. If you want to make it special, serve with apple butter. This adds a nice sweet and spicy touch. For the full recipe, check out the steps above. {{image_2}} To make vegan pumpkin scones, you can swap a few ingredients. Use plant-based butter instead of regular butter. Replace the egg with a flax egg made from one tablespoon of ground flaxseed and three tablespoons of water. Mix the flaxseed and water and let it sit for five minutes to thicken. Use almond or coconut milk instead of heavy cream. This way, you keep the scones moist and tasty. For gluten-free pumpkin scones, use a gluten-free flour blend. Many blends work well, but make sure it has xanthan gum for structure. You can also try almond flour for a nutty flavor. Keep the other ingredients the same to maintain flavor. This makes a great scone that everyone can enjoy. You can customize your pumpkin scones with fun add-ins. Consider adding chocolate chips for a sweet touch. Dried cranberries or raisins bring a fruity flavor. For a nutty crunch, fold in chopped walnuts or pecans. You can also add spices like cardamom for a unique twist. These variations let you create your perfect pumpkin scone. Check out the Full Recipe for more ideas! To keep your baked pumpkin scones fresh, place them in an airtight container. This helps to lock in moisture. Store them at room temperature for up to three days. For longer freshness, consider refrigerating them. The cold air will help prevent mold and keep them tasty. When you're ready to enjoy your scones again, reheating is easy. Preheat your oven to 350°F (175°C). Place the scones on a baking sheet and cover them with foil. Heat them for about 10 minutes. This warms them through while keeping them soft. You can also microwave a scone for about 15 seconds, but it may not stay as fluffy. Freezing scones is a great way to save some for later. First, let the scones cool completely. Next, wrap each scone tightly in plastic wrap. Place them in a freezer bag or container. They can stay in the freezer for up to three months. When you're ready to eat, just thaw them in the fridge overnight. Reheat them in the oven for the best taste. For more delicious details, check out the Full Recipe. To make pumpkin scones from scratch, gather your ingredients. You need flour, brown sugar, baking powder, baking soda, spices, salt, butter, pumpkin puree, cream, egg, and vanilla. Mix the dry ingredients in one bowl. In another bowl, mix the wet ingredients. Then, combine both mixtures gently. Shape the dough, cut it into wedges, and bake until golden. For the full recipe, check out the detailed instructions. Yes, you can use fresh pumpkin. Start by roasting or steaming the pumpkin until soft. Then, blend it until smooth. Make sure to drain excess water. Fresh pumpkin can add a vibrant taste to your scones. However, canned pumpkin is often more convenient and consistent in texture. You can find pumpkin scones at many local bakeries or coffee shops. Some grocery stores also sell them, especially in the fall. If you want a fresh batch, try making them at home. It’s a fun and rewarding process! Pumpkin scones are simple to make and versatile. We covered main ingredients, optional add-ins, and substitutes for diets. The step-by-step guide helps you prepare the dough, bake the scones, and glaze them for a perfect finish. I shared tips to avoid mistakes and enhance your scone texture. You can even explore variations for vegan or gluten-free options. Lastly, I provided storage tips to keep your scones fresh. Enjoy baking and sharing your delicious pumpkin scones with friends and family!

Are you ready to enjoy pumpkin scones that are both easy and delicious? In this guide, I’ll walk you through a simple recipe that captures the essence of fall in …

Read more

Categories Desserts

Mini Pumpkin Pie Pops Easy Festive Treats

July 20, 2025 by Chef Theo
To make mini pumpkin pie pops, gather these simple ingredients: - 1 cup pumpkin puree - 1/2 cup brown sugar - 1/4 cup granulated sugar - 1 teaspoon pumpkin pie spice - 1/2 teaspoon vanilla extract - 1 package ready-made pie crusts (2 crusts) - 1 egg, beaten (for egg wash) - Lollipop sticks - Whipped cream for serving These ingredients create a rich and sweet filling. Pumpkin puree gives the pops their flavor and smooth texture. Brown and granulated sugars add sweetness, while pumpkin pie spice brings warmth. Vanilla extract enhances the taste. Using ready-made pie crusts saves time and effort. The egg wash gives a nice shine to the crust once baked. Don’t forget the lollipop sticks for easy handling! Finally, whipped cream adds a delicious touch when serving. For the full recipe, check out the details in the recipe section. 1. First, preheat your oven to 375°F (190°C). 2. Line a baking sheet with parchment paper. This helps the pops bake evenly and prevents sticking. 3. In a medium bowl, whisk together the pumpkin puree, brown sugar, granulated sugar, pumpkin pie spice, and vanilla extract. Mix until smooth. This filling is sweet and full of flavor. 1. Roll out the pie crusts on a floured surface. Use a round cookie cutter, about 3 inches wide, to cut out circles. You will make about 12 circles from two crusts. 2. Take one circle and add a small spoonful, about 1 tablespoon, of the pumpkin filling in the center. 3. Insert a lollipop stick into the filling. Then, take another circle and place it on top. Press the edges together to seal. 4. Use a fork to crimp the edges. This step adds a nice touch and keeps the filling from leaking. 1. Brush the tops of the pops with the beaten egg. This gives them a golden color when baked. 2. Place the pie pops on the prepared baking sheet. Bake them for 15-18 minutes. They are ready when the crust is golden brown. 3. Let the pumpkin pie pops cool for a few minutes before serving. They taste best warm. Enjoy your mini pumpkin pie pops! For the full recipe, check the details above. To get a flaky crust, use cold ingredients. Cold butter and water help the dough stay light. Avoid overworking the dough. Just mix until it comes together. I recommend using a rolling pin to evenly spread the crust. For assembly, you need a few tools: - A round cookie cutter (3 inches) - A fork for crimping - A small spoon for filling - A baking sheet lined with parchment paper These tools make the process easy and fun. For a special touch, serve your mini pumpkin pie pops on a pretty platter. Add a dollop of whipped cream on top. A sprinkle of extra pumpkin pie spice brings color and flavor. Pair these treats with warm apple cider or coffee. They are great for fall gatherings or holiday parties. To store leftover pops, place them in an airtight container. Keep them in the fridge for up to three days. When you want to enjoy them again, reheat in the oven at 350°F (175°C) for about 10 minutes. This way, they stay crisp and taste fresh. For the Full Recipe, check out the detailed steps and ingredients. {{image_2}} You can change the spice mix for your mini pumpkin pie pops. Try adding cinnamon or nutmeg for extra warmth. You can also use ginger for a bit of a kick. If you want a twist, swap the pumpkin filling. Use sweet potato, pecan, or even apple filling for a new taste. For gluten-free options, use gluten-free pie crusts. Many brands offer tasty choices that work well. If you want a vegan version, replace the egg wash with almond milk. You can also use a plant-based pie crust and coconut cream instead of whipped cream. To package mini pumpkin pie pops as gifts, use clear bags tied with ribbon. This way, they look cute and festive. You can also place them in small boxes for a more elegant touch. For parties, serve them on a colorful platter, with whipped cream and sprinkles on the side. This makes sharing easy and fun! You can find mini pumpkin pie pops at many local bakeries. These spots often make fresh, tasty treats. Look for bakeries that focus on seasonal items. They may have pumpkin pie pops during fall. Farmers markets are another great place to check. Local farmers often sell baked goods, including mini pies. Buying local supports small businesses and gives you fresh flavors. If you prefer shopping online, many reliable websites offer pre-made desserts. Websites like Goldbelly or Etsy often have unique options. When you shop online, read reviews to ensure quality. Look for sellers who use fresh ingredients. Check for clear images of their products, too. This helps you see what you are buying. The average cost for store-bought mini pumpkin pie pops ranges from $15 to $30 for a dozen. Pricing can vary based on ingredients and location. High-quality ingredients usually mean a higher price. Special packaging or unique flavors can also affect the cost. Always compare prices to find the best deal. For those who want to make these treats at home, check out the full recipe for mini pumpkin pie pops. Yes, you can make mini pumpkin pie pops ahead of time. Here are some tips for prepping: - Prepare the filling: You can mix the pumpkin filling a day in advance. Store it in the fridge until you're ready to use it. - Assemble and freeze: You can assemble the pops and freeze them before baking. Place them on a baking sheet and freeze until solid. - Bake when ready: When you want to serve them, bake straight from the freezer. Just add a couple of extra minutes to the baking time. Mini pumpkin pie pops can last up to three days at room temperature. Store them in an airtight container to keep them fresh. If you want to keep them longer, you can freeze them. They can last up to two months in the freezer. Just make sure to wrap them well. For quality pumpkin puree, I recommend these brands: - Libby's: A classic choice that many people love. - Farmer's Market: Known for its rich flavor and smooth texture. - Homemade: You can also make it from scratch by roasting fresh pumpkins. Canned pumpkin puree is convenient, but homemade can be more flavorful. Just remember, homemade may take longer to prepare. It's worth trying both to see which you prefer! In this article, I shared how to make delightful mini pumpkin pie pops. We discussed the essential ingredients, detailed steps for preparation and baking, and helpful tips for achieving the best results. I also covered fun variations, storage methods, and where to find premade options. Mini pumpkin pie pops are tasty treats for all occasions. Enjoy making and sharing these treats with family and friends. Happy baking and let your creativity shine!

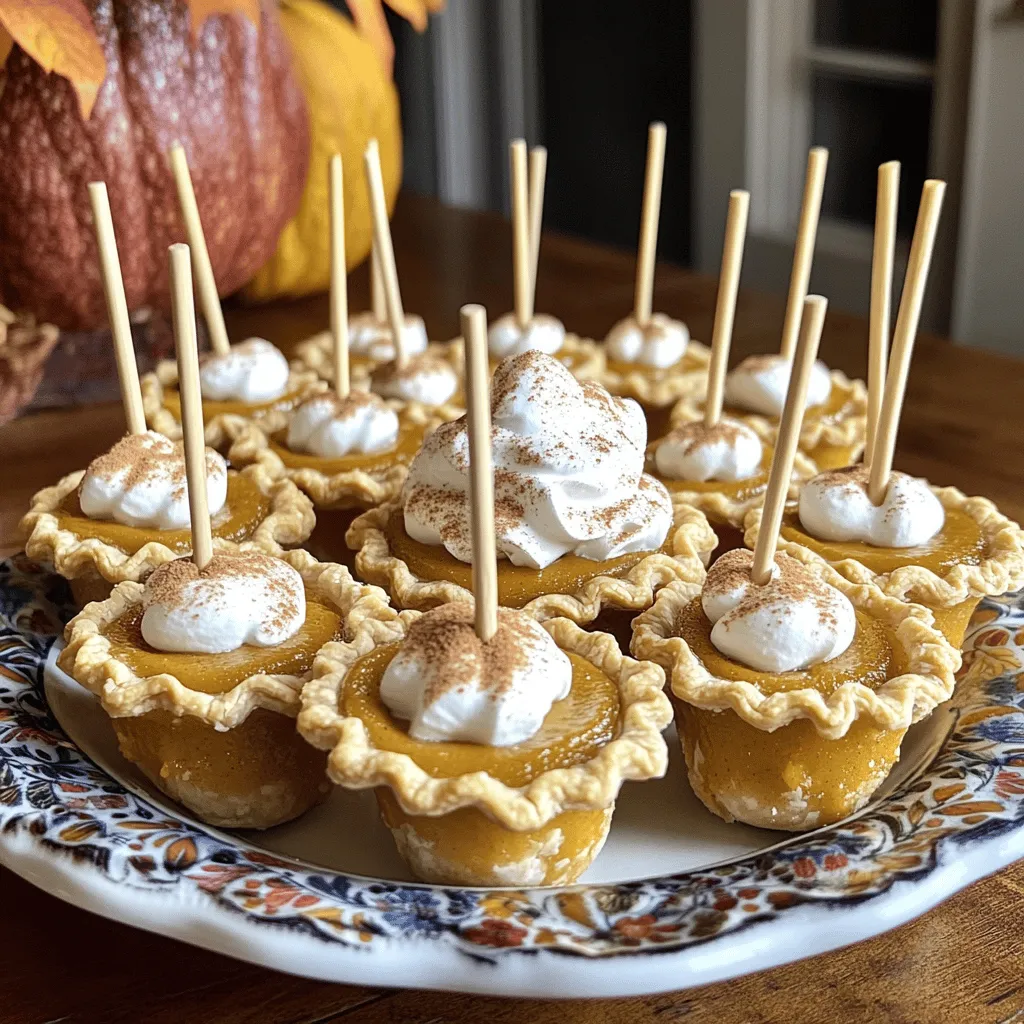
Are you ready to spice up your fall dessert game? These Mini Pumpkin Pie Pops are the perfect mix of fun, festivity, and flavor. With simple ingredients and easy steps, …

Read more

Categories Desserts

Pumpkin Streusel Muffins Perfectly Moist and Flavorful

July 20, 2025 by Chef Theo
To make Pumpkin Streusel Muffins, gather these ingredients: - 1 cup all-purpose flour - 1 cup whole wheat flour - 1 cup canned pumpkin puree - 1/2 cup brown sugar - 1/2 cup granulated sugar - 1/2 cup vegetable oil - 1/4 cup milk - 3 large eggs - 2 teaspoons baking powder - 1 teaspoon baking soda - 1 teaspoon ground cinnamon - 1/2 teaspoon ground nutmeg - 1/2 teaspoon salt - 1/4 teaspoon ground ginger For the streusel topping, you will need: - 1/2 cup rolled oats - 1/4 cup all-purpose flour - 1/4 cup brown sugar - 1/4 teaspoon ground cinnamon - 2 tablespoons cold butter, diced If you need to convert measurements, here are some helpful tips: - 1 cup = 16 tablespoons - 1/2 cup = 8 tablespoons - 1/4 cup = 4 tablespoons - 1 teaspoon = 5 milliliters - 1 tablespoon = 15 milliliters Knowing these conversions makes cooking easier and more fun! If you have dietary needs, you can still enjoy these muffins. Here are some good swaps: - Use gluten-free flour instead of all-purpose flour. - Replace sugar with a sugar substitute if you want less sweetness. - For a dairy-free option, use almond milk or coconut milk instead of regular milk. - You can swap eggs for flaxseed meal mixed with water for a vegan version. These substitutions keep your muffins tasty while meeting your needs! For the full recipe, check out the complete details above. Start by preheating your oven to 350°F (175°C). This heat is key to baking fluffy muffins. While the oven heats, grab a muffin tin. You can use paper liners or grease the tin lightly. Greasing helps the muffins pop out easily after baking. In a large bowl, whisk together the dry ingredients. Combine the all-purpose flour, whole wheat flour, baking powder, baking soda, ground cinnamon, nutmeg, ginger, and salt. This step builds the base for your muffins. Make sure to mix them well so the flavors blend evenly. In another bowl, you will mix the wet ingredients. Combine the canned pumpkin puree, vegetable oil, granulated sugar, brown sugar, milk, and eggs. Whisk these together until they are smooth and well blended. This mixture adds moisture and flavor to your muffins. For the streusel topping, take a small bowl. Add rolled oats, all-purpose flour, brown sugar, and ground cinnamon. Then, add the cold butter, diced into small pieces. Use your fingers or a fork to mix until it looks like coarse crumbs. This will add a crunchy texture to your muffins. Spoon the muffin batter into the prepared muffin tin. Fill each cup about 2/3 full. It’s important not to overfill. Next, sprinkle the streusel topping generously on each muffin. This gives a sweet and crunchy layer. Bake the muffins in the preheated oven for 20-25 minutes. You can check if they are done by inserting a toothpick into the center. If it comes out clean, they are ready! Once baked, let the muffins cool in the pan for about 5 minutes. Then, transfer them to a wire rack to cool completely. Enjoy these warm and flavorful treats! For the complete recipe, check out the Full Recipe. To make perfect pumpkin streusel muffins, follow these tips: - Use Fresh Ingredients: Ensure your baking powder and baking soda are fresh. This helps the muffins rise well. - Don’t Overmix: Mix the wet and dry ingredients gently. Overmixing can make your muffins dense. - Room Temperature Ingredients: Use eggs and milk at room temperature. This helps everything mix better. - Fill Muffin Cups Correctly: Fill each muffin cup about 2/3 full. This allows space for rising. - Check Oven Temperature: Use an oven thermometer. An oven that runs hot can burn the muffins. Avoid these common mistakes to ensure great results: - Skipping the Streusel: The streusel adds flavor and texture. Don't skip it! - Not Preheating the Oven: Always preheat your oven before baking. This ensures even cooking. - Using the Wrong Flour: Stick to the flour types listed in the Full Recipe. Mixing types can change texture. - Ignoring Baking Time: Start checking your muffins a few minutes early. Ovens vary, and you don’t want them dry. - Storing While Warm: Wait for your muffins to cool before storing. This prevents sogginess. To keep your muffins fresh, follow these storage tips: - Cool Completely: Let muffins cool on a wire rack. This prevents moisture buildup. - Use an Airtight Container: Store muffins in an airtight container. This keeps them soft and fresh. - Refrigerate for Longer Storage: If you need to keep them longer, refrigerate. They last about a week this way. - Freeze for Future Enjoyment: For longer storage, freeze muffins. They stay fresh for about three months. - Reheat Before Serving: Warm them up in the microwave for a few seconds before enjoying. This brings back their fresh-baked taste. {{image_2}} You can make these muffins gluten-free. Swap the all-purpose flour with a gluten-free blend. Make sure it has xanthan gum. This helps with texture. Use the same amount as the recipe calls for. The muffins will still be moist and tasty. To make vegan muffins, replace eggs with flax eggs. Mix 1 tablespoon of flaxseed meal with 3 tablespoons of water. Let it sit for a few minutes to thicken. Also, use non-dairy milk instead of regular milk. Replace vegetable oil with melted coconut oil or applesauce. These swaps keep the muffins soft and flavorful. You can add fun flavors to the batter. Try mixing in chocolate chips or chopped nuts. Walnuts or pecans work great! For a more spiced flavor, add a pinch of cloves or allspice. You could also stir in dried cranberries or raisins for a sweet twist. Each option brings a unique taste to your muffins. For the complete recipe, check the Full Recipe section. To keep your pumpkin streusel muffins fresh, store them in an airtight container. This helps prevent them from drying out. You can also wrap them in plastic wrap or foil. If you want to enjoy them later, keep them at room temperature for short-term storage. For longer freshness, refrigeration is an option but may change the texture slightly. Freezing is a great way to save muffins for later. First, let the muffins cool completely. Then, wrap each muffin tightly in plastic wrap. Place the wrapped muffins in a freezer bag or a container. They can last up to three months in the freezer. When you want to eat them, just thaw them overnight in the fridge or warm them in the microwave for a quick treat. When stored properly, pumpkin streusel muffins can last about 3-4 days at room temperature. If you keep them in the fridge, they may last up to a week. However, for the best taste and texture, I recommend eating them fresh or within a few days. Enjoy the flavors while they are at their peak! For the full recipe, refer back to the main section. Yes, you can make these muffins ahead of time. I often bake them the night before. Store them in an airtight container. They stay fresh for about three days. You can also freeze them. Just wrap each muffin in plastic wrap, then put them in a freezer bag. They last up to three months in the freezer. To check if the muffins are done, insert a toothpick into the center. If it comes out clean or with just a few crumbs, they are ready. Baking time can vary, so start checking around 20 minutes. The tops should look golden and spring back when touched. Yes, you can use fresh pumpkin. Just cook it and puree it until smooth. Make sure to drain excess moisture, as fresh pumpkin can be wetter. This may change the texture slightly, but it will still taste great. These muffins pair well with many items. Try serving them with cream cheese spread or butter. A cup of coffee or chai tea complements them nicely. For a fun twist, serve them alongside some apple cider. Absolutely! You can adapt this recipe for mini muffins. Just reduce the baking time to about 12-15 minutes. Fill each mini muffin cup about halfway. You will have a delightful bite-sized treat that everyone loves. For the full recipe, refer back to the ingredients and steps provided. These pumpkin streusel muffins are simple and tasty. We covered the ingredients, easy steps, and helpful tips. You learned how to prepare, mix, and bake perfect muffins. Plus, we explored variations and storage methods. By following these tips, you can avoid common mistakes and enjoy fresh muffins for weeks. Experiment with flavors and enjoy making this recipe yours. Get ready to share these muffins with friends and family. Happy baking!

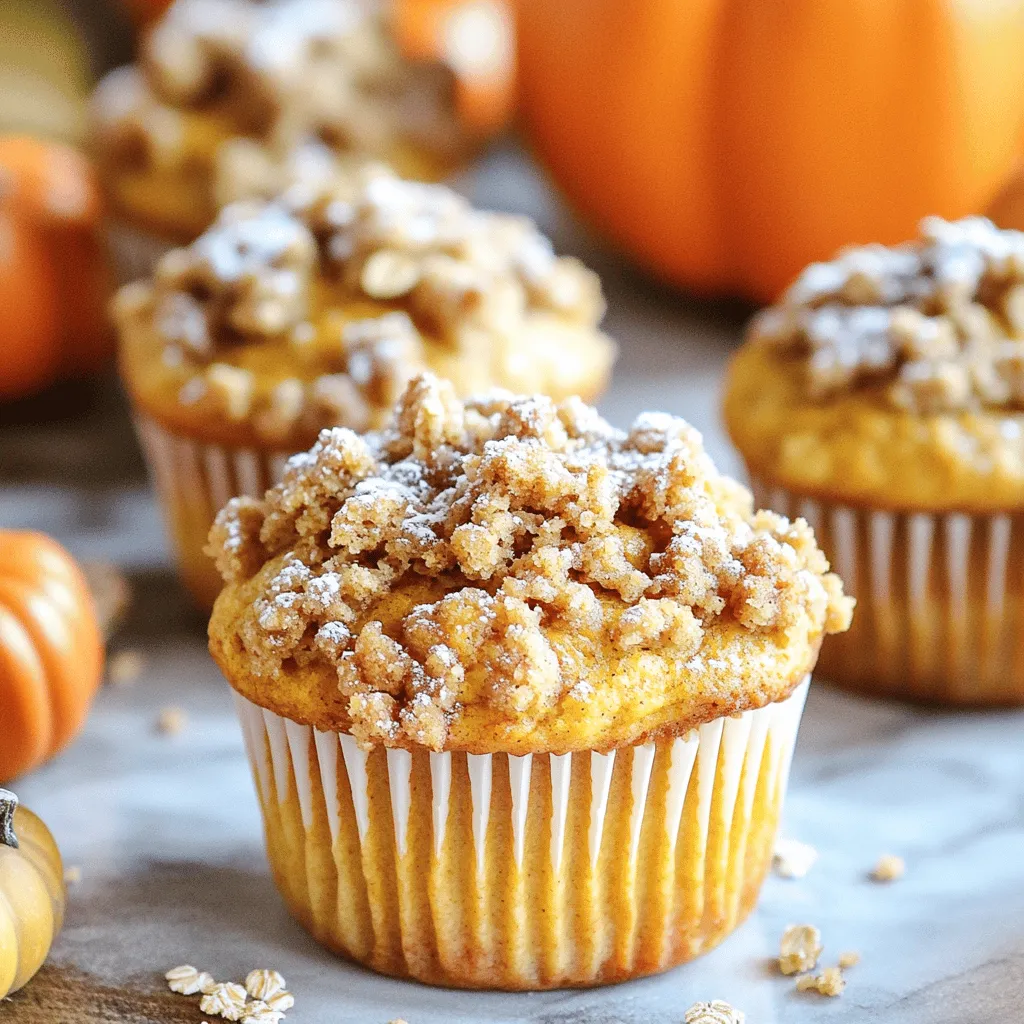
If you’re craving a warm, spiced treat, these Pumpkin Streusel Muffins are for you! Moist and flavorful, they’ll brighten up any morning. I’ll share my secrets to create perfect muffins, …

Read more

Categories Desserts

Cheeseburger Soup Comforting and Flavorful Recipe

July 20, 2025 by Chef Theo
For this delicious cheeseburger soup, you need: - 1 pound ground beef - 1 medium onion, diced - 2 cloves garlic, minced - 3 medium potatoes, diced - 4 cups beef broth - 2 cups shredded cheddar cheese - 1 cup milk - 1 tablespoon Worcestershire sauce - 1 teaspoon mustard - 1 teaspoon paprika - Salt and pepper to taste - 2 tablespoons olive oil - Chopped green onions for garnish These ingredients blend to create a warm, hearty soup. The ground beef gives it that classic cheeseburger taste. The potatoes add bulk and texture. Cheddar cheese provides creamy goodness. You can add different flavors to make the soup your own. Some options include: - Cooked bacon for a smoky kick - Jalapeños for heat - Frozen corn for sweetness - Diced tomatoes for freshness - A splash of hot sauce for spice Using these optional ingredients lets you tailor the soup to your taste. Feel free to get creative! If you need to adjust amounts, here are some simple conversions: - 1 cup = 8 ounces - 1 tablespoon = 3 teaspoons For substitutes, you can use ground turkey instead of beef. Use vegetable broth for a lighter flavor. If you want a dairy-free version, try almond milk and non-dairy cheese. These swaps help keep the soup just as tasty! For the complete recipe, check out the Full Recipe section. Start by gathering your ingredients. You need: - 1 pound ground beef - 1 medium onion, diced - 2 cloves garlic, minced - 3 medium potatoes, diced - 4 cups beef broth - 2 cups shredded cheddar cheese - 1 cup milk - 1 tablespoon Worcestershire sauce - 1 teaspoon mustard - 1 teaspoon paprika - Salt and pepper to taste - 2 tablespoons olive oil - Chopped green onions for garnish Chop your onion, mince the garlic, and dice the potatoes. This step makes cooking easier. In a large pot, heat the olive oil on medium heat. Add the diced onion first. Cook until soft, about 5 minutes. Then, add the minced garlic and cook for one more minute. This makes the base of your soup flavorful. Now, increase the heat to medium-high. Add the ground beef and break it apart with a spoon. Cook until it turns brown, about 5-7 minutes. If there's excess grease, drain it off. Next, stir in the diced potatoes, beef broth, Worcestershire sauce, mustard, paprika, salt, and pepper. Bring this mixture to a boil. Once it's boiling, reduce the heat to a simmer. Cover the pot and let it cook for about 15-20 minutes. This makes the potatoes tender. Once the potatoes are soft, stir in the milk and shredded cheddar cheese. Mix until the cheese melts and the soup becomes creamy. Taste it and adjust the seasoning if you need to. Remove the pot from the heat and let it cool for a few minutes. Ladle the soup into bowls. For a nice touch, garnish with chopped green onions and an extra sprinkle of cheese on top. Serve with warm, crusty bread for a cozy meal. For a complete guide, don't forget to check the Full Recipe. To make your cheeseburger soup shine, use fresh ingredients. Fresh potatoes and onions add great taste. Brown the beef well for rich flavor. Don't rush the cooking; let the onions soften first. Stir the garlic in just before you add the beef. This keeps the garlic strong and tasty. Use good quality beef broth for depth. Try adding a splash of hot sauce for a kick. One mistake is not draining the fat from the beef. Too much fat can make the soup greasy. Another mistake is overcooking the potatoes. Keep an eye on them; they should be tender, not mushy. Don’t skip on seasoning. Taste and adjust as you go. Lastly, avoid boiling the soup after adding cheese. It can separate and ruin the texture. Need a lighter version? Use lean ground turkey instead of beef. If you want a dairy-free option, use coconut milk and dairy-free cheese. To make it gluten-free, ensure your broth and Worcestershire sauce are gluten-free. For a veggie boost, add spinach or carrots. These tweaks keep the taste while meeting your needs. Check the Full Recipe for more details. {{image_2}} You can make a tasty vegetarian version of cheeseburger soup. Swap out the ground beef for a mix of beans or lentils. Use vegetable broth instead of beef broth. This keeps the soup hearty and filling. Add diced mushrooms for a meaty texture. Want to change things up? You can add fun ingredients! Crispy bacon gives a nice crunch. Diced jalapeños add heat and spice. For a smoky taste, try adding smoked paprika. You can even throw in some corn for sweetness. These additions make the soup more exciting. You have two great choices: creamy or broth-based. For a creamy soup, use more milk and cheese. This makes it rich and smooth. For a lighter option, stick with the broth. This version is great if you want something less heavy. Both styles taste amazing, so pick what you like! To store leftover cheeseburger soup, let it cool to room temperature. Then, place it in an airtight container. Make sure to seal it well to keep out air. Store it in the fridge for up to three days. This keeps the soup fresh and tasty for later meals. You can freeze cheeseburger soup for future meals. First, let the soup cool completely. Then, pour it into freezer-safe bags or containers. Remove as much air as possible before sealing. Label the bags with the date. This soup can last in the freezer for up to three months. When you are ready to eat it, thaw it in the fridge overnight. When reheating, use a pot on the stove over low heat. Stir the soup often to avoid sticking. If it looks too thick, add a splash of milk or broth. This helps restore its creamy texture. You can also microwave it in a bowl, but cover it to prevent splattering. Heat in short bursts, stirring in between, until warm. Enjoy the comforting flavors again! Cheeseburger soup is a warm and tasty dish. It combines the flavors of a cheeseburger in a creamy soup. You get ground beef, cheese, and veggies all in one bowl. People love it because it’s hearty and easy to make. You can enjoy it with bread or crackers for a full meal. Yes, you can make cheeseburger soup ahead of time. Just prepare the soup as usual and let it cool. Then, store it in the fridge for up to three days. When you’re ready to eat, simply reheat it on the stove. The flavors will blend even more, making it taste great! Making cheeseburger soup in a slow cooker is simple. Start by browning the beef in a pan first. Then, add it to the slow cooker with all the other ingredients. Set it on low for about 6 hours or high for 3 hours. Stir in the cheese and milk before serving. It’s easy and perfect for busy days! You can serve many tasty sides with cheeseburger soup. Some great options are: - Warm crusty bread - Grilled cheese sandwiches - Salad with fresh greens - Crackers for dipping These sides pair well and make your meal even more enjoyable. For the full recipe, check out the [Full Recipe]. Cheeseburger soup is a tasty dish you can customize. We covered key ingredients, cooking steps, and storage tips. Don't forget the optional ingredients that can spice it up! Use the tips to avoid common mistakes and adjust the recipe to fit your diet. You can make it vegetarian or add unique flavors. With these guidelines, you can enjoy this comforting soup anytime. Your kitchen is ready for a delicious meal!

Imagine a warm bowl of Cheeseburger Soup, brimming with flavor and comfort. This creamy dish blends all the best parts of a cheeseburger into a tasty soup. In this post, …

Read more

Categories Dinner

Healthy Pumpkin Donut Holes Tasty Fall Treat Recipe

July 20, 2025 by Chef Theo
To make perfect healthy pumpkin donut holes, avoid common mistakes. One frequent error is overmixing the batter. Mix just until combined for a light texture. Another tip is to check your oven temperature. Use an oven thermometer to ensure it matches the set temperature. To ensure doneness without drying out your treats, keep a close eye on the baking time. Start checking at 10 minutes. Insert a toothpick into the center. If it comes out clean, your donut holes are done. If not, bake for an extra minute or two. Serving your donut holes can be fun and creative. Arrange them in a rustic basket lined with parchment paper. This adds charm and makes it feel special. You can also stack them high for a playful look. Enhance their visual appeal with toppings. Dust them with powdered sugar or sprinkle cinnamon sugar on top. You can also drizzle a light icing made from maple syrup for a sweet touch. Boost the health factor by adding protein or fiber. You can mix in some ground flaxseed or chia seeds. These additions are simple and pack a nutritional punch. For those with allergies, consider substitutions. Use oat flour instead of almond flour for a nut-free option. You can also replace maple syrup with agave syrup if you need a vegan sweetener. These swaps keep your donut holes tasty while catering to different dietary needs. For the full recipe, check out our detailed guide to make these delicious treats! {{image_2}} You can make your healthy pumpkin donut holes even tastier with some fun changes. Try adding spices like ginger or cloves to boost the flavor. A splash of vanilla extract can also enhance the sweet taste. If you love chocolate, mix in some chocolate chips. Nuts, like walnuts or pecans, can add a nice crunch. These small tweaks can really change how your donut holes taste! If you need a gluten-free option, you can use almond flour or oat flour instead of whole wheat flour. Both will keep your donut holes soft and tasty. For a vegan version, swap out the eggs with flaxseed meal mixed with water. You can also replace maple syrup with agave syrup. These changes keep the recipe healthy while making it fit for different diets. You can change your healthy pumpkin donut holes to match the seasons. In fall, try adding cranberries for a fruity twist. In the winter, a bit of nutmeg or peppermint extract can add a cozy flavor. In spring and summer, mix in some fresh berries or lemon zest. These seasonal swaps keep your treats exciting all year long. For the complete recipe, check out the Full Recipe section! To keep your healthy pumpkin donut holes fresh, you have two options: room temperature or refrigeration. If you plan to eat them in a day, store them in a cool, dry place. Use an airtight container to keep them soft. If you need to store them for longer, place the donut holes in the fridge. They will stay fresh for about a week. Again, an airtight container is best to avoid drying out. Freezing your donut holes is a great way to enjoy them later. To freeze, allow them to cool completely. Then, place them in a single layer on a baking sheet. Freeze them for about one hour, until solid. After that, transfer them to an airtight freezer bag. When you're ready to eat, take them out and let them thaw in the fridge. To warm them up, pop them in the microwave for about 15 seconds. This keeps them soft and tasty. Healthy pumpkin donut holes can last about a week in the fridge. If you freeze them, they will stay good for up to three months. Watch for signs of spoilage. If they develop an off smell or unusual texture, it’s best to toss them. Keeping an eye on your treats will ensure you enjoy them at their best! To make these donut holes, start by preheating your oven to 350°F (175°C). You will need a mini muffin or donut hole pan. In a large bowl, mix 1 cup of canned pumpkin puree, 1/4 cup of maple syrup, 1/4 cup of unsweetened applesauce, 1 tablespoon of melted coconut oil, and 1/4 teaspoon of vanilla extract until smooth. In another bowl, combine 1/2 cup of whole wheat flour, 1/2 cup of almond flour, 1 teaspoon of baking powder, 1/2 teaspoon of baking soda, 1 teaspoon of ground cinnamon, 1/2 teaspoon of ground nutmeg, and 1/4 teaspoon of salt. Gradually add the dry mix to the wet mix. Fill the pan about 2/3 full with the batter. Bake for 10-12 minutes. A toothpick should come out clean when done. Let them cool before serving. Yes, you can use fresh pumpkin. Fresh pumpkin gives a great flavor and texture. To prepare fresh pumpkin, you need to roast it first. Cut the pumpkin, remove seeds, and bake it until soft. Then, scoop out the flesh and mash it until smooth. Use the same amount as the canned pumpkin in the recipe. This method will enhance the taste of your donut holes and add natural sweetness. These donut holes can fit into a low-sugar diet. The recipe uses maple syrup and applesauce as natural sweeteners. You can adjust the amount of maple syrup to lower the sugar content. If you need even less sugar, consider using a sugar substitute like stevia or erythritol. Always check the labels to ensure they fit your dietary needs. Serve the donut holes warm for the best flavor. You can dust them with powdered sugar or sprinkle cinnamon sugar on top. Pair them with a cup of coffee or tea for a cozy treat. For a fun twist, try dipping them in yogurt or a light cream cheese glaze. You can arrange them in a rustic basket for a lovely presentation. In this blog post, we explored healthy pumpkin donut holes, from key ingredients to baking tips. You learned how to make these delights with canned pumpkin, whole wheat flour, and natural sweeteners. We discussed optional ingredients like coconut oil and toppings, along with storage tips. Don’t forget, you can change flavors and adapt for dietary needs. Making these donut holes is fun and rewarding. Enjoy them fresh or store some for later. Happy baking!

Fall is here, and what better way to celebrate than with Healthy Pumpkin Donut Holes? These delicious bites combine the warmth of pumpkin spice with wholesome ingredients. You’ll love how …

Read more

Categories Desserts
Older posts
Newer posts
← Previous Page1 … Page12 Page13 Page14 … Page94 Next →

TOASTED RECIPES

Where ideas are warm, crisp, and ready to serve! 🍞

PAGES

Home About Contact Privacy Policy Terms & Conditions Cookie Policy GDPR Policy Copyright Policy Disclaimer

CATEGORIES

Appetizers Desserts Salads Breakfast Dinner

Contact

  • Pinterest
  • Mail
Copyright © 2025 Toasted Recipes. All rights reserved.