Skip to content
toastedrecipes.com
  • Home
  • Appetizers
  • Desserts
  • Salads
  • Breakfast
  • Dinner
  • Privacy Policy
  • Contact
  • About

Chef Theo

Pumpkin S’mores Bars Irresistible Fall Treat

July 23, 2025 by Chef Theo
To make pumpkin s'mores bars, gather these ingredients: - 1 ½ cups graham cracker crumbs - ½ cup unsweetened cocoa powder - ½ cup unsalted butter, melted - 1 cup granulated sugar - 1 cup pumpkin puree - 2 large eggs - 1 teaspoon vanilla extract - 1 teaspoon ground cinnamon - ½ teaspoon ground nutmeg - ¼ teaspoon salt - 1 cup mini marshmallows - ½ cup chocolate chips (milk or dark) You can swap some ingredients for others if needed: - Use almond flour instead of graham cracker crumbs for a gluten-free option. - Replace unsweetened cocoa powder with carob powder for a different flavor. - Coconut oil can replace unsalted butter for a dairy-free treat. - Maple syrup can work instead of granulated sugar to add a unique taste. Choosing the right ingredients makes a big difference. Here are some tips: - Use fresh pumpkin puree for the best flavor. Avoid canned pumpkin with added sugars. - Select high-quality cocoa powder for rich chocolate flavor. Look for brands with no additives. - Choose unsalted butter for better control over the salt level in your recipe. - Pick mini marshmallows made with natural ingredients. They will melt beautifully and taste great. Using high-quality ingredients ensures your pumpkin s'mores bars are tasty and fun. For the full recipe, check the complete guide! To make your pumpkin s'mores bars, start by preheating your oven to 350°F (175°C). Grease a 9x13 inch baking pan or line it with parchment paper. This helps with easy removal later. Next, mix 1 ½ cups of graham cracker crumbs, ½ cup of cocoa powder, and ½ cup of melted butter in a medium bowl. Stir until it looks like wet sand. Firmly press this mix into the bottom of your pan. In a large bowl, whisk together 1 cup of granulated sugar, 1 cup of pumpkin puree, 2 large eggs, 1 teaspoon of vanilla extract, 1 teaspoon of ground cinnamon, ½ teaspoon of ground nutmeg, and ¼ teaspoon of salt. Mix until it’s smooth and well combined. Pour this pumpkin mixture over your crust. Spread it evenly with a spatula. Bake your bars in the oven for 25-30 minutes. The edges should be set, and a toothpick should come out mostly clean when you check the center. After baking, remove the pan and sprinkle 1 cup of mini marshmallows and ½ cup of chocolate chips on top. Return the pan to the oven, but set it to broil for 1-2 minutes. Keep a close eye on it. You want the marshmallows to get golden and puffy but not burnt. Once done, let the bars cool in the pan for about 30 minutes. Then, transfer them to the fridge for another hour to set. Finally, cut them into squares and enjoy your delicious pumpkin s'mores bars! The key times in this recipe are the baking time of 25-30 minutes and the broiling time of 1-2 minutes. Keep an eye on the bars while broiling. Ovens can vary, and you don’t want to burn the marshmallows. Use a toothpick to check if the bars are done. Insert it in the center; if it comes out mostly clean, they are ready. Preparing the baking pan is an important step. You can grease the pan with a little butter or non-stick spray. This will help the bars come out easily. If you line the pan with parchment paper, leave some overhang. This makes it easy to lift the bars out after cooling. To get the perfect texture in your Pumpkin S'mores Bars, focus on your crust. Mix graham cracker crumbs, cocoa powder, and melted butter until it feels like wet sand. Press this mix firmly into your pan. This helps form a strong base that won’t crumble when you cut the bars. For the pumpkin layer, blend the ingredients well. A smooth mixture is key. This ensures even baking and a creamy texture. When mixing your ingredients, use a large bowl. Start with the sugar and pumpkin puree. Whisk these together until they are smooth. Then, add the eggs and vanilla. Make sure to mix well after each addition. This helps blend the flavors. For the spices, sprinkle them in while mixing. This allows the cinnamon and nutmeg to spread evenly. Lastly, fold in the mini marshmallows and chocolate chips gently. You want them to stay whole for that gooey effect. One common mistake is overbaking the bars. Check them around 25 minutes. If the edges are set but the center is slightly wobbly, they’re done. Another mistake is not greasing the pan. This can make it hard to remove the bars later. Also, avoid adding too many marshmallows. They can overpower the pumpkin flavor. Stick to the amount in the recipe for balance. For the best results, follow the Full Recipe closely. {{image_2}} You can change the flavor of your Pumpkin S'mores Bars easily. Try adding a pinch of sea salt or even a splash of maple syrup. These changes can add depth to the sweet pumpkin taste. For a fun twist, add peanut butter chips or white chocolate. These flavors give your bars a new life. If you need gluten-free bars, use gluten-free graham crackers. They work just as well in the crust. For a dairy-free version, swap the butter with coconut oil. You can also use dairy-free chocolate chips and marshmallows. This way, everyone can enjoy these tasty treats. You can make these bars even more special by adding spices or nuts. Try some ground ginger or cloves for extra warmth. Chopped pecans or walnuts can add a nice crunch, too. Sprinkle them on top or mix them into the batter. Seasonal changes keep your bars fresh and exciting, perfect for fall gatherings. For the full recipe, you can refer back to the beginning of the article. To keep your pumpkin s'mores bars fresh, store them in an airtight container. You can place parchment paper between layers to prevent sticking. Make sure they are completely cool before sealing. This helps lock in moisture and flavor. These bars last about 4 to 5 days in the fridge. If you want to keep them longer, freeze them. Cut the bars into squares and wrap each piece tightly in plastic wrap. Place the wrapped bars in a freezer-safe bag. They can stay fresh for up to three months. When you’re ready to eat, let them thaw in the fridge overnight. To enjoy your pumpkin s'mores bars warmed, use the microwave. Heat for 10 to 15 seconds. This softens the marshmallows and makes the chocolate creamy. You can also reheat them in the oven. Set your oven to 350°F (175°C) and warm the bars for about 5 minutes. This method gives you a nice, warm treat. Enjoy every bite of your delicious pumpkin s'mores bars! For the complete recipe, check out the Full Recipe. Yes, you can make Pumpkin S'mores Bars ahead of time. I often prepare them a day before a gathering. After baking, let the bars cool. Then, chill them in the fridge. This helps the flavors blend well. Just remember to cover them tightly to keep them fresh. If you can't find pumpkin puree, use sweet potato puree. It gives a similar taste. You can also use butternut squash puree. Both options work well in this recipe. Make sure they are smooth and well-mixed to match the texture of pumpkin. To check if your bars are done, look for set edges. The center should be mostly clean when you poke it with a toothpick. If it comes out with a bit of pumpkin on it, that’s okay. The bars will set more as they cool. For the best results, follow the baking time in the Full Recipe. We covered the key steps to make tasty Pumpkin S'mores Bars. Start with the right ingredients, choose quality ones, and follow the steps carefully. Remember to mix well and avoid common mistakes. You can try fun variations and easy ways to store leftovers too. Cooking can be simple and rewarding. Enjoy these bars at any time of year!

Get ready for the taste of fall with my Pumpkin S’mores Bars! This treat combines pumpkin, chocolate, and marshmallows for a cozy dessert. You won’t want to miss the steps …

Read more

Categories Desserts

Creamy Chicken Enchilada Soup Flavorful Weeknight Meal

July 23, 2025 by Chef Theo
To make Creamy Chicken Enchilada Soup, you will need: - 2 tablespoons olive oil - 1 medium onion, diced - 3 cloves garlic, minced - 1 bell pepper (any color), diced - 1 jalapeño, minced (optional for heat) - 2 cups cooked chicken, shredded - 4 cups chicken broth - 1 can (15 oz) black beans, rinsed and drained - 1 can (15 oz) corn, drained - 1 can (10 oz) red enchilada sauce - 1 cup heavy cream (or coconut cream for dairy-free) - 1 teaspoon ground cumin - 1 teaspoon chili powder - Salt and pepper to taste - Fresh cilantro, chopped (for garnish) - Avocado, diced (for garnish) - Tortilla strips (for garnish) Using fresh ingredients can boost flavor. Fresh onions and garlic give a nice base. Fresh herbs, like cilantro, add brightness. However, canned items save time. Canned black beans and corn are quick and easy. They still taste great in this soup. Both options work well, so choose what suits you best. Not everyone has the same diet. You can adjust a few ingredients to fit your needs. If you want a dairy-free version, use coconut cream instead of heavy cream. For a lower sodium option, pick low-sodium chicken broth. If you're vegetarian, swap chicken for extra beans or lentils. This soup is flexible, so feel free to make it yours. Check out the Full Recipe for more details. To make Creamy Chicken Enchilada Soup, gather your ingredients first. You will need olive oil, onion, garlic, bell pepper, jalapeño, cooked chicken, chicken broth, black beans, corn, enchilada sauce, heavy cream, spices, and garnishes. This soup comes together quickly, so prepare everything in advance. Chop the onion, garlic, and bell pepper. Shred the chicken if it is not already done. 1. In a large pot, heat 2 tablespoons of olive oil over medium heat. 2. Add the diced onion and cook it until it is soft. This takes about 4 to 5 minutes. 3. Next, stir in 3 cloves of minced garlic, 1 diced bell pepper, and jalapeño if you want heat. Cook for another 3 to 4 minutes, until the veggies soften. 4. Now, add the shredded chicken, 4 cups of chicken broth, 1 can of black beans, 1 can of corn, and 1 can of red enchilada sauce. Mix well. 5. Bring your soup to a simmer. Let it cook for 10 to 15 minutes. This helps the flavors blend. 6. Stir in 1 cup of heavy cream, 1 teaspoon of ground cumin, 1 teaspoon of chili powder, and salt and pepper. Taste the soup and adjust the seasoning if needed. Let it simmer for 5 more minutes. 7. Remove the pot from heat and serve the soup hot. Ladle the soup into bowls. Garnish with fresh chopped cilantro, diced avocado, and crispy tortilla strips. These toppings add great flavor and crunch. You can also serve this soup with warm tortillas or bread to soak up the goodness. Enjoy every spoonful of your Creamy Chicken Enchilada Soup with your loved ones. For a complete guide, check the Full Recipe. To boost the taste of your creamy chicken enchilada soup, use fresh herbs. Fresh cilantro adds a bright note. You can also squeeze lime juice for a zesty kick. Consider adding a pinch of smoked paprika for depth. If you love heat, toss in more jalapeño or a few dashes of hot sauce. Try using homemade chicken broth for a richer taste. This small change makes a big difference. One mistake is overcooking the soup. If you boil it too long, the cream may curdle. Always keep the heat low after adding the cream. Another mistake is not seasoning enough. Taste your soup, and add salt or spices as needed. Some may skip the garnishes; don’t! They add texture and flavor. Lastly, using low-quality canned ingredients can dull the taste. Opt for organic or high-quality brands when you can. Meal prep makes weeknight cooking easier. You can chop your veggies in advance. Store them in the fridge in airtight bags. Cook the chicken ahead of time, too. Shredded chicken freezes well, so make a batch and store it. If you want to save time, use rotisserie chicken. For even quicker meals, you can make this soup in larger batches. It stores well and tastes better the next day. Check out the full recipe for step-by-step guidance! {{image_2}} You can make this soup vegetarian by using vegetable broth. Swap the chicken for hearty veggies like zucchini or mushrooms. To make it vegan, replace heavy cream with coconut cream. You can also add more beans for protein and texture. This way, you still enjoy a rich and creamy taste without meat or dairy. If you love spice, add more jalapeños or use a hotter pepper. Chipotle peppers in adobo sauce can bring a smoky flavor. You can also sprinkle in red pepper flakes for extra heat. Don't forget to taste as you go. Adjust the spice level to fit your taste. For a different protein, try shredded beef or turkey. Tofu is a great choice for a plant-based option. You can also use cooked quinoa for a protein boost. Each option brings its own flavor and texture, making the soup unique each time. Check out the Full Recipe for the perfect base and then explore these fun twists! To keep your creamy chicken enchilada soup fresh, cool it down quickly. Pour the soup into shallow containers. This helps it cool faster. Seal the containers tightly with a lid or plastic wrap. Store the soup in the fridge for up to three days. Always label the container with the date. Freezing this soup is simple. First, let it cool completely. Then, pour it into freezer-safe bags or containers. Remember to leave some space at the top for expansion. Seal the bags tightly and remove as much air as possible. You can freeze the soup for up to three months. When you’re ready to enjoy the soup again, thaw it in the fridge overnight. For reheating, pour the soup into a pot on medium heat. Stir it often to ensure even heating. If it seems too thick, add a little chicken broth or water. You can also microwave it in a bowl. Heat in short bursts, stirring between each, until hot. Yes, you can make this soup in a slow cooker. Start by sautéing the onion, garlic, and bell pepper in a pan. Then, add them to the slow cooker with all the other ingredients, except for the cream. Cook on low for 6-8 hours or high for 3-4 hours. Stir in the cream 30 minutes before serving. This method makes it easy and hands-free! You have many options to serve with this soup. Here are some tasty ideas: - Fresh tortilla chips - Warm corn tortillas - A side salad with lime vinaigrette - Mexican rice for a heartier meal These sides pair well and add more flavor to your meal. This soup lasts about 3-4 days in the fridge. Store it in an airtight container. Just remember to let it cool before putting it in the fridge. You can also freeze it for up to 3 months. Thaw it overnight in the fridge before reheating. For the best taste, enjoy it fresh! For the full recipe, check the detailed instructions above! This blog post covered a complete guide to making Creamy Chicken Enchilada Soup. We discussed key ingredients, preparing steps, and helpful tips for flavor. I shared options for diet needs and variations, as well as storage and reheat methods. You can use this information to make a great soup at home. Remember, cooking is fun! Experiment and find your favorite way to enjoy this dish.

Looking for a quick and tasty dinner? Try my Creamy Chicken Enchilada Soup! This dish packs bold flavors and creamy goodness into every spoonful. Perfect for busy weeknights, it’s easy …

Read more

Categories Dinner

Healthy Lemon Basil Vinaigrette Zesty Flavor Boost

July 23, 2025 by Chef Theo
To make a great lemon basil vinaigrette, gather these key ingredients: - 1/4 cup fresh lemon juice (about 2 large lemons) - 1/2 cup extra virgin olive oil - 1 tablespoon honey (or maple syrup for a vegan option) - 2 tablespoons fresh basil leaves, finely chopped - 1 teaspoon Dijon mustard - 1 clove garlic, finely minced - Salt and pepper to taste These ingredients form a bright and fresh dressing. Each one plays an important role in creating a zesty flavor boost. You can customize your vinaigrette with optional add-ins: - Different herbs like parsley or oregano enhance flavor. - Red pepper flakes add a nice kick for heat lovers. Feel free to experiment and find your perfect mix. Now, let’s look at the health benefits of these ingredients: - Fresh lemon juice: It is rich in vitamin C. This vitamin helps your immune system and improves skin health. - Extra virgin olive oil: This oil is great for heart health. It contains healthy fats that can lower bad cholesterol. - Fresh basil: This herb is full of antioxidants. It can help reduce inflammation and support overall wellness. Using these ingredients not only adds flavor but also boosts your health. For the full recipe, check the detailed instructions above. - Gather all ingredients: - 1/4 cup fresh lemon juice (about 2 large lemons) - 1/2 cup extra virgin olive oil - 1 tablespoon honey (or maple syrup for a vegan option) - 2 tablespoons fresh basil leaves, finely chopped - 1 teaspoon Dijon mustard - 1 clove garlic, finely minced - Salt and pepper to taste - Essential kitchen tools: - Medium bowl - Whisk - Airtight container - Start by whisking the liquid ingredients. In a medium bowl, combine the lemon juice, honey, Dijon mustard, and minced garlic. Mix until it’s smooth and well blended. - Next, emulsify the dressing. Gradually drizzle in the olive oil while whisking constantly. This helps combine the oil with the other ingredients, making it creamy and rich. - Now, incorporate the fresh basil. Gently fold in the finely chopped basil leaves. This adds a bright flavor and fresh aroma to your vinaigrette. - Taste for seasoning. Add salt and pepper to suit your taste. You can always adjust the sweetness or acidity as needed. - Allow the flavors to meld. Transfer the vinaigrette to an airtight container and let it sit for at least 10 minutes. This rest time lets all the flavors blend beautifully together. To make your lemon basil vinaigrette shine, focus on two main things: consistency and flavor balance. - Achieving the right consistency: A good vinaigrette should be smooth and slightly thick. Start by whisking your lemon juice and other liquid ingredients together. Gradually add olive oil while whisking. This helps the oil blend well, creating a creamy texture. If it’s too thin, add a touch more oil. If it’s too thick, a splash of water can help. - Adjusting sweetness and acidity: The balance of sweet and sour is key. If your vinaigrette is too tart, add a bit more honey or maple syrup. Taste as you go. It’s better to add small amounts rather than too much at once. This will keep your flavors vibrant and pleasing. Keeping your vinaigrette fresh is easy if you follow a few simple steps. - Best storage methods for freshness: Store your vinaigrette in an airtight container. Glass jars work well. Make sure to seal it tightly to keep out air and moisture. - Shelf-life of homemade vinaigrette: Your lemon basil vinaigrette can last up to a week in the fridge. After a few days, check for any changes in smell or texture. If you notice anything odd, it’s best to toss it. This zesty vinaigrette pairs well with many dishes. - Best salads to pair with vinaigrette: Use it on a simple green salad. It also tastes great drizzled over a tomato and mozzarella salad. For a heartier option, try it on a quinoa salad packed with veggies. - Creative uses beyond salads: You can use this vinaigrette as a marinade for grilled chicken or fish. It also works well drizzled over roasted vegetables or even as a dipping sauce for fresh bread. You can find the Full Recipe to make this delicious dressing and start enjoying these tips today! {{image_2}} You can give your lemon basil vinaigrette an exciting twist. Want a kick? Add a pinch of chili flakes. This small change brings heat and depth to your salad. If you want a creamy option, blend in some Greek yogurt or avocado. This creamy lemon basil dressing is rich and satisfying. If you follow a vegan diet, replace honey with maple syrup. This swap keeps the sweetness while staying plant-based. For those avoiding gluten, check your Dijon mustard. Most are gluten-free, but it’s smart to read labels. You can enjoy this vinaigrette with peace of mind. Don’t stop at lemon! Try lime or orange juice for a fresh spin. Lime adds a tangy flair, while orange gives sweetness. You can even mix citrus juices together. This combination creates a unique flavor that brightens your meals. Explore these options to find your favorite twist on this classic recipe. Store your lemon basil vinaigrette in an airtight container. This helps keep it fresh and tasty. Glass jars work great for this. They let you see the lovely color of the vinaigrette too. Make sure to seal the lid tightly. Refrigerate your vinaigrette right after you make it. Cold storage slows down spoilage. It also keeps the flavors bright and zesty. Homemade vinaigrette lasts about one week in the fridge. After that, it may start to lose its flavor. Check for signs of spoilage. If you see separation, that's normal. But if it smells off or looks strange, it's best to throw it out. You can use leftover vinaigrette in many ways. It makes a great marinade for meats or veggies. Just coat them in the vinaigrette and let them soak for a bit. You can also add it to grain bowls. Drizzle some over quinoa or brown rice for extra flavor. It brightens up the dish and adds a tasty twist. Don't forget to check the Full Recipe for more ideas on how to enjoy this vibrant dressing! To balance the acidity, add a touch of sweetness. Honey works well here. If you prefer a vegan option, use maple syrup instead. Start with a small amount, then taste and adjust. This will help round out the flavors and make your vinaigrette smoother. You can use dried basil, but the flavor will be different. Fresh basil has a bright and vibrant taste. Dried basil is more muted and less aromatic. If using dried, remember to use less. A general rule is to use one-third the amount of dried herbs as fresh. This vinaigrette shines on salads. Try it on a mixed green salad with tomatoes and cucumbers. It also makes a great dressing for grilled chicken or fish. Consider using it as a marinade for roasted veggies. The zesty flavor elevates any dish. Yes, this vinaigrette can be vegan-friendly. Use maple syrup instead of honey to keep it plant-based. All other ingredients are vegan. This makes it a versatile option for many diets. Enjoy it knowing it fits a variety of needs. For the full recipe, check the earlier section. Homemade lemon basil vinaigrette is simple to make and great for your health. We explored key ingredients, easy steps, and ways to customize your dressing. Remember the nutritional benefits of lemon and olive oil. You can mix in different herbs for fun flavors. Store it properly to enjoy longer. Use leftovers in marinades or grain bowls. With these tips, your vinaigrette will always impress. Enjoy the fresh taste and health benefits in every bite.

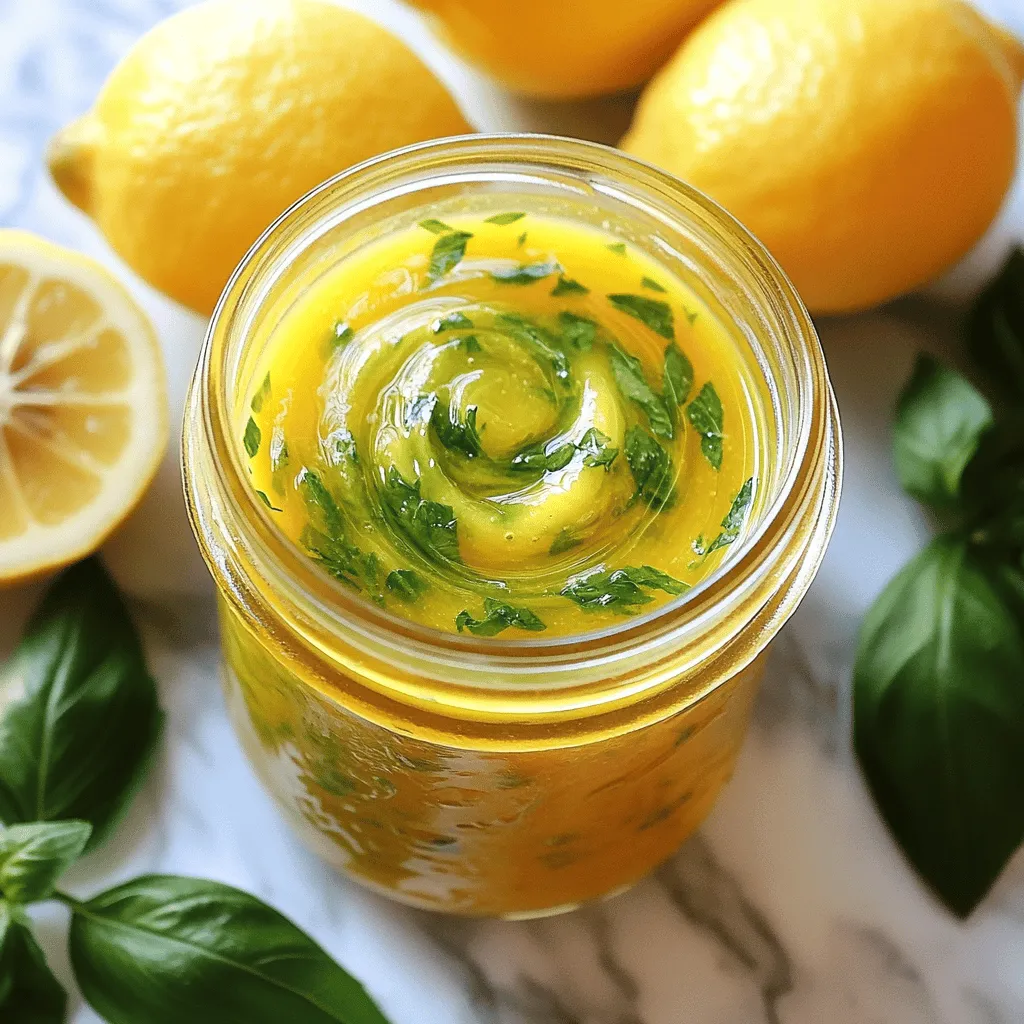
Looking to add a zesty boost to your salads? This Healthy Lemon Basil Vinaigrette is the answer! Packed with fresh flavors, it’s easy to make and bursting with health benefits. …

Read more

Categories Salads

Mini Pancake Fruit Stack Delightful Breakfast Recipe

July 23, 2025 by Chef Theo
To make mini pancakes, you need simple items. Here’s what you will need: - 1 cup all-purpose flour - 2 tablespoons sugar - 1 tablespoon baking powder - 1/2 teaspoon salt - 1 cup milk - 1 large egg - 2 tablespoons melted butter - 1/2 teaspoon vanilla extract These ingredients come together to create a light and fluffy pancake base. Start with dry ingredients in one bowl. Mix the wet ones in another. This keeps the batter smooth and tasty. Fresh fruit makes this dish special. You can use: - Strawberries - Blueberries - Banana slices - Kiwi Feel free to add other seasonal fruits too. Apples or peaches can work well. The bright colors and flavors make your stack pop! Toppings add sweetness and flair. Consider these options: - Maple syrup - Honey - Powdered sugar You can also add fresh mint leaves for a nice look. These small details make your mini pancake fruit stack even more delightful. The taste and look will impress anyone who sees it. You can find the Full Recipe for all steps needed to create this masterpiece! To make the batter, first, you need to blend the dry ingredients. In a large bowl, whisk together: - 1 cup all-purpose flour - 2 tablespoons sugar - 1 tablespoon baking powder - 1/2 teaspoon salt Next, in a different bowl, mix the wet ingredients. Combine: - 1 cup milk - 1 large egg - 2 tablespoons melted butter - 1/2 teaspoon vanilla extract Pour the wet mix into the dry mix. Stir gently until they blend. You want a few lumps, so don’t overmix. Now, heat your skillet over medium heat. Lightly grease it with butter or oil. This helps prevent sticking. For each mini pancake, pour about 2 tablespoons of batter onto the hot skillet. Cook for 1 to 2 minutes. You’ll see bubbles on the top. When this happens, it’s time to flip them. Cook for another 1 to 2 minutes until golden brown. Take 3 or 4 mini pancakes and stack them on a plate. In between each pancake, layer your choice of fresh fruits. Use strawberries, blueberries, banana slices, or kiwi for great flavors. Drizzle maple syrup or honey on top. For a fun touch, add more fruit and mint leaves for garnish. It makes the dish look pretty and taste great. This process brings your Mini Pancake Fruit Stack to life. You can find the Full Recipe for detailed instructions and tips. Enjoy your delicious breakfast! To make fluffy mini pancakes, avoid overmixing. Mix the batter until just combined. A few lumps are okay. Overmixing leads to tough pancakes. For even cooking, preheat your skillet. Use medium heat to ensure they cook through. Flip them when bubbles form on top. This timing helps your pancakes turn golden brown. Presentation matters! Use colorful plates to make your meal pop. Arrange the pancakes in a stack. Alternate layers of pancake and fruit for a fun look. You can also try different heights for your stacks. Top with mint leaves for a fresh touch. A light dusting of powdered sugar adds sweetness and flair. Have leftovers? You can warm them up easily. Place pancakes on a plate and cover with a damp paper towel. Microwave them for about 20-30 seconds. Serve your mini pancake stacks with yogurt or a side of fresh fruit. They pair well with crispy bacon or sausage for a hearty meal. {{image_2}} You can make your mini pancakes taste even better with a few spices. Adding a pinch of cinnamon gives a warm flavor. Nutmeg can also add a sweet touch. For a fun twist, try adding flavored extracts. Almond or orange zest can change the whole vibe. You don't have to stick with just fruit. Yogurt is creamy and makes a great layer. Whipped cream can add a light and fluffy feel. Chocolate sauce is a sweet treat that kids love. If you're looking for crunch, nut butters are a great option. Granola can also add texture and flavor. If you need to avoid gluten, you can use gluten-free flour. Many brands work well in pancakes. For those who prefer vegan options, you can replace the egg with flaxseed meal mixed with water. Use almond milk or oat milk instead of dairy milk. These swaps make it easy for everyone to enjoy this dish. To keep leftover pancakes fresh, use airtight containers. Glass or plastic containers work well. Make sure they cool down before sealing. Store pancakes in the fridge for up to three days. This keeps them soft and tasty. You can freeze mini pancakes for longer storage. Place them in a single layer on a baking sheet. Freeze for about an hour until firm, then transfer to a zip-top bag. This prevents pancakes from sticking together. To reheat, pop them in the toaster or microwave. They will taste almost fresh! If you have extra fruit, get creative! Use leftover fruits in smoothies or yogurt bowls. You can also top oatmeal or cereal with them. For an easy dessert, mix fruits with a little honey and yogurt. Your leftover toppings can also make a fun fruit salad. Enjoy experimenting with flavors! Yes, you can make mini pancakes in advance. To prepare, cook the pancakes as usual. Let them cool completely. After that, stack them with parchment paper between each pancake. This helps keep them from sticking. Place the stack in an airtight container. Store in the fridge for up to three days. You can also freeze them. Use a freezer-safe bag and separate each pancake with parchment paper. To stack pancakes nicely, choose a flat plate. Start with a mini pancake at the bottom. Add a layer of fruit, then another pancake. Repeat this process. Make sure each layer is aligned. Use fresh fruit to keep the stack stable. Drizzle syrup on top for a beautiful finish. This method gives a lovely look and makes it easy to serve. You can make mini pancakes healthier by reducing sugar. Try using mashed bananas or applesauce instead. You can also use whole wheat flour instead of all-purpose flour. This adds fiber and nutrients. You can swap out butter for yogurt for creaminess without extra fat. These changes keep the taste great while making them better for you. Mini pancakes taste great with many fruits. Strawberries and blueberries are classic choices. Bananas add a nice sweetness. Kiwi brings a tart flavor that pairs well too. You can mix and match fruits for variety. For seasonal options, use peaches in summer and apples in fall. These combinations enhance both flavor and color. Yes, you can use different types of flour. Almond flour is good for gluten-free diets. Oat flour adds a nice flavor and texture. Coconut flour absorbs more liquid, so use less. Each flour will change the pancake's texture slightly. Experiment with different flours to find your favorite. You can find the full recipe for Mini Pancake Fruit Stack by following this link: [Full Recipe]. It includes detailed instructions and tips to help you prepare this delightful dish. Now you know how to make delicious mini pancakes with fresh fruit. We covered the best ingredients, easy steps, and helpful tips to make your pancakes perfect. You can try different flavors and toppings to suit your taste. Don't forget to store leftovers properly for a tasty treat later. Enjoy stacking, serving, and sharing your mini pancake creations. With these ideas, you'll impress everyone at breakfast!

Are you ready to transform your breakfast routine? This Mini Pancake Fruit Stack is not just fun to make; it’s deliciously cute too! With fresh fruits and fluffy mini pancakes, …

Read more

Categories Breakfast

Apple Pie Cheesecake Bars Tasty and Easy Treat

July 23, 2025 by Chef Theo
To make these tasty apple pie cheesecake bars, you'll need: - 1 cup graham cracker crumbs - 1/2 cup unsalted butter, melted - 1/4 cup sugar - 2 (8 oz) packages cream cheese, softened - 1 cup sugar - 2 large eggs - 1 teaspoon vanilla extract - 2 cups apples, peeled and diced (preferably Granny Smith) - 1 teaspoon cinnamon - 1/4 teaspoon nutmeg - 1 tablespoon lemon juice - 1/4 cup brown sugar These ingredients blend together to create a rich and creamy dessert with a crunchy crust. You can add fun twists to your bars with these options: - Chopped nuts like walnuts or pecans for added crunch - A splash of caramel sauce swirled in for extra sweetness - A sprinkle of sea salt on top to enhance flavors - Different spices like ginger or allspice for a unique taste Feel free to experiment based on your taste! Each bar offers a balance of flavors and nutrients. Here’s a quick look: - Calories: 220 - Total Fat: 12g - Saturated Fat: 7g - Cholesterol: 70mg - Sodium: 150mg - Total Carbohydrates: 25g - Dietary Fiber: 1g - Sugars: 15g - Protein: 3g This information helps you enjoy your dessert while keeping track of your diet. For the full recipe, check the complete guide to make your own delicious apple pie cheesecake bars! Start by preheating your oven to 350°F (175°C). Take an 8x8 inch baking dish and line it with parchment paper. Leave some paper hanging over the edges to help lift the bars out later. In a medium bowl, mix together 1 cup of graham cracker crumbs, 1/2 cup of melted unsalted butter, and 1/4 cup of sugar. Stir until everything blends well. Press this mix firmly into the bottom of your baking dish. This forms a nice, sturdy crust. In a large bowl, beat 2 packages (8 oz each) of softened cream cheese with 1 cup of sugar. Mix until smooth and creamy. Add 2 large eggs one at a time, mixing well after each. Finally, stir in 1 teaspoon of vanilla extract to add flavor. Now, toss 2 cups of peeled and diced apples with 1 teaspoon of cinnamon, 1/4 teaspoon of nutmeg, 1 tablespoon of lemon juice, and 1/4 cup of brown sugar in a separate bowl. Make sure the apples get fully coated. Pour half of the cheesecake mixture over the cooled crust. Spread the spiced apples on top. Then, pour the rest of the cheesecake mixture over the apples. Bake the layered bars for 35-40 minutes. The center should be set but still have a slight jiggle. Once done, take them out and let them cool at room temperature. Refrigerate for at least 4 hours, or overnight if you can wait. When ready, lift the bars out using the parchment paper. Cut into squares and enjoy your delicious creation! For the full recipe, check the details above! Making apple pie cheesecake bars can be simple, but mistakes happen. Here are some common ones to watch for: - Not cooling the crust: If you skip cooling the crust, the cheesecake may not set well. - Overmixing the cream cheese: Mixing too much can add air and cause cracks. - Using unpeeled apples: Always peel your apples for a smoother texture. - Skipping the chilling time: This step is key for the best flavor and texture. To get the best results, follow these baking tips: - Preheat your oven fully: This ensures even baking from the start. - Use a water bath: Place your baking dish in a larger pan with water. This helps the cheesecake cook evenly. - Check for jiggle: The center should jiggle slightly when you take it out. It will firm up as it cools. - Avoid opening the oven door: This can cause temperature drops and lead to uneven baking. How you serve your bars can make a big difference. Here are some fun ideas: - Dust with powdered sugar: This adds a nice touch and looks pretty. - Garnish with apple slices: A fresh apple slice on top gives a lovely look. - Drizzle caramel sauce: This adds sweetness and richness to each bite. - Serve with whipped cream: A dollop of whipped cream makes it feel extra special. For the complete recipe, check out the Full Recipe link to get all the details! {{image_2}} You can switch up the flavor of these bars easily. Try using pumpkin for a fall twist. Simply add 1 cup of pumpkin puree to the cheesecake mix. This gives it a warm, spiced taste. For a caramel apple flavor, mix in some caramel sauce with the apples. It adds a sweet and rich layer to the bars. You can also drizzle more caramel on top before serving for extra sweetness. Making these bars gluten-free is simple. Replace graham cracker crumbs with gluten-free crumbs. Almond flour or gluten-free cookies work well. Use gluten-free oats for a different crust. Check the labels on sugar and other ingredients to ensure they are gluten-free. This way, everyone can enjoy the treat without worry. If you want to make these bars vegan, I have some easy swaps. Use vegan cream cheese instead of regular cream cheese. Replace the eggs with flax eggs; mix 1 tablespoon of ground flaxseed with 3 tablespoons of water, then let it sit. For the butter, use coconut oil or a vegan butter substitute. These swaps keep the taste rich and creamy while being plant-based. Enjoy your delicious vegan apple pie cheesecake bars! You can keep your apple pie cheesecake bars in an airtight container. Make sure to let them cool completely before covering. Store them in the fridge for up to five days. This helps keep the bars fresh and tasty. If you need to stack them, place parchment paper between layers. This prevents sticking and keeps the texture nice. If you want to save some for later, freezing is a great option. First, cut the bars into squares. Wrap each square tightly in plastic wrap. Then, place them in a freezer-safe bag or container. They can stay frozen for up to three months. When you’re ready to eat, just thaw them in the fridge overnight. To enjoy your bars warm, reheat them gently. Place a square in the microwave for about 10-15 seconds. Check to make sure it’s warm, not hot. This keeps the cheesecake creamy and the crust from getting too soft. Enjoy them fresh, just like when you first made them. For a special touch, add a drizzle of caramel sauce before serving! Yes, you can use different types of apples. Granny Smith apples work best due to their tartness. However, you can try Honeycrisp or Fuji apples for a sweeter touch. Each type will change the taste a bit. Mix and match apples for fun flavors. You can keep these bars in the fridge for up to five days. Make sure they are covered tightly. If you want to keep them longer, consider freezing them. They can last in the freezer for about three months. Absolutely! These bars are perfect for making ahead. You can bake them a day or two in advance. Just store them in the fridge until you are ready to serve. Chilling them will help the flavors blend. If your cheesecake doesn't set, it may need more time in the oven. Check if the center is jiggly but not liquid. If it is too soft, return it to the oven for five to ten more minutes. Cooling it in the fridge overnight can also help firm it up. This post covered all you need for apple pie cheesecake bars. We looked at key ingredients and how to mix them well. I shared step-by-step tips for a smooth bake and tasty results. You learned about fun variations and how to store leftovers. Try these bars for a sweet treat. With simple steps, you can impress your friends and family. Enjoy making and sharing this dessert!

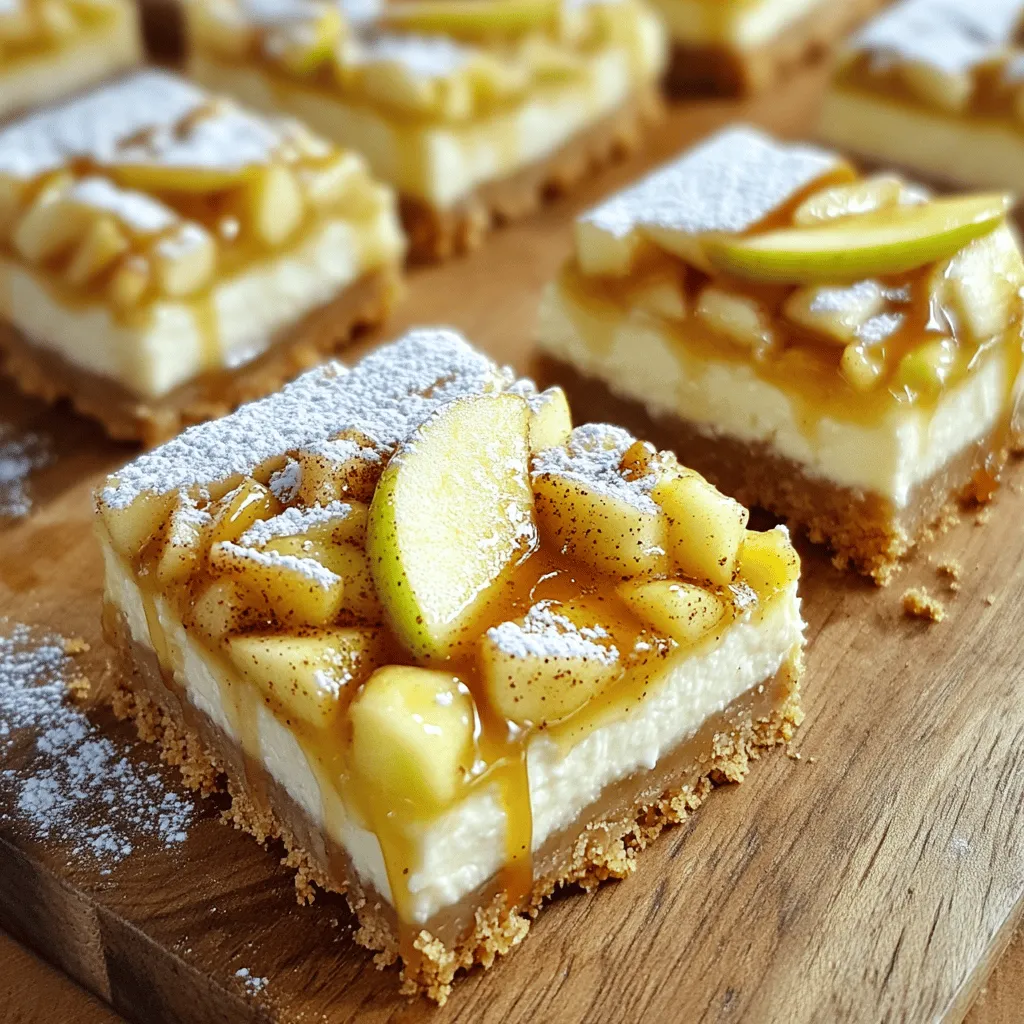
Looking for a simple yet tasty treat? You’ve found it with these Apple Pie Cheesecake Bars! Combining creamy cheesecake with sweet, spiced apple filling, these bars will delight everyone. Plus, …

Read more

Categories Desserts

Pumpkin Dream Cupcakes Irresistible Fall Delight

July 23, 2025 by Chef Theo
- 1 ½ cups all-purpose flour - 1 teaspoon baking powder - 1 teaspoon baking soda - ½ teaspoon salt - 1 teaspoon ground cinnamon - ½ teaspoon ground nutmeg - ½ teaspoon ground ginger - ½ cup unsalted butter, softened - 1 cup granulated sugar - 2 large eggs - 1 cup canned pumpkin puree - ½ cup buttermilk - 1 teaspoon vanilla extract - 1 cup cream cheese frosting (store-bought or homemade) - Optional: crushed pecans for topping I love using fresh, quality ingredients. They make a big difference in flavor and texture. For the dry mix, I start with all-purpose flour. It gives a nice structure to the cupcake. Baking powder and baking soda help the cupcakes rise. Salt enhances the sweet and spicy notes. I use ground cinnamon, nutmeg, and ginger for that warm fall flavor. For wet ingredients, softened unsalted butter is key. It mixes well with sugar for a lovely creamy base. The canned pumpkin puree adds moisture and a rich taste. Buttermilk makes the cupcakes tender and fluffy. I always add a splash of vanilla extract for a fragrant touch. Finally, the cream cheese frosting is a must. It adds a tangy sweetness that pairs perfectly with the pumpkin. Optional crushed pecans give a lovely crunch and extra flavor. Follow the [Full Recipe] for a detailed guide on how to make these cupcakes. First, preheat your oven to 350°F (175°C). This helps your cupcakes bake evenly. Next, line a standard muffin tin with cupcake liners. This makes clean-up easy and keeps cupcakes from sticking. In a medium bowl, whisk together the dry ingredients: - 1 ½ cups all-purpose flour - 1 teaspoon baking powder - 1 teaspoon baking soda - ½ teaspoon salt - 1 teaspoon ground cinnamon - ½ teaspoon ground nutmeg - ½ teaspoon ground ginger Set this aside for later. In a large mixing bowl, cream the softened butter and sugar together. Use a hand mixer for about 2-3 minutes. This step makes the mixture light and fluffy. Then, add the eggs one at a time, mixing well after each addition. This ensures a smooth batter. Next, stir in the pumpkin puree, buttermilk, and vanilla extract. Mix until everything combines well. It should look rich and creamy. Now, gradually add your dry ingredients to the wet mixture. Mix gently until just combined. Be careful not to overmix, as this can make cupcakes tough. Divide the batter evenly among the cupcake liners, filling each about two-thirds full. Bake in the preheated oven for 18-20 minutes. To check if they’re done, insert a toothpick in the center. If it comes out clean, they’re ready. Remove the cupcakes from the oven and let them cool in the pan for 5 minutes. Then, transfer them to a wire rack to cool completely. Once cool, frost with cream cheese frosting and sprinkle with crushed pecans if you like. These steps will make your Pumpkin Dream Cupcakes truly irresistible. For a complete guide, refer to the Full Recipe. To make perfect Pumpkin Dream Cupcakes, avoid overmixing. When you combine wet and dry ingredients, stir just until you see no flour. This keeps the cupcakes soft. The best temperature for butter is room temperature. Softened butter blends well with sugar, creating a fluffy mix. To soften butter quickly, cut it into small pieces. You can also microwave it for a few seconds, but watch closely. To frost evenly, use a knife or a spatula. Start in the center and spread out. This method gives a smooth finish. You can also use a piping bag for fun designs. For creative garnishes, consider crushed pecans or a sprinkle of cinnamon. You can also add a drizzle of caramel sauce for extra sweetness. Get creative with toppings that match your taste. For the best pairing, serve these cupcakes with warm cider or a spiced latte. The warm flavors enhance the pumpkin taste. For gatherings, arrange cupcakes on a pretty platter. A sprinkle of cinnamon or melted white chocolate on top adds a nice touch. This makes them look fancy and inviting. For the full recipe, check out the complete details earlier. {{image_2}} To make Pumpkin Dream Cupcakes even better, try adding chocolate chips. They add a sweet twist to the warm spices. Use about ½ cup of semi-sweet chips. Fold them in gently at the end, just before baking. You can also play with the spices. Add more cinnamon or even a pinch of allspice. This gives your cupcakes a unique flavor. If you need gluten-free options, swap the all-purpose flour for a gluten-free blend. Make sure the blend works for baking. For a dairy-free version, use a dairy-free butter and almond milk instead of buttermilk. You can also find dairy-free cream cheese for frosting. These changes make the recipe friendly for more diets. Cream cheese frosting is classic, but you can try other frostings too. A vanilla buttercream adds a sweet touch. For a twist, use maple frosting. Simply add maple syrup to your buttercream. Another idea is using whipped cream, which keeps it light and airy. You can even blend in flavors like pumpkin spice or chocolate for more variety. You can store your Pumpkin Dream Cupcakes on the counter or in the fridge. If you choose the counter, keep them in a container with a lid. This keeps them fresh for about three days. If you prefer the fridge, use an airtight container. This option can make the cupcakes last up to a week. To freeze your cupcakes, first wrap them tightly in plastic wrap. Then, place them in a freezer bag or airtight container. This method helps prevent freezer burn. When you want to enjoy them, take them out and let them thaw in the fridge overnight. You can also let them sit at room temperature for a few hours. The ideal storage time in the freezer is up to three months. To check freshness, look for any signs of mold or an off smell. If the cupcakes seem dry or crumbly, they may not taste good. I recommend eating them within a week for the best flavor. However, if frozen, enjoy them within three months for the best taste and texture. For the full recipe, refer back to the earlier section. To keep your cupcakes moist, use the right amount of oil or butter. Adding pumpkin puree helps, too. Mix the batter gently. Overmixing can make them dry. Always bake them until just done. Use a toothpick to check for doneness. If it comes out clean, they're ready! Yes, you can use fresh pumpkin. First, cook it until soft. Then, mash it well. Drain any excess water. This way, it mimics the canned version. It may take more time, but the flavor is worth it. Store leftover cupcakes in an airtight container. Keep them at room temperature for up to three days. If you need to store them longer, refrigerate them. Just make sure they are covered. Frosting can harden in the fridge. Absolutely! To freeze, let them cool completely. Wrap each cupcake in plastic wrap. Place them in a freezer bag. They will stay fresh for up to three months. Thaw them in the fridge before serving. Cream cheese frosting pairs great with pumpkin flavors. Its tangy taste balances the sweetness. You can use store-bought or homemade. Other options include whipped cream or maple frosting. Frost them with a piping bag for a nice touch. You can also sprinkle crushed pecans on top. A drizzle of caramel or melted chocolate adds charm. Use seasonal decorations like small pumpkins for a fun look. Yes, adding nuts or chocolate chips can enhance flavor. Fold them into the batter before baking. Just be mindful not to add too many. This keeps the cupcakes light and fluffy. You can make a quick substitute. Mix one cup of milk with one tablespoon of vinegar or lemon juice. Let it sit for five minutes. This gives you a buttermilk alternative with similar acidity. This recipe yields 12 cupcakes. If you want more, you can double the ingredients. Just make sure to adjust baking time if necessary. Serve them on a nice platter. You can garnish with a sprinkle of cinnamon. A drizzle of melted chocolate also adds flair. Pair them with coffee or tea for a cozy treat. This blog post shared a simple guide to making delicious cupcakes. We covered key ingredients, including spices and toppings. The step-by-step instructions help you mix and bake with ease. Tips and tricks ensure perfect results every time. You can explore flavor variations and storage methods. Remember, creativity matters! Enjoy sharing these treats with friends and family. Trust that these cupcakes will impress and satisfy everyone. Keep baking and have fun experimenting!

Get ready to indulge in the cozy flavors of fall with my Pumpkin Dream Cupcakes! These treats are soft, spiced, and topped with creamy frosting. They make the perfect dessert …

Read more

Categories Desserts

Rice Patties Flavorful and Easy Recipe Guide

July 23, 2025 by Chef Theo
The main ingredients for rice patties include: - 2 cups cooked jasmine rice (or any rice of choice) - 1/2 cup grated mozzarella cheese - 1/4 cup fresh parsley, finely chopped - 1/4 cup green onions, finely chopped - 1/2 teaspoon garlic powder - 1/2 teaspoon onion powder - 1/2 teaspoon paprika - Salt and pepper to taste - 1/2 cup all-purpose flour (or gluten-free flour) - 1 large egg, beaten - Olive oil (for frying) Choosing the right rice is key. Jasmine rice gives a nutty flavor and sticky texture. Basmati rice adds a light, fluffy feel. Both options work well, so pick what you like best! You can add more flavor with herbs and spices. Consider these options: - Fresh basil or cilantro for a twist - Spices like cumin or curry powder for warmth If you want to change the cheese, use alternatives like cheddar or vegan cheese. For dietary needs, replace the egg with a flaxseed mix or unsweetened applesauce. This keeps the patties together while being egg-free. For the full recipe, check the Crispy Herb-Infused Rice Patties section. Enjoy making these tasty bites! Start by taking a large bowl. Combine the cooked rice, mozzarella cheese, parsley, green onions, garlic powder, onion powder, paprika, salt, and pepper in the bowl. Mix everything well. You want the ingredients to blend together nicely. For the right texture, add flour gradually. If the mixture feels too wet, add a bit more flour. You should be able to form it into a patty without it falling apart. It should feel sticky but not too wet. Now, shape the mixture into patties. Each patty should be about 2 inches wide and 1/2 inch thick. Press them firmly to hold together. This step ensures they fry well without breaking apart. Next, dip each patty into the beaten egg. Make sure each one is fully coated. This coating helps the patties get crispy when frying. If you want an extra crunch, you can coat them in breadcrumbs after the egg dip. For frying, use a non-stick skillet. Heat a generous amount of olive oil over medium heat. The oil should shimmer but not smoke. Cook the patties in batches. This avoids overcrowding, which can lead to steaming instead of frying. Fry each side for about 3-4 minutes. You want them golden brown and crispy. Once done, place them on a plate lined with paper towels. This helps absorb any extra oil. For a full recipe, you can refer to the detailed instructions provided above. Enjoy your rice patties warm! To make great rice patties, you need to adjust your ingredients based on the rice type. Jasmine rice gives a soft texture, while basmati adds a nutty flavor. If you use brown rice, add a bit more moisture. This will help create the best texture for your patties. Preventing your rice patties from falling apart is key. Make sure to mix the rice and other ingredients well. Adding enough flour helps bind them. If you find the mixture too loose, add a bit more flour. If it's too dry, add a splash of water or an extra egg. Pair your rice patties with tasty dipping sauces. I love serving them with sweet chili sauce or a creamy garlic dip. You can also try soy sauce mixed with sesame oil for an extra kick. For serving sizes, I recommend two patties per person as an appetizer. They are perfect for parties, game days, or family gatherings. You can even serve them as a main dish with a side salad. Check out the Full Recipe for more ideas! {{image_2}} You can easily change the taste of your rice patties. Adding vegetables and proteins makes them more fun. Try mixing in bell peppers, spinach, or corn. These veggies add color and flavor. You can also include cooked chicken, shrimp, or tofu for more protein. Different cuisines offer exciting flavor profiles. For a Mediterranean twist, add feta cheese and olives. For an Asian flair, use soy sauce and green onions. You can even make spicy patties with chili flakes or sriracha. The options are endless! Making your rice patties gluten-free is simple. Just swap regular flour with gluten-free flour. Many brands offer good substitutes. This way, everyone can enjoy them. If you're vegan, you can replace the egg and cheese. Use flaxseed meal mixed with water as an egg substitute. For cheese, try vegan cheese or nutritional yeast. Both options give a nice flavor and texture. These changes make it easy to cater to different diets. For the full recipe, check out the Crispy Herb-Infused Rice Patties section. To keep your leftover rice patties fresh, place them in an airtight container. Refrigerate them for up to three days. If you want to store them longer, freezing is a great option. Wrap each patty in plastic wrap, then place them in a freezer bag. You can freeze them for up to three months. This method helps preserve their flavor and texture. When it's time to enjoy your rice patties again, reheating properly is key. The best method is to use a skillet. Heat a bit of olive oil over medium heat and add the patties. Cook for about two to three minutes on each side. This keeps them crispy. To avoid sogginess, do not cover the skillet while cooking. You can also use an oven. Preheat it to 350°F (175°C) and bake them for about 10 minutes. This method also helps retain that delightful crunch. What is the best type of rice for patties? The best type of rice for patties is jasmine rice. It is sticky and gives the patties a nice texture. You can also use basmati or short-grain rice. If you prefer, try brown rice for a healthier option. Each type will affect the flavor and texture, so choose what you enjoy most. Can rice patties be made in advance? Yes, you can make rice patties in advance. Form the patties and refrigerate them for up to a day. When you are ready to cook, simply fry them as directed. This saves time for busy days or gatherings. How long do rice patties take to cook? Rice patties take about 6 to 8 minutes to cook. Fry each side for about 3 to 4 minutes until they turn golden brown. Make sure the oil is hot enough for that perfect crisp. Can I bake rice patties instead of frying? Yes, you can bake rice patties! Preheat your oven to 400°F (200°C). Place the patties on a baking sheet lined with parchment paper. Bake for 15 to 20 minutes, flipping halfway through. This method is healthier and still gives great results. Are rice patties healthy? Rice patties can be healthy, especially if you use whole grains and fresh herbs. They provide carbs and can be rich in flavor without too many added fats or sugars. Add veggies or lean proteins for added nutrition. Caloric content per serving? Each serving of rice patties contains about 200 to 250 calories. This can vary based on the ingredients and cooking method you choose. Check the Full Recipe for more details on nutritional content and portion sizes. Rice patties are simple and fun to make. You learned about key ingredients, like rice choice and optional spices. The guide covered shaping techniques and cooking methods for the best crispiness. We shared tips on perfecting texture and serving ideas too. When making rice patties, get creative. Try new flavors or dietary swaps. Find what works best for you, and enjoy these tasty treats. With practice, you’ll impress everyone at the table. Happy cooking!

If you’re on the hunt for a delicious, easy-to-make dish, rice patties are your answer. In this guide, I’ll show you how to whip up flavorful rice patties using simple …

Read more

Categories Appetizers

Hatch Chile Queso Bold and Creamy Dip Recipe

July 23, 2025 by Chef Theo
To make the bold and creamy Hatch Chile Queso, you will need a few key ingredients. Here's the list: - 2 cups shredded sharp cheddar cheese - 1 cup cream cheese, softened - 1 cup heavy cream - 1 cup roasted hatch chiles, chopped - 1/2 cup diced tomatoes - 1/4 cup onion, finely chopped - 2 cloves garlic, minced - 1 teaspoon ground cumin - 1/2 teaspoon smoked paprika - Salt and pepper to taste - Fresh cilantro for garnish - Tortilla chips for serving Each ingredient plays a big role in the final taste. The sharp cheddar adds a rich flavor, while the cream cheese makes it super creamy. The roasted hatch chiles give it a unique kick that you will love. If you want to learn more about how these flavors blend, check out the Full Recipe. It will guide you through the magic of making this dip! - Start by heating a medium saucepan over medium heat. - Add 1/4 cup of finely chopped onion and 2 cloves of minced garlic. Sauté for about 3-4 minutes until the onions turn soft and smell great. - Next, add 1/2 cup of diced tomatoes and 1 cup of chopped hatch chiles to the pan. Stir everything well and cook for another 2-3 minutes. - Now, reduce the heat to low and mix in 1 cup of softened cream cheese. Stir until it melts and blends into the mix. - Gradually pour in 1 cup of heavy cream while stirring constantly. Keep mixing until the sauce is smooth and creamy. - Add in 2 cups of shredded sharp cheddar cheese. Also, mix in 1 teaspoon of ground cumin and 1/2 teaspoon of smoked paprika. - Season the mixture with salt and pepper to taste. Keep stirring until the cheese fully melts and the queso is creamy. - Once done, remove it from heat and let it cool a bit before serving. You can find the full recipe with more details on preparation and serving. Enjoy your delicious Hatch Chile Queso! To avoid clumps in your queso, stir the cheese slowly and gently. This helps it melt evenly. Always keep the heat low when adding cheese. High heat can cause clumping. Also, make sure your cream cheese is soft. It blends better when it’s at room temperature. To maintain creaminess, add the heavy cream slowly. Mix it in bit by bit. This helps the cheese melt smoothly without getting gritty. If your queso seems too thick, add a splash more cream until it’s just right. For the best accompaniments, serve your queso with crispy tortilla chips. They add a nice crunch. You can also pair it with fresh veggies like carrots and celery. Sliced jalapeños can kick it up a notch if you like heat. Presentation is key! Serve the queso in a warm bowl. Surround it with tortilla chips for a colorful display. You can sprinkle extra cheese or chopped cilantro on top. This adds a nice touch and makes it look even more inviting. Enjoy your creamy Hatch Chile Queso! {{image_2}} You can switch up the cheese in this recipe. Try Monterey Jack for a milder flavor. If you want a bolder taste, use pepper jack cheese. You can even mix cheeses for a unique twist. For veggies, feel free to add bell peppers or corn. These choices bring more color and flavor. For a heartier dip, include black beans or cooked chorizo. They add texture and taste. To make your queso a bit spicier, add sliced jalapeños. You can mix them in or use them as a topping. Fresh jalapeños give a nice crunch and heat. Adjust the spice level by adding more or less hatch chiles. If you want it milder, remove the seeds. If you like it hot, keep the seeds in. This way, you control the heat just how you like it! To keep your Hatch Chile Queso fresh, store it properly. First, let it cool completely. Then, transfer it to an airtight container. Place it in the fridge for up to five days. If you want to keep it longer, freeze it. Just pour the cooled queso into a freezer-safe container. Leave some space at the top for expansion. You can freeze it for up to three months. When it's time to enjoy your queso again, reheating is key. To restore creaminess, add a splash of milk or cream. This helps it regain its smooth texture. Use low heat on the stove or microwave. Stir it often to prevent burning. For the stove, heat in a saucepan on low. Stir until it's warm. If using a microwave, heat in short bursts, stirring in between. This keeps it creamy and delicious. Hatch chiles are a special type of green chile. They come from Hatch, New Mexico. They have a unique flavor that is both sweet and spicy. You can taste roasted notes, too. You can find Hatch chiles in many grocery stores, especially in late summer. Look for them in the produce section. If you can't find fresh ones, canned Hatch chiles work well, too. Yes, you can make queso ahead of time. Just prepare the queso and let it cool. Store it in an airtight container in the fridge. It stays good for about three days. When you want to eat it, just reheat it on the stove. Stir it often so it doesn’t stick. To make your queso spicier, add more Hatch chiles. You can also mix in diced jalapeños or hot sauce. Start with a small amount and taste as you go. Be careful not to add too much heat at once. You can always add more if needed. For the complete steps and ingredient list, check out the Full Recipe. You will find all you need to make this tasty dip. This blog post covered making delicious Hatch Chile Queso. We explored key ingredients, from creamy cheeses to flavorful chiles. I shared simple steps for a perfect blend and tips to avoid clumps. You can customize the dish with different cheeses or spices. Remember, storing and reheating properly keeps it creamy and tasty. Enjoy this cheesy dip at your next gathering, knowing you have the skills to impress!

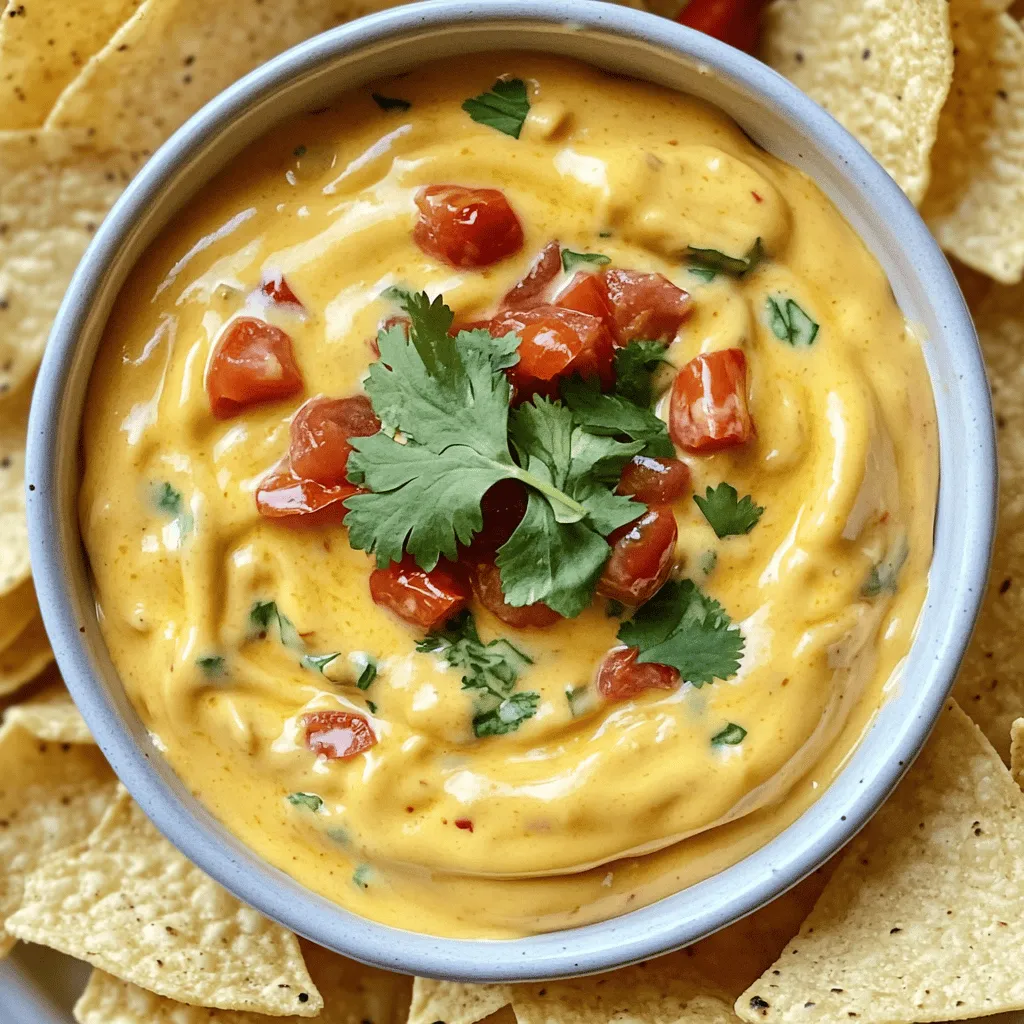
Get ready to elevate your snack game with my bold and creamy Hatch Chile Queso! This dip is rich, cheesy, and packed with the smoky flavors of roasted hatch chiles. …

Read more

Categories Appetizers

Broccoli Cheese Pinwheels Tasty and Easy Snack Recipe

July 23, 2025 by Chef Theo
To make these tasty broccoli cheese pinwheels, you need: - 1 cup fresh broccoli florets, chopped - 1 cup shredded cheddar cheese - 1/2 cup cream cheese, softened - 1/4 cup grated Parmesan cheese - 1 tsp garlic powder - Salt and pepper to taste - 1 large tortilla wrap (whole wheat or regular) - 1/2 cup shredded carrots (optional) - Olive oil (for brushing) You can switch up the ingredients to suit your taste. Use any cheese you love, like mozzarella or pepper jack. If you want a healthier option, try using a whole wheat tortilla or a gluten-free one. You can also add other veggies, like spinach or bell peppers. For extra flavor, toss in some herbs or spices. When picking broccoli, look for bright green florets with no yellowing. The stems should feel firm. For cheese, choose blocks over pre-shredded, as they melt better. Check the expiration date on cream cheese. Fresh ingredients make a big difference in taste. Always select the best for your pinwheels. First, gather all your ingredients. You need fresh broccoli, cheddar cheese, cream cheese, Parmesan cheese, garlic powder, and a tortilla wrap. This recipe takes about 30 minutes from start to finish. You will have a tasty snack ready in no time. 1. Preheat the Oven: Set your oven to 375°F (190°C). This step is key for even cooking. 2. Steam the Broccoli: Place the chopped broccoli in a steaming pot. Steam it for 3-4 minutes. It should turn bright green and be tender. After steaming, let it cool for a few minutes. 3. Mix the Cheese: In a bowl, combine softened cream cheese, shredded cheddar, grated Parmesan, garlic powder, salt, and pepper. Mix until it’s all smooth. 4. Combine Ingredients: Add the cooled broccoli to the cheese mixture. If you want more color and crunch, add shredded carrots. Mix until everything is well-coated. 5. Prepare the Tortilla: Lay the tortilla flat on a clean surface. Spread the broccoli cheese mixture evenly over the tortilla. 6. Roll It Up: Start from one end and roll the tortilla tightly. Make sure the filling stays inside as you roll. 7. Slice the Pinwheels: Cut the rolled tortilla into 1-inch thick slices. You should get about 12-15 pinwheels. 1. Arrange on Baking Sheet: Place the pinwheels on a lined baking sheet. 2. Brush with Olive Oil: Lightly brush the tops of the pinwheels with olive oil. This helps them crisp up. 3. Bake: Put the baking sheet in the preheated oven. Bake for 10-12 minutes. The cheese should melt and the edges should turn golden. 4. Cool and Serve: Take the pinwheels out of the oven. Let them cool for a couple of minutes. Serve warm for the best taste. For the full recipe, you can refer to our earlier section to ensure all steps are clear. Enjoy your delicious broccoli cheese pinwheels! To make the best broccoli cheese pinwheels, start with fresh ingredients. The broccoli should be bright green and crisp. Chop it finely to mix well with the cheeses. Use softened cream cheese for easy spreading. This is key for a smooth texture. Spread the cheese mixture evenly on the tortilla. Roll it tightly but gently. This keeps the filling inside and helps with slicing. A sharp knife works best for cutting the pinwheels. Aim for 1-inch slices for a good bite size. One mistake is overcooking the broccoli. Steaming it for just 3-4 minutes keeps it bright and crunchy. Another error is using too much filling. If you overstuff, the pinwheels can fall apart. Also, avoid using cold cream cheese. Always let it soften first. Lastly, don’t skip brushing olive oil on top. This helps the pinwheels brown nicely in the oven. For a great look, serve the pinwheels on a large platter. Add a sprinkle of extra Parmesan cheese on top for flair. Fresh broccoli florets can add color and freshness. You can even arrange them like a flower. This makes your dish pop and look inviting. For extra fun, serve with a colorful dip on the side. This makes it more appealing and interactive for your guests. Enjoy creating your masterpiece! {{image_2}} You can change up your broccoli cheese pinwheels with fun add-ins. Try adding cooked bacon for a smoky flavor. You can also mix in sun-dried tomatoes for a pop of color and taste. For a spicy kick, add some diced jalapeños. If you want extra veggies, consider spinach or bell peppers. These small changes can make a big difference in taste. Don't be afraid to experiment! If you need gluten-free pinwheels, use a gluten-free tortilla. For a vegan version, swap out the cheese for vegan cheese. You can also use a nut-based cream cheese. This way, everyone can enjoy these tasty snacks. Adjusting the recipe helps make it fit your needs while keeping the flavor strong. Serve your pinwheels warm or cold. They taste great either way! Arrange them on a platter for a fun party snack. Pair them with your favorite dips, like ranch or salsa. You can also serve them with a fresh salad for a light meal. Don’t forget to garnish with extra cheese or broccoli florets for a nice touch. For the full recipe, check out the details above! To keep your broccoli cheese pinwheels fresh, store them in an airtight container. Place a paper towel inside the container to absorb moisture and keep the pinwheels crisp. They can last in the fridge for up to three days. If you want to enjoy them later, it’s best to freeze them. To freeze the pinwheels, first, slice them and place them on a baking sheet. Make sure they are not touching. Freeze them for about one hour until solid. Then, transfer them to a freezer bag or container. This method helps keep their shape. You can freeze them for up to three months. When you're ready to eat the pinwheels, preheat your oven to 350°F (175°C). Place the pinwheels on a baking sheet and cover them loosely with foil. Heat them for about 10-15 minutes. This helps them warm through without drying out. You can also microwave them for a quick option, but they may lose some crispness. Enjoy your tasty snack! If you want the full recipe for these delicious pinwheels, check out the [Full Recipe]. Broccoli cheese pinwheels last about 3 to 4 days in the fridge. Keep them in an airtight container. This helps keep them fresh and tasty. If you notice any changes in smell or texture, it's best to toss them. Yes, you can make these pinwheels ahead of time. Prepare them a day before serving. Just wrap them tightly and place them in the fridge. When you're ready, bake them for a quick snack. Absolutely! You can use many types of cheese. Try mozzarella for a milder taste or pepper jack for some heat. Mixing cheeses can add fun flavors to your pinwheels. Great dips include ranch, sour cream, or even a spicy salsa. You can also try a creamy garlic dip for a rich flavor. These dips complement the cheesy taste well and make snacking even better. This article covered everything you need for broccoli cheese pinwheels. We discussed key ingredients, cooking steps, tips, and variations. You learned how to avoid common pitfalls and make your pinwheels shine. Remember to store any leftovers properly for later enjoyment. Experiment with flavors and adaptations to suit your taste. With these insights, you can create tasty pinwheels that impress everyone at your next gathering. Happy cooking!

Are you ready to try a fun, tasty snack? Broccoli Cheese Pinwheels are super easy to make and perfect for any time. With fresh broccoli and gooey cheese wrapped in …

Read more

Categories Appetizers

Pumpkin Cake with Caramel Cream Cheese Frosting Delight

July 23, 2025 by Chef Theo
- 2 cups all-purpose flour - 1 ½ teaspoons baking powder - 1 teaspoon baking soda - 1 teaspoon ground cinnamon - ½ teaspoon ground nutmeg - ½ teaspoon ground ginger - ½ teaspoon salt - 1 cup granulated sugar - ½ cup brown sugar, packed - 1 cup vegetable oil - 4 large eggs - 1 cup canned pumpkin puree - 1 teaspoon vanilla extract - 8 oz cream cheese, softened - ½ cup unsalted butter, softened - 2 cups powdered sugar - ½ cup caramel sauce - A pinch of sea salt Gathering the right ingredients is key to making this pumpkin cake shine. You start with the dry ingredients. The blend of flour, baking powder, baking soda, and spices creates a warm, inviting aroma. The sugar adds sweetness, while the pumpkin puree gives moisture and flavor. Next, we have wet ingredients. The combination of granulated sugar and brown sugar makes the cake moist and rich. The vegetable oil keeps it soft, and eggs add structure. Canned pumpkin puree provides the beloved pumpkin flavor. Don't forget the vanilla extract for that extra touch. Finally, we prepare the frosting. Cream cheese and butter combine for a creamy base. Add powdered sugar to sweeten the mix, and caramel sauce brings in that delightful sweetness. The pinch of sea salt balances the flavors. You can find the full recipe to see how these ingredients come together perfectly! - Preheat the oven to 350°F (175°C). - Grease and flour two 9-inch round cake pans. Getting the oven ready is the first step. This ensures your cake rises and bakes evenly. Greasing and flouring the pans helps prevent sticking. Use a bit of butter or oil to grease, and flour works great for dusting. - Combine dry ingredients in a bowl. - Mix sugars and oil in a separate bowl. In a medium bowl, mix the dry ingredients. This includes the flour, baking powder, baking soda, spices, and salt. Whisk them well to break up lumps. In another large bowl, combine the granulated sugar, brown sugar, and vegetable oil. Use an electric mixer to blend them until smooth. This gives your cake a nice, sweet flavor. - Add eggs and pumpkin, combine well. - Gradually mix in dry ingredients, then bake for 25-30 minutes. Now, add the eggs one at a time to the sugar mixture. Mix well after each addition. Then add in the pumpkin puree and vanilla extract. This adds moisture and flavor. Gradually add the dry ingredients to this mixture. Use a spatula to fold it gently. This helps keep your cake fluffy. Pour the batter into the prepared pans and smooth the tops. Bake them for 25-30 minutes. To check if they are done, insert a toothpick in the center. If it comes out clean, your cakes are ready! Let them cool in the pans for about 10 minutes before moving them to wire racks. This helps them cool completely and makes it easier to frost. For the complete recipe, be sure to check out the Full Recipe section. To make a fluffy pumpkin cake, avoid over-mixing. When you combine the wet and dry ingredients, be gentle. Just mix until you see no dry flour. Also, using room temperature ingredients is key. If your eggs and pumpkin puree are warm, they blend better, making your cake rise well. For a smooth frosting, use softened cream cheese and butter. This helps the frosting blend nicely. If your frosting is too soft, chill it for a short time. This makes it easier to spread on the cake without dripping. Serve your cake slices on white plates. The bright color of the cake stands out against white. Drizzle caramel sauce over each slice for an added touch. You can also garnish with fresh mint leaves. They add a nice pop of color and freshness. For extra flair, sprinkle some crushed nuts or cinnamon on top. These small touches make your cake look and taste fantastic. For the complete recipe, check out the Full Recipe. {{image_2}} You can make your pumpkin cake even tastier! To do this, add more cinnamon or nutmeg. Just a teaspoon more can boost the flavor. If you enjoy deeper spices, incorporate some ground cloves. This spice adds warmth and richness that pairs well with pumpkin. Want to make a healthier version of this cake? Substitute brown sugar with coconut sugar. This swap gives you a lower glycemic index and a hint of caramel flavor. You can also use Greek yogurt instead of cream cheese for the frosting. This change adds protein and cuts some fat while keeping it creamy. Add-ins can make your cake special! You might include chopped nuts, like walnuts or pecans, right in the batter. They add crunch and flavor. You can also toss in chocolate chips for a sweet twist. For a fun finish, top your cake with grated chocolate or toffee bits. These will give your cake extra texture and make it even more delightful. For the complete recipe, check out the Full Recipe. You can keep leftover pumpkin cake in an airtight container. It will stay fresh at room temperature for up to 2 days. If you want to keep it longer, refrigerate it. The cake will last in the fridge for up to a week. Just make sure to seal it well to keep the moisture in. If you have more cake than you can eat, freezing is a great option. Wrap each layer of the cake in plastic wrap. This will help keep it fresh. You can freeze them for up to 3 months. When you’re ready to enjoy the cake again, thaw the layers in the fridge. Let them warm up before frosting and serving for the best taste. If you want a warm slice of cake, reheating is easy. You can microwave individual slices for a few seconds. This warms the cake without drying it out. If you prefer, you can also warm it briefly in the oven. Just pop it in at a low heat. This will help refresh the cake's texture, making it taste freshly baked again. For the full recipe, check out the Pumpkin Spice Delight Cake. Yes, but ensure it is well-pureed and drained of excess moisture. Fresh pumpkin can bring a vibrant flavor to your cake. Start with a small pumpkin, roast it, and scoop out the soft flesh. Blend it until smooth. This step helps achieve the right texture in your cake. Add more powdered sugar gradually until the desired consistency is reached. Start with half a cup and mix it in well. If it’s still too thin, keep adding until you get that fluffy, thick texture. This icing should hold its shape well on the cake. Store-bought works well, but homemade caramel can enhance flavor. If you have time, try making your own. It’s simple and offers a deeper taste. Just melt sugar, add cream, and stir until smooth. Homemade caramel adds a special touch to your frosting. Substitute flour with a gluten-free blend for a gluten-free version. Many blends work well, but make sure to check for a mix that contains xanthan gum. This will help with the texture and keep your cake moist and delicious. This blog post covers a tasty cake recipe from start to finish. We discussed the dry and wet ingredients needed, and how to mix and bake the cake perfectly. I shared tips to keep your cake fluffy and how to create smooth frosting. You can make fun variations to suit your taste and enjoy easy storage tips for leftovers. Try this recipe for a delightful dessert. Simple steps make tasty results. Happy baking!

Craving a sweet treat that captures fall in every bite? This Pumpkin Cake with Caramel Cream Cheese Frosting is your answer! With warm spices and a rich, creamy topping, it’s …

Read more

Categories Desserts
Older posts
Newer posts
← Previous Page1 … Page10 Page11 Page12 … Page94 Next →

TOASTED RECIPES

Where ideas are warm, crisp, and ready to serve! 🍞

PAGES

Home About Contact Privacy Policy Terms & Conditions Cookie Policy GDPR Policy Copyright Policy Disclaimer

CATEGORIES

Appetizers Desserts Salads Breakfast Dinner

Contact

  • Pinterest
  • Mail
Copyright © 2025 Toasted Recipes. All rights reserved.