Apple Crisp Mini Cheesecakes Tasty and Simple Treat

WANT TO SAVE THIS RECIPE?

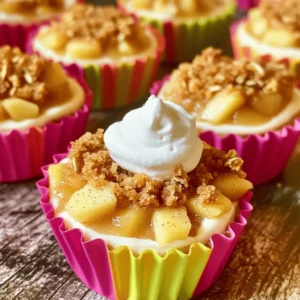
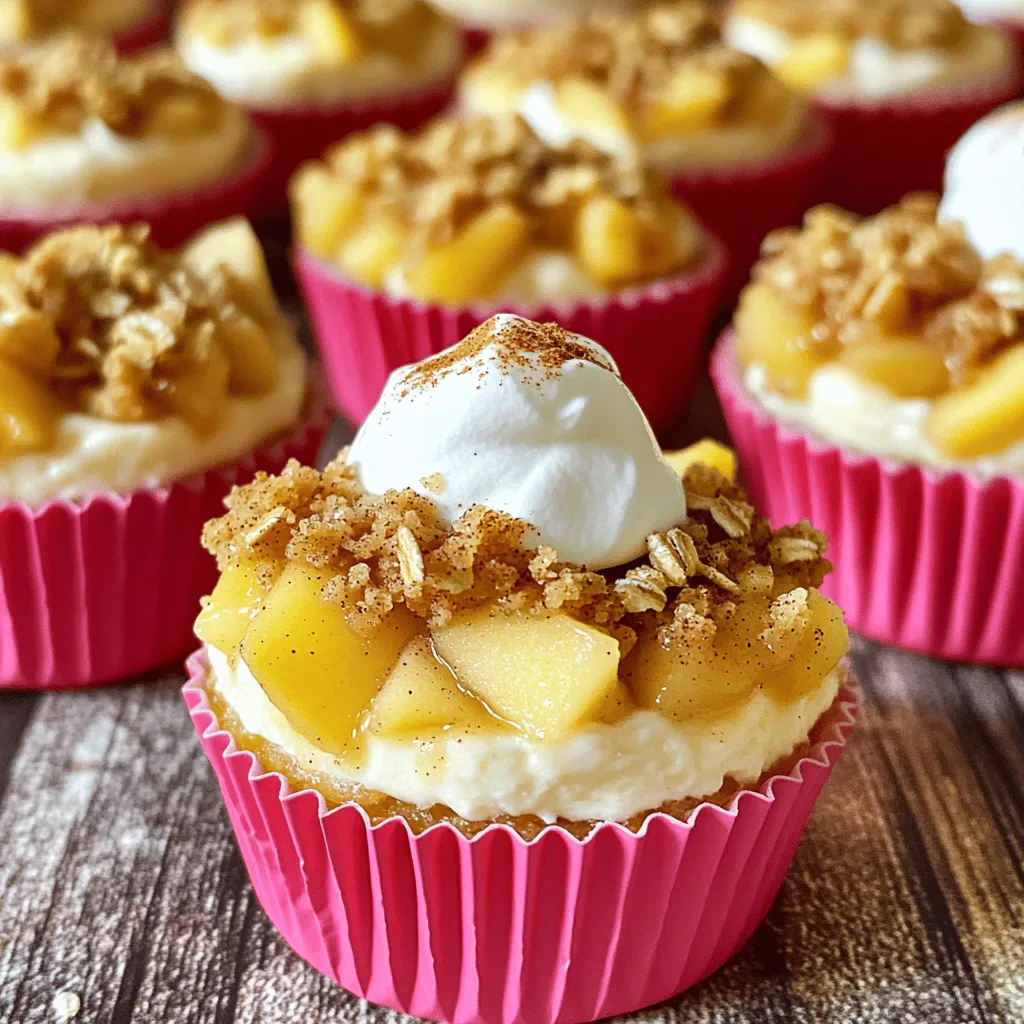
Looking for a dessert that’s both tasty and easy? Try my Apple Crisp Mini Cheesecakes! These bite-sized treats combine creamy cheesecake with a crunchy apple topping, giving you all the fall flavors you love. Whether you’re hosting a party or just craving something sweet, these mini cheesecakes are perfect. I’ll guide you step-by-step through the ingredients, baking tips, and variations, so you’ll impress everyone with your baking skills!

Ingredients

Complete List of Ingredients

To make these tasty apple crisp mini cheesecakes, you will need:

– 1 cup graham cracker crumbs

– 1/4 cup unsalted butter, melted

– 2 tablespoons sugar

– 8 oz cream cheese, softened

– 1/2 cup sugar

– 1 teaspoon vanilla extract

– 1/2 teaspoon ground cinnamon

– 1 large egg

– 1 cup apples, peeled and diced (about 2 small apples)

– 1/2 cup rolled oats

– 1/4 cup brown sugar

– 1/4 teaspoon nutmeg

– 1 tablespoon lemon juice

These ingredients work together to create a creamy, sweet, and crunchy dessert. Each bite brings the taste of apple crisp paired with cheesecake.

Ingredient Substitutions

You can change some ingredients if needed. Here are a few ideas:

Graham cracker crumbs: Use crushed cookies or biscuits.

Unsalted butter: Coconut oil or margarine will work well.

Sugar: Use honey or maple syrup for a natural sweetener.

Cream cheese: Try ricotta cheese or a dairy-free cream cheese.

Apples: Any firm apple works, like Granny Smith or Honeycrisp.

Rolled oats: Quick oats are fine if you don’t have rolled oats.

These swaps can help fit your taste or dietary needs while keeping the recipe fun and delicious.

Fresh vs. Frozen Ingredients

I prefer fresh ingredients for the best taste. Fresh apples bring a crisp texture and vibrant flavor. However, frozen apples can also work if fresh ones are not available. Just thaw and drain them well before using.

Using fresh or frozen oats has no real effect on the taste, so you can choose based on what you have at home.

The choice of ingredients affects the cheesecake’s final flavor. So, pick what you love! For the full recipe, check the details above.

Step-by-Step Instructions

Preparation Overview

To make Apple Crisp Mini Cheesecakes, start by gathering your ingredients. You will need a few simple items. The recipe is easy to follow and fun to make. It takes about 20 minutes to prep and 1 hour and 15 minutes total, including baking and cooling time.

Detailed Baking Steps

1. Preheat the Oven: Set your oven to 325°F (163°C). Line a muffin tin with cupcake liners.

2. Prepare the Crust: In a medium bowl, mix together:

– 1 cup graham cracker crumbs

– 1/4 cup unsalted butter, melted

– 2 tablespoons sugar

Press this mixture into the bottom of each cupcake liner. Bake for 5 minutes and then let it cool.

3. Make the Cheesecake Filling: In a large bowl, beat 8 oz of softened cream cheese until smooth. Add:

– 1/2 cup sugar

– 1 teaspoon vanilla extract

– 1/2 teaspoon ground cinnamon

Mix until creamy. Then, add 1 large egg and beat until just combined.

4. Prepare the Apples: In another bowl, toss 1 cup of peeled and diced apples with:

– 1 tablespoon lemon juice

– A sprinkle of ground cinnamon

5. Add Apples to Filling: Fold the diced apples into the cheesecake mixture carefully.

6. Fill the Crusts: Pour the cheesecake and apple mixture into the pre-baked crusts, filling each about 3/4 full.

7. Prepare the Topping: In a separate bowl, mix:

– 1/2 cup rolled oats

– 1/4 cup brown sugar

– 1/4 teaspoon nutmeg

Sprinkle this topping over each mini cheesecake.

8. Bake: Place the tray in the oven and bake for 18-20 minutes. Look for slight golden tops and firm cheesecakes.

9. Cool: Allow the mini cheesecakes to cool in the pan for 10 minutes. Then, transfer them to a wire rack to cool completely.

10. Chill: Finally, refrigerate for at least 2 hours before serving. This step helps them set properly.

Tips for Ensuring Perfect Cheesecakes

– Use softened cream cheese for a smooth filling.

– Avoid overmixing after adding the egg to keep the texture right.

– Let them cool completely before chilling to prevent sogginess.

– Serve with a dollop of whipped cream and a sprinkle of cinnamon for a nice touch.

– Check the baking time closely to prevent overbaking.

For the full recipe, check the details above. Enjoy this tasty treat!

Tips & Tricks

Common Mistakes to Avoid

When making Apple Crisp Mini Cheesecakes, some mistakes can lead to less tasty treats. Here are key points to keep in mind:

Overmixing the filling: Beat the cream cheese until smooth, then mix in the egg just until combined. Overmixing can make the texture too fluffy.

Skipping the cooling time: Let the mini cheesecakes cool for 10 minutes in the pan. This helps keep them from cracking.

Not measuring apples properly: Use about two small apples. Too many apples can make the filling runny.

Best Practices for Baking

To ensure your mini cheesecakes turn out great, follow these best practices:

Preheat your oven: Always preheat to 325°F (163°C). This step is vital for even baking.

Use cupcake liners: They help with easy removal and keep the cheesecakes intact.

Fill crusts evenly: Pour the filling until each crust is about 3/4 full. This helps them bake uniformly.

Serving Suggestions

Serving your mini cheesecakes can add to their appeal. Here are some ideas:

Top with whipped cream: A dollop of whipped cream makes them look fancy and taste great.

Add a sprinkle of cinnamon: This adds warmth and enhances the apple flavor.

Garnish with apple slices: Thinly sliced apples can add a fresh touch to your plate.

For the full recipe, check out the details above. Enjoy your baking!

Variations

Flavor Modifications

You can change the flavor of your Apple Crisp Mini Cheesecakes easily. Swap out the apples for pears for a fresh twist. You can also add spices like ginger or cloves for more warmth. Want something fun? Try adding peanut butter to the filling. It gives a nutty taste that pairs well with apples.

Alternative Toppings

Toppings can elevate your mini cheesecakes. Instead of oatmeal topping, use crushed nuts for crunch. Walnuts or pecans add a nice touch. You could also drizzle caramel or chocolate sauce on top. If you like a fruity touch, try adding a spoonful of fruit preserves. It brightens up the flavor and adds color.

Dietary Adjustments

You can make these cheesecakes fit your diet. For a gluten-free option, use gluten-free graham crackers for the crust. If you want a vegan version, replace cream cheese with a plant-based alternative. Use flaxseed meal mixed with water instead of an egg. This keeps the texture creamy and delicious.

Check out the Full Recipe for all the ingredients and steps to make these tasty treats!

Storage Info

How to Store Leftover Cheesecakes

To store leftover apple crisp mini cheesecakes, place them in an airtight container. You can stack them gently to save space. Keep them in the fridge for up to five days. If you want to enjoy them later, freezing is a great option.

Freezing Instructions

To freeze these mini cheesecakes, first allow them to cool completely. Wrap each one tightly in plastic wrap. Then, place them in a freezer-safe bag or container. They can last in the freezer for up to three months. When you’re ready to eat, thaw them in the fridge overnight.

Shelf Life Tips

For the best taste, enjoy these cheesecakes within five days when stored in the fridge. If frozen, try to eat them within three months. Always check for any signs of spoilage before consuming. Keeping them in the right conditions helps maintain their yummy flavor and texture. You can find the full recipe for these tasty treats above.

FAQs

How do I know when the mini cheesecakes are done?

You can tell when they are done by checking the tops. They should look slightly golden. The cheesecakes will also feel firm to the touch. If they jiggle a little, they need more time. Bake them until they are set, about 18 to 20 minutes. Let them cool in the pan for ten minutes after baking.

Can I make these ahead of time?

Yes, you can make these mini cheesecakes in advance. They chill well in the fridge. I often prepare them a day ahead. Just cover them tightly after they cool. They will stay fresh and delicious for up to three days. This makes them perfect for parties or gatherings.

What can I substitute for cream cheese?

If you need a cream cheese substitute, try Greek yogurt. It gives a creamy texture. You can also use mascarpone cheese for a richer taste. Silken tofu is another good option for a dairy-free choice. Just blend it well before mixing it into your filling. Check the flavor and adjust the sugar if needed.

For the full recipe, check out the detailed cooking instructions.

To recap, we explored the key ingredients for delicious mini cheesecakes, from swaps to fresh and frozen options. I shared step-by-step baking instructions and essential tips to avoid common mistakes. You can also customize flavors and toppings to match your taste. Proper storage methods can extend your cheesecake’s shelf life, making it easier to enjoy later.

Baking cheesecakes should be fun and rewarding. Follow these tips and enjoy your tasty creations!

To make these tasty apple crisp mini cheesecakes, you will need: - 1 cup graham cracker crumbs - 1/4 cup unsalted butter, melted - 2 tablespoons sugar - 8 oz cream cheese, softened - 1/2 cup sugar - 1 teaspoon vanilla extract - 1/2 teaspoon ground cinnamon - 1 large egg - 1 cup apples, peeled and diced (about 2 small apples) - 1/2 cup rolled oats - 1/4 cup brown sugar - 1/4 teaspoon nutmeg - 1 tablespoon lemon juice These ingredients work together to create a creamy, sweet, and crunchy dessert. Each bite brings the taste of apple crisp paired with cheesecake. You can change some ingredients if needed. Here are a few ideas: - Graham cracker crumbs: Use crushed cookies or biscuits. - Unsalted butter: Coconut oil or margarine will work well. - Sugar: Use honey or maple syrup for a natural sweetener. - Cream cheese: Try ricotta cheese or a dairy-free cream cheese. - Apples: Any firm apple works, like Granny Smith or Honeycrisp. - Rolled oats: Quick oats are fine if you don’t have rolled oats. These swaps can help fit your taste or dietary needs while keeping the recipe fun and delicious. I prefer fresh ingredients for the best taste. Fresh apples bring a crisp texture and vibrant flavor. However, frozen apples can also work if fresh ones are not available. Just thaw and drain them well before using. Using fresh or frozen oats has no real effect on the taste, so you can choose based on what you have at home. The choice of ingredients affects the cheesecake’s final flavor. So, pick what you love! For the full recipe, check the details above. To make Apple Crisp Mini Cheesecakes, start by gathering your ingredients. You will need a few simple items. The recipe is easy to follow and fun to make. It takes about 20 minutes to prep and 1 hour and 15 minutes total, including baking and cooling time. 1. Preheat the Oven: Set your oven to 325°F (163°C). Line a muffin tin with cupcake liners. 2. Prepare the Crust: In a medium bowl, mix together: - 1 cup graham cracker crumbs - 1/4 cup unsalted butter, melted - 2 tablespoons sugar Press this mixture into the bottom of each cupcake liner. Bake for 5 minutes and then let it cool. 3. Make the Cheesecake Filling: In a large bowl, beat 8 oz of softened cream cheese until smooth. Add: - 1/2 cup sugar - 1 teaspoon vanilla extract - 1/2 teaspoon ground cinnamon Mix until creamy. Then, add 1 large egg and beat until just combined. 4. Prepare the Apples: In another bowl, toss 1 cup of peeled and diced apples with: - 1 tablespoon lemon juice - A sprinkle of ground cinnamon 5. Add Apples to Filling: Fold the diced apples into the cheesecake mixture carefully. 6. Fill the Crusts: Pour the cheesecake and apple mixture into the pre-baked crusts, filling each about 3/4 full. 7. Prepare the Topping: In a separate bowl, mix: - 1/2 cup rolled oats - 1/4 cup brown sugar - 1/4 teaspoon nutmeg Sprinkle this topping over each mini cheesecake. 8. Bake: Place the tray in the oven and bake for 18-20 minutes. Look for slight golden tops and firm cheesecakes. 9. Cool: Allow the mini cheesecakes to cool in the pan for 10 minutes. Then, transfer them to a wire rack to cool completely. 10. Chill: Finally, refrigerate for at least 2 hours before serving. This step helps them set properly. - Use softened cream cheese for a smooth filling. - Avoid overmixing after adding the egg to keep the texture right. - Let them cool completely before chilling to prevent sogginess. - Serve with a dollop of whipped cream and a sprinkle of cinnamon for a nice touch. - Check the baking time closely to prevent overbaking. For the full recipe, check the details above. Enjoy this tasty treat! When making Apple Crisp Mini Cheesecakes, some mistakes can lead to less tasty treats. Here are key points to keep in mind: - Overmixing the filling: Beat the cream cheese until smooth, then mix in the egg just until combined. Overmixing can make the texture too fluffy. - Skipping the cooling time: Let the mini cheesecakes cool for 10 minutes in the pan. This helps keep them from cracking. - Not measuring apples properly: Use about two small apples. Too many apples can make the filling runny. To ensure your mini cheesecakes turn out great, follow these best practices: - Preheat your oven: Always preheat to 325°F (163°C). This step is vital for even baking. - Use cupcake liners: They help with easy removal and keep the cheesecakes intact. - Fill crusts evenly: Pour the filling until each crust is about 3/4 full. This helps them bake uniformly. Serving your mini cheesecakes can add to their appeal. Here are some ideas: - Top with whipped cream: A dollop of whipped cream makes them look fancy and taste great. - Add a sprinkle of cinnamon: This adds warmth and enhances the apple flavor. - Garnish with apple slices: Thinly sliced apples can add a fresh touch to your plate. For the full recipe, check out the details above. Enjoy your baking! {{image_2}} You can change the flavor of your Apple Crisp Mini Cheesecakes easily. Swap out the apples for pears for a fresh twist. You can also add spices like ginger or cloves for more warmth. Want something fun? Try adding peanut butter to the filling. It gives a nutty taste that pairs well with apples. Toppings can elevate your mini cheesecakes. Instead of oatmeal topping, use crushed nuts for crunch. Walnuts or pecans add a nice touch. You could also drizzle caramel or chocolate sauce on top. If you like a fruity touch, try adding a spoonful of fruit preserves. It brightens up the flavor and adds color. You can make these cheesecakes fit your diet. For a gluten-free option, use gluten-free graham crackers for the crust. If you want a vegan version, replace cream cheese with a plant-based alternative. Use flaxseed meal mixed with water instead of an egg. This keeps the texture creamy and delicious. Check out the Full Recipe for all the ingredients and steps to make these tasty treats! To store leftover apple crisp mini cheesecakes, place them in an airtight container. You can stack them gently to save space. Keep them in the fridge for up to five days. If you want to enjoy them later, freezing is a great option. To freeze these mini cheesecakes, first allow them to cool completely. Wrap each one tightly in plastic wrap. Then, place them in a freezer-safe bag or container. They can last in the freezer for up to three months. When you're ready to eat, thaw them in the fridge overnight. For the best taste, enjoy these cheesecakes within five days when stored in the fridge. If frozen, try to eat them within three months. Always check for any signs of spoilage before consuming. Keeping them in the right conditions helps maintain their yummy flavor and texture. You can find the full recipe for these tasty treats above. You can tell when they are done by checking the tops. They should look slightly golden. The cheesecakes will also feel firm to the touch. If they jiggle a little, they need more time. Bake them until they are set, about 18 to 20 minutes. Let them cool in the pan for ten minutes after baking. Yes, you can make these mini cheesecakes in advance. They chill well in the fridge. I often prepare them a day ahead. Just cover them tightly after they cool. They will stay fresh and delicious for up to three days. This makes them perfect for parties or gatherings. If you need a cream cheese substitute, try Greek yogurt. It gives a creamy texture. You can also use mascarpone cheese for a richer taste. Silken tofu is another good option for a dairy-free choice. Just blend it well before mixing it into your filling. Check the flavor and adjust the sugar if needed. For the full recipe, check out the detailed cooking instructions. To recap, we explored the key ingredients for delicious mini cheesecakes, from swaps to fresh and frozen options. I shared step-by-step baking instructions and essential tips to avoid common mistakes. You can also customize flavors and toppings to match your taste. Proper storage methods can extend your cheesecake's shelf life, making it easier to enjoy later. Baking cheesecakes should be fun and rewarding. Follow these tips and enjoy your tasty creations!

Apple Crisp Mini Cheesecakes

Indulge in the delightful taste of Apple Crisp Mini Cheesecakes that combine creamy cheesecake with the sweet crunch of apples! This easy recipe features a buttery graham cracker crust, a rich apple-infused filling, and a crunchy oat topping. Perfect for gatherings or a cozy night in, these mini treats are sure to impress. Click through to discover the full recipe and bring this delicious dessert to your table today!

Ingredients
  

1 cup graham cracker crumbs

1/4 cup unsalted butter, melted

2 tablespoons sugar

8 oz cream cheese, softened

1/2 cup sugar

1 teaspoon vanilla extract

1/2 teaspoon ground cinnamon

1 large egg

1 cup apples, peeled and diced (about 2 small apples)

1/2 cup rolled oats

1/4 cup brown sugar

1/4 teaspoon nutmeg

1 tablespoon lemon juice

Instructions
 

Preheat the Oven: Preheat your oven to 325°F (163°C) and line a muffin tin with cupcake liners.

    Prepare the Crust: In a medium bowl, combine the graham cracker crumbs, melted butter, and sugar. Mix until well combined. Press this mixture firmly into the bottom of each cupcake liner to form the crust. Bake in the preheated oven for 5 minutes, then remove and set aside.

      Make the Cheesecake Filling: In a large mixing bowl, beat the softened cream cheese until smooth. Add the sugar, vanilla extract, and ground cinnamon. Mix until creamy. Then, add the egg and beat until just combined—do not overmix.

        Prepare the Apples: In a separate bowl, toss the diced apples with lemon juice and a sprinkle of ground cinnamon.

          Add Apples to Filling: Fold the diced apples into the cheesecake mixture until evenly distributed.

            Fill the Crusts: Pour the cheesecake and apple mixture evenly into the pre-baked crusts, filling each about 3/4 full.

              Prepare the Topping: In another bowl, mix rolled oats, brown sugar, and nutmeg. Sprinkle this topping over each mini cheesecake.

                Bake: Bake in the oven for 18-20 minutes, or until the tops are slightly golden and the cheesecakes are set.

                  Cool: Let the mini cheesecakes cool in the pan for 10 minutes, then transfer them to a wire rack to cool completely.

                    Chill: Refrigerate for at least 2 hours before serving to allow them to set properly.

                      Prep Time: 20 min | Total Time: 1hr 15 min | Servings: 12

                        - Presentation Tips: Serve chilled topped with a dollop of whipped cream and a sprinkle of cinnamon or a thinly sliced apple fan for an elegant touch.

                          WANT TO SAVE THIS RECIPE?