Crisp Pickled Okra Tangy and Flavorful Delight

WANT TO SAVE THIS RECIPE?

Crisp pickled okra is a tasty treat you can make at home. With a tangy kick and crunchy texture, this dish adds flavor to any meal. I’ll show you how to whip up this delight, using fresh ingredients and simple steps. Plus, I’ll share tips for maximum crispiness and fun variations. Dive in, and let’s get that jar filled with delicious pickled okra!

Ingredients

Fresh Okra

To make crisp pickled okra, you need one pound of fresh okra. Choose okra that is bright green and firm. Look for pods that are about four inches long. Trim the stems carefully. This keeps the okra from getting mushy during the pickling process. Wash the okra well to remove any dirt.

Vinegar and Seasonings

For the brine, you need two cups of distilled white vinegar and one cup of water. The vinegar gives the okra its tangy taste. You also need three tablespoons of kosher salt and one tablespoon of sugar. The salt helps with the preservation, while the sugar balances the vinegar’s sharpness.

Additional Flavoring Ingredients

Add four cloves of peeled garlic for a nice kick. You will also need two teaspoons of mustard seeds and one teaspoon each of black peppercorns and red pepper flakes. These spices add warmth and depth to the flavor. Lastly, include three to four sprigs of fresh dill. The dill gives a fresh and herbal note to the pickles.

Check out the Full Recipe for more detailed steps!

Step-by-Step Instructions

Prep the Okra

First, wash your okra well under cold water. This removes dirt and dust. Next, trim the stem ends. Be careful not to cut into the pods. Keeping them whole helps them stay crisp during pickling.

Prepare the Pickling Brine

For the brine, grab a medium saucepan. Add distilled white vinegar, water, kosher salt, and sugar. Heat this mix over medium heat. Stir it until the salt and sugar dissolve completely. Once done, take it off the heat and let it cool slightly. This brine gives the okra its zingy flavor.

Packing and Storing

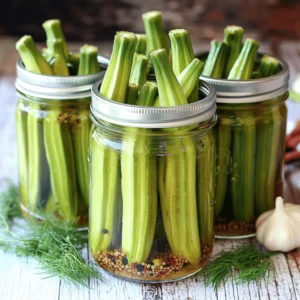
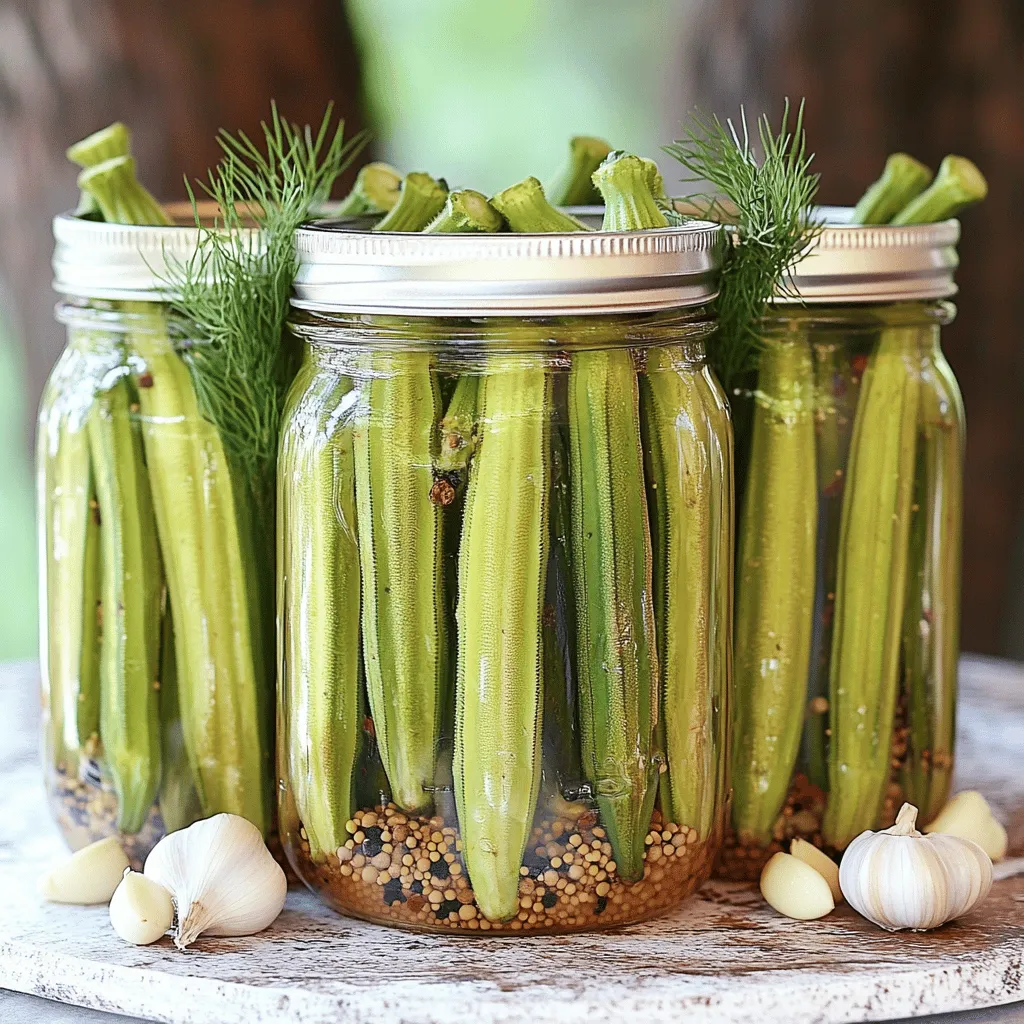
Now, it’s time to pack the jars. Take sterilized jars, like pint-sized mason jars. Place garlic cloves, mustard seeds, black peppercorns, red pepper flakes, and fresh dill at the bottom. Next, pack the okra in vertically. Make sure they fit snugly but do not crush them. Pour the cooled vinegar mixture over the okra, covering them completely. If needed, add more vinegar. Seal the jars tightly and let them cool to room temperature.

Once cooled, store the jars in the fridge. Let the okra pickle for at least 48 hours. This waiting time allows the flavors to blend. You can keep them in the fridge for up to 3 months. For the complete recipe, check out the Full Recipe.

Tips & Tricks

Achieving Maximum Crispiness

To get your okra nice and crisp, start with fresh pods. Look for firm, bright green okra. Trim the stems without cutting into the pods. This keeps them whole and crunchy. When you pack them into the jars, arrange them snugly but not too tight. This way, each pod gets enough pickling juice. Lastly, chill the jars in the fridge for at least 48 hours. The longer they sit, the better they taste!

Sterilization Techniques for Jars

Sterilizing your jars is key for safe pickling. First, wash the jars and lids in hot, soapy water. Rinse them well. Next, place the jars in a pot of boiling water for about 10 minutes. This kills any germs. You can also use a hot dishwasher cycle. Let the jars cool before you fill them. This step helps keep your pickled okra fresh longer.

Timing for Best Flavor Development

Timing matters when it comes to flavor. After you make your pickled okra, let them sit for at least 48 hours in the fridge. This gives the spices time to seep into the okra. If you can wait longer, even better! They will get tastier with each passing day. For the best results, enjoy them within three months. You will love the tangy, flavorful delight that awaits you! Check out the Full Recipe for exact steps.

Variations

Spicy Crisp Pickled Okra

To make spicy crisp pickled okra, add more heat! Increase red pepper flakes to 2 teaspoons. You can also add sliced jalapeños for extra kick. The spice blends well with the tangy vinegar. This version is perfect for those who love bold flavors.

Sweet and Savory Options

For a sweet twist, add more sugar. Try 2 tablespoons instead of 1. You can also mix in honey or agave syrup. This gives the okra a nice balance of sweet and tangy. Serve them alongside grilled meats for a tasty contrast.

Alternative Vinegar Choices

You can switch up the vinegar too! Try apple cider vinegar for a fruity flavor. Rice vinegar adds a mild sweetness. Each type of vinegar will change the taste a bit. Experiment to find your favorite combination. Check out the Full Recipe for more ideas on how to customize your pickled okra!

Storage Info

Refrigeration Guidelines

After you make crisp pickled okra, store it in the fridge. Always keep the jars sealed tightly. This keeps the okra fresh and crunchy. You can enjoy them as snacks or toppings. The cool temperature helps the flavors blend well.

Shelf Life of Crisp Pickled Okra

Crisp pickled okra lasts up to three months in the fridge. After this time, the taste may change. For best flavor, eat them within this time frame. Mark the jar with the date you made them. This way, you won’t forget how long they’ve been stored.

Signs of Spoilage

Check your jars for any signs of spoilage. If you see mold or off smells, it’s time to toss them. The okra should stay crisp and bright. If they look dull or mushy, don’t eat them. Trust your senses; they’re key to safe eating.

FAQs

How long does it take for pickled okra to be ready?

It takes at least 48 hours for pickled okra to be ready. This time allows the flavors to blend. After this period, you can taste your okra. If you want a stronger flavor, let it sit longer. The okra becomes tangy and crisp over time.

Can I use frozen okra for this recipe?

I don’t recommend using frozen okra for this recipe. Frozen okra often loses its crunch. It may turn mushy during the pickling process. Fresh okra gives you the best texture and flavor. Always choose fresh for this delightful dish.

Where can I buy ready-made crisp pickled okra?

You can find ready-made crisp pickled okra at grocery stores. Look in the condiment aisle or near pickles. Many farmers’ markets also sell homemade varieties. If you want to try different flavors, check local specialty shops. They often have unique options for you to explore.

Can I adjust the spice level in the recipe?

Yes, you can adjust the spice level. To make it spicier, add more red pepper flakes. For milder okra, reduce the amount of red pepper. You can also try adding other spices, like jalapeños, for new flavors. Experimenting can lead to your perfect taste.

How should I serve crisp pickled okra?

Crisp pickled okra is great as an appetizer. You can serve it on a cheese platter or with dips. It also adds a fun touch to cocktails, like Bloody Marys. Get creative and use it in salads or sandwiches for extra crunch.

Can I reuse the pickling brine?

You can reuse the pickling brine for another batch. Make sure to heat it again and add fresh spices. However, the flavor may weaken over time. For best results, it’s better to make a new batch. This ensures your pickled okra stays tasty and fresh.

How do I know if my pickled okra is bad?

Check for signs of spoilage before eating. If you see mold or notice an off smell, throw it away. The okra should look bright and crunchy. If it feels slimy, it’s best to discard it. Always trust your senses when it comes to food safety.

In this guide, we explored how to make crisp pickled okra. We covered fresh ingredients like okra, vinegar, and seasonings. You learned the steps to prep, brine, and store your pickles. I shared tips for crispiness and safe storage. We also discussed variations, such as spicy and sweet options. Remember, pickled okra can add a tasty crunch to meals. Enjoy making your own jars, and don’t hesitate to experiment with flavors! Your kitchen will smell great, and your taste buds will thank you.

To make crisp pickled okra, you need one pound of fresh okra. Choose okra that is bright green and firm. Look for pods that are about four inches long. Trim the stems carefully. This keeps the okra from getting mushy during the pickling process. Wash the okra well to remove any dirt. For the brine, you need two cups of distilled white vinegar and one cup of water. The vinegar gives the okra its tangy taste. You also need three tablespoons of kosher salt and one tablespoon of sugar. The salt helps with the preservation, while the sugar balances the vinegar's sharpness. Add four cloves of peeled garlic for a nice kick. You will also need two teaspoons of mustard seeds and one teaspoon each of black peppercorns and red pepper flakes. These spices add warmth and depth to the flavor. Lastly, include three to four sprigs of fresh dill. The dill gives a fresh and herbal note to the pickles. Check out the Full Recipe for more detailed steps! First, wash your okra well under cold water. This removes dirt and dust. Next, trim the stem ends. Be careful not to cut into the pods. Keeping them whole helps them stay crisp during pickling. For the brine, grab a medium saucepan. Add distilled white vinegar, water, kosher salt, and sugar. Heat this mix over medium heat. Stir it until the salt and sugar dissolve completely. Once done, take it off the heat and let it cool slightly. This brine gives the okra its zingy flavor. Now, it's time to pack the jars. Take sterilized jars, like pint-sized mason jars. Place garlic cloves, mustard seeds, black peppercorns, red pepper flakes, and fresh dill at the bottom. Next, pack the okra in vertically. Make sure they fit snugly but do not crush them. Pour the cooled vinegar mixture over the okra, covering them completely. If needed, add more vinegar. Seal the jars tightly and let them cool to room temperature. Once cooled, store the jars in the fridge. Let the okra pickle for at least 48 hours. This waiting time allows the flavors to blend. You can keep them in the fridge for up to 3 months. For the complete recipe, check out the Full Recipe. To get your okra nice and crisp, start with fresh pods. Look for firm, bright green okra. Trim the stems without cutting into the pods. This keeps them whole and crunchy. When you pack them into the jars, arrange them snugly but not too tight. This way, each pod gets enough pickling juice. Lastly, chill the jars in the fridge for at least 48 hours. The longer they sit, the better they taste! Sterilizing your jars is key for safe pickling. First, wash the jars and lids in hot, soapy water. Rinse them well. Next, place the jars in a pot of boiling water for about 10 minutes. This kills any germs. You can also use a hot dishwasher cycle. Let the jars cool before you fill them. This step helps keep your pickled okra fresh longer. Timing matters when it comes to flavor. After you make your pickled okra, let them sit for at least 48 hours in the fridge. This gives the spices time to seep into the okra. If you can wait longer, even better! They will get tastier with each passing day. For the best results, enjoy them within three months. You will love the tangy, flavorful delight that awaits you! Check out the Full Recipe for exact steps. {{image_2}} To make spicy crisp pickled okra, add more heat! Increase red pepper flakes to 2 teaspoons. You can also add sliced jalapeños for extra kick. The spice blends well with the tangy vinegar. This version is perfect for those who love bold flavors. For a sweet twist, add more sugar. Try 2 tablespoons instead of 1. You can also mix in honey or agave syrup. This gives the okra a nice balance of sweet and tangy. Serve them alongside grilled meats for a tasty contrast. You can switch up the vinegar too! Try apple cider vinegar for a fruity flavor. Rice vinegar adds a mild sweetness. Each type of vinegar will change the taste a bit. Experiment to find your favorite combination. Check out the Full Recipe for more ideas on how to customize your pickled okra! After you make crisp pickled okra, store it in the fridge. Always keep the jars sealed tightly. This keeps the okra fresh and crunchy. You can enjoy them as snacks or toppings. The cool temperature helps the flavors blend well. Crisp pickled okra lasts up to three months in the fridge. After this time, the taste may change. For best flavor, eat them within this time frame. Mark the jar with the date you made them. This way, you won’t forget how long they’ve been stored. Check your jars for any signs of spoilage. If you see mold or off smells, it’s time to toss them. The okra should stay crisp and bright. If they look dull or mushy, don’t eat them. Trust your senses; they’re key to safe eating. It takes at least 48 hours for pickled okra to be ready. This time allows the flavors to blend. After this period, you can taste your okra. If you want a stronger flavor, let it sit longer. The okra becomes tangy and crisp over time. I don’t recommend using frozen okra for this recipe. Frozen okra often loses its crunch. It may turn mushy during the pickling process. Fresh okra gives you the best texture and flavor. Always choose fresh for this delightful dish. You can find ready-made crisp pickled okra at grocery stores. Look in the condiment aisle or near pickles. Many farmers' markets also sell homemade varieties. If you want to try different flavors, check local specialty shops. They often have unique options for you to explore. Yes, you can adjust the spice level. To make it spicier, add more red pepper flakes. For milder okra, reduce the amount of red pepper. You can also try adding other spices, like jalapeños, for new flavors. Experimenting can lead to your perfect taste. Crisp pickled okra is great as an appetizer. You can serve it on a cheese platter or with dips. It also adds a fun touch to cocktails, like Bloody Marys. Get creative and use it in salads or sandwiches for extra crunch. You can reuse the pickling brine for another batch. Make sure to heat it again and add fresh spices. However, the flavor may weaken over time. For best results, it's better to make a new batch. This ensures your pickled okra stays tasty and fresh. Check for signs of spoilage before eating. If you see mold or notice an off smell, throw it away. The okra should look bright and crunchy. If it feels slimy, it’s best to discard it. Always trust your senses when it comes to food safety. In this guide, we explored how to make crisp pickled okra. We covered fresh ingredients like okra, vinegar, and seasonings. You learned the steps to prep, brine, and store your pickles. I shared tips for crispiness and safe storage. We also discussed variations, such as spicy and sweet options. Remember, pickled okra can add a tasty crunch to meals. Enjoy making your own jars, and don’t hesitate to experiment with flavors! Your kitchen will smell great, and your taste buds will thank you.

Crisp Pickled Okra

Discover the crunchy delight of crisp pickled okra with this easy recipe! Learn how to make your own pickled okra using fresh ingredients like garlic, dill, and spices for a flavorful snack or garnish. Perfect for appetizers or to elevate your favorite cocktails, these pickled veggies pack a punch. Click through to explore the full recipe and start your pickling adventure today! Enjoy freshness and flavor at your fingertips!

Ingredients
  

1 pound fresh okra, stems trimmed

2 cups distilled white vinegar

1 cup water

3 tablespoons kosher salt

1 tablespoon sugar

4 cloves garlic, peeled

2 teaspoons mustard seeds

1 teaspoon black peppercorns

1 teaspoon red pepper flakes

3-4 sprigs of fresh dill

Instructions
 

Begin by washing the okra thoroughly and trimming the stems without cutting into the pods. This helps maintain their shape during pickling.

    In a medium saucepan, combine the distilled white vinegar, water, kosher salt, and sugar. Heat over medium heat while stirring until the salt and sugar have completely dissolved. Remove from heat and allow to cool slightly.

      In sterilized jars (you can use pint-sized mason jars), place the garlic cloves, mustard seeds, black peppercorns, red pepper flakes, and fresh dill at the bottom.

        Pack the okra vertically into the jars, ensuring they are snug, but not crushed.

          Pour the cooled vinegar mixture over the okra, ensuring that they are completely submerged. You can add more vinegar if necessary.

            Seal the jars tightly with their lids and allow them to cool to room temperature.

              Once cooled, refrigerate the jars and let the okra pickle for at least 48 hours before tasting for optimal flavor. They can be stored in the refrigerator for up to 3 months.

                Prep Time: 15 min | Total Time: 48 hrs (plus cooling) | Servings: 4-6 jars

                  - Presentation Tips: Serve the crisp pickled okra as a vibrant appetizer alongside a cheese platter or use them to garnish cocktails and other dishes.

                    WANT TO SAVE THIS RECIPE?