Are you ready to take your breakfast to a new level? With my Easy Peanut Butter & Jelly French Toast Delight, you can turn a classic sandwich into a warm, crispy treat in just a few steps. This recipe is fun and simple, perfect for busy mornings or lazy weekends. Let’s dive into the ingredients and cooking process that will make your taste buds dance! You won’t want to miss this delightful twist on a childhood favorite!
Ingredients
List of Ingredients for Easy Peanut Butter & Jelly French Toast
To make this tasty dish, gather these simple ingredients:
– 4 slices of bread (your choice: white, whole grain, or brioche)
– 1/2 cup creamy or crunchy peanut butter
– 1/4 cup your favorite fruit jam or jelly (grape, strawberry, or raspberry)
– 2 large eggs
– 1/4 cup milk (dairy or non-dairy)
– 1/2 teaspoon cinnamon
– 1 teaspoon vanilla extract
– Butter or oil for frying
– Powdered sugar for dusting (optional)
– Fresh fruit for garnish (optional)
Substitutions for Dietary Preferences
You can easily adjust this recipe to fit your needs. Here are some swaps:
– Bread: Use gluten-free bread for a gluten-free option.
– Peanut Butter: Swap peanut butter for almond or sunflower seed butter.
– Jelly: Choose sugar-free jelly or fruit spread for a healthier option.
– Milk: Use oat milk or almond milk for a dairy-free version.
– Eggs: For a vegan twist, use flax eggs or a commercial egg replacer.
Recommended Bread Types
The type of bread can change your French toast. Here are some great options:
– White Bread: Soft and easy to work with.
– Whole Grain Bread: Adds a nutty flavor and more fiber.
– Brioche: Rich and buttery, perfect for a special treat.
– Challah: Slightly sweet and fluffy, great for a cozy breakfast.
Use the Full Recipe to create this delightful dish. Enjoy making your Easy Peanut Butter & Jelly French Toast!
Step-by-Step Instructions
Preparation of Peanut Butter & Jelly Sandwich
First, grab your favorite bread. You can use white, whole grain, or brioche. Take one slice and spread about a tablespoon of peanut butter on it. Then, grab your fruit jam or jelly. Spread about a tablespoon of jelly on top of the peanut butter. Now, add another slice of bread on top to make a sandwich. Repeat this with the other slices to make a second sandwich.
Whisking the Egg Mixture
Next, take a shallow bowl. Crack two large eggs into the bowl. Add a quarter cup of milk. You can use dairy or non-dairy milk, whichever you like. Now, sprinkle in half a teaspoon of cinnamon and one teaspoon of vanilla extract. Use a whisk or fork to mix everything together until it looks smooth and well combined.
Cooking the Sandwiches
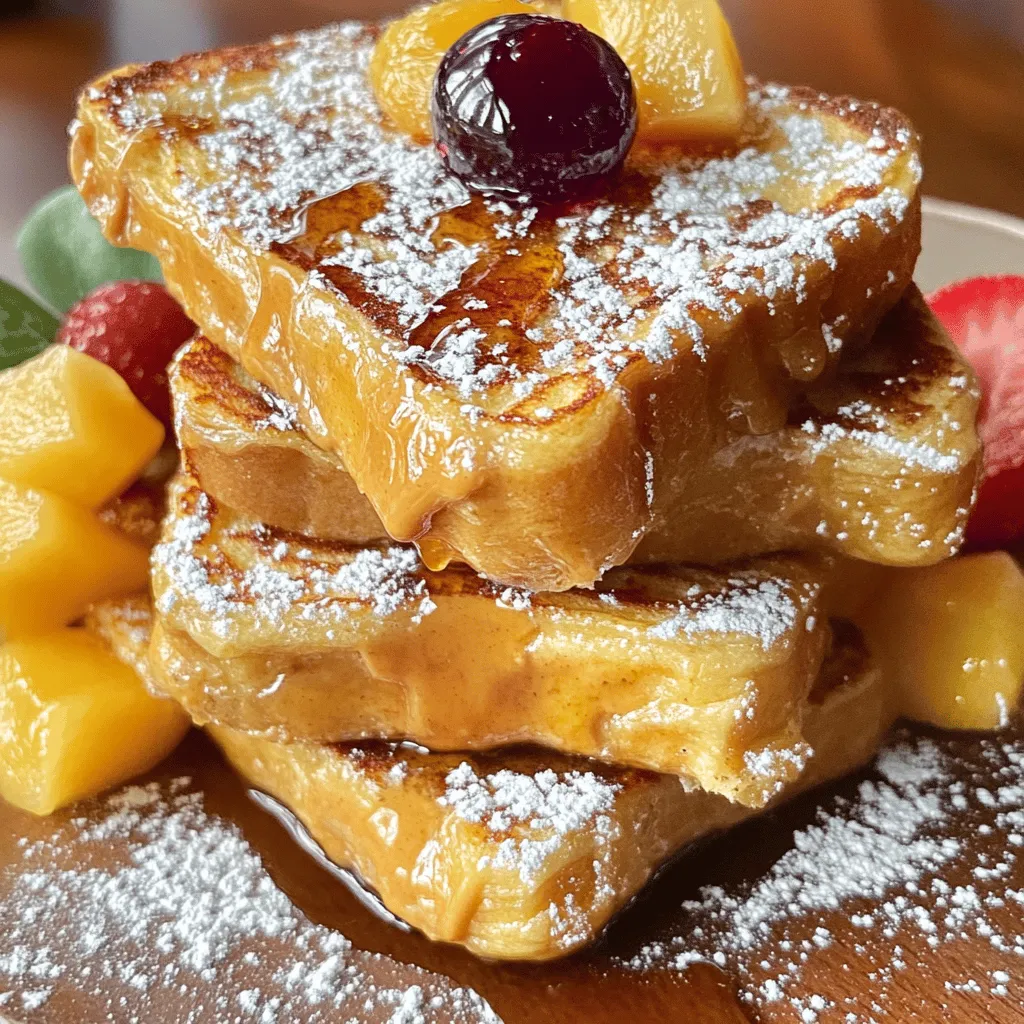
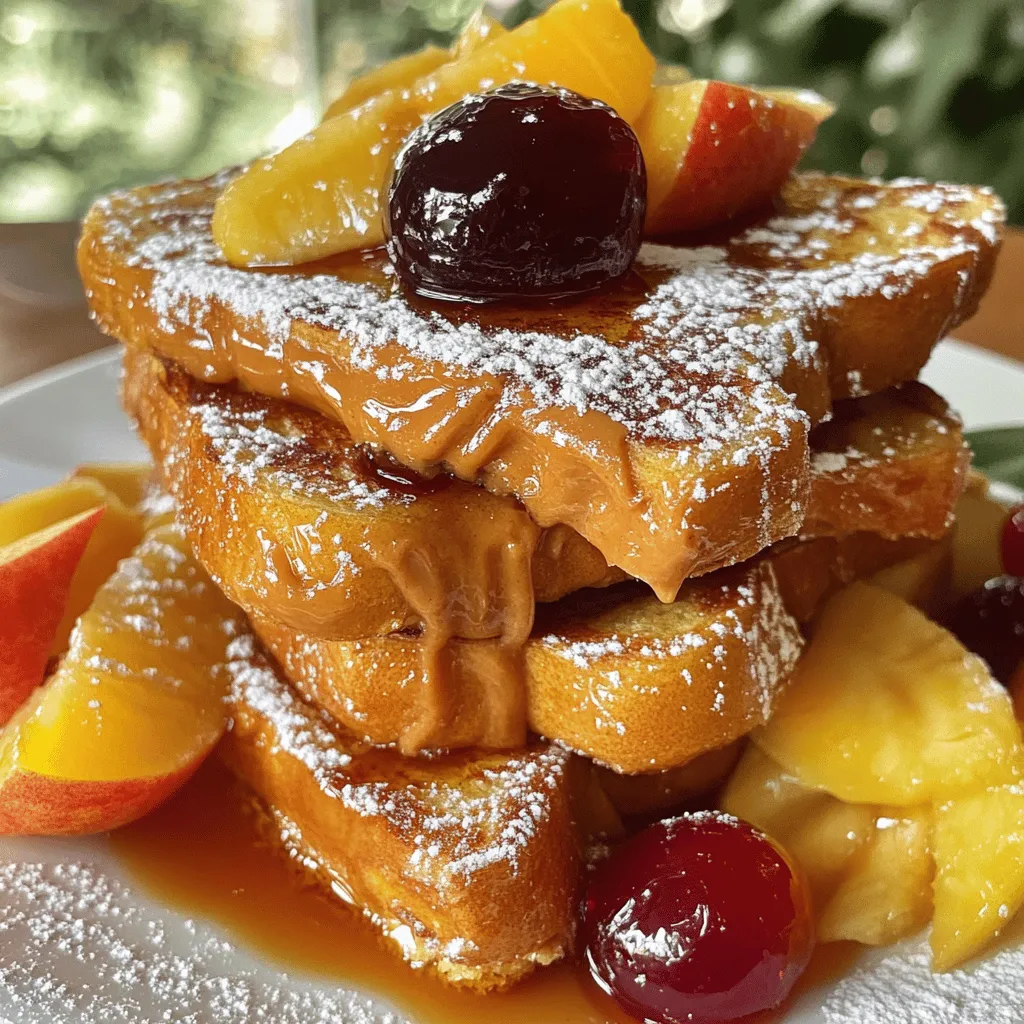
Now, heat a non-stick skillet or griddle over medium heat. Add a pat of butter or a splash of oil to the pan. While the pan heats up, dip each sandwich into the egg mixture. Make sure both sides get coated, but don’t let them soak too long. Place the soaked sandwiches in the skillet. Cook for about 3-4 minutes on each side. You’re aiming for a golden brown and crispy finish. If they start to burn, lower the heat. Once done, take them out and cut each sandwich into halves or quarters. You can dust them with powdered sugar if you want. Serve while hot, and maybe add some extra jelly or peanut butter on the side for fun. Enjoy this easy peanut butter & jelly French toast delight! For the full recipe, check above.
Tips & Tricks
Best Practices for Perfect French Toast
To make the best peanut butter and jelly French toast, follow these tips:
– Use thick bread: Choose bread that is thick, like brioche or Texas toast. This helps soak up the egg mixture without falling apart.
– Let the mixture soak: Dip the sandwich in the egg mix and let it soak for a few seconds. This allows the bread to absorb more flavor.
– Use medium heat: Cooking on medium heat gives the toast a nice golden color without burning it. Keep an eye on it while cooking.
– Add a pinch of salt: Mixing a small pinch of salt into the egg mix can enhance the flavor of the French toast.
Common Mistakes to Avoid
Avoid these common mistakes to ensure your French toast is a hit:
– Soaking too long: Don’t let the bread sit too long in the egg mix. It can become too soggy and break apart.
– Not using enough heat: If your skillet is not hot enough, the toast may end up pale and soft rather than golden and crisp.
– Skipping the butter: Using butter or oil in the skillet is key for a crispy exterior. Don’t skip this step!
– Overcrowding the pan: Cook in batches if needed. Too many sandwiches at once will lower the pan’s heat and lead to uneven cooking.
Enhancing Flavor with Toppings
Toppings can elevate your peanut butter and jelly French toast. Here are some ideas:
– Drizzle of honey or maple syrup: A sweet drizzle adds extra flavor and makes it feel fancy.
– Fresh fruit: Slices of banana or strawberries on top can enhance both flavor and nutrition.
– Chopped nuts: Sprinkle chopped nuts like almonds or walnuts for added crunch.
– Whipped cream: A dollop of whipped cream can make your dish feel indulgent and special.
For the complete recipe, check out the Full Recipe.
Variations
Different Nut Butters
You can switch up the nut butter in this recipe. While creamy or crunchy peanut butter is classic, try almond or cashew butter. Each nut butter brings a new taste. Almond butter adds a slight sweetness, while cashew butter is smooth and creamy. You can even use sunflower seed butter for a nut-free option. This keeps the dish fun and fresh!
Alternative Jellies and Spreads
The jelly you choose can change the flavor profile. Grape jelly is a favorite, but strawberry or raspberry jam works well too. For a twist, consider using honey or chocolate spread instead. Each spread adds its own flair. Experimenting with different jams can lead to tasty surprises. You might find a new favorite!
Adding Fruits or Nuts for Texture
Adding fruits or nuts gives your French toast extra texture. You can slice bananas or strawberries and add them inside the sandwich. This adds sweetness and a burst of flavor. Chopped nuts like walnuts or pecans can bring a crunchy bite. You can even sprinkle some on top after cooking. Get creative with what you have at home!
For the full recipe, check out the Easy Peanut Butter & Jelly French Toast. Enjoy the fun of making it your own!
Storage Info
Storing Leftovers
You can store leftover Easy Peanut Butter & Jelly French Toast in an airtight container. Place it in the fridge for up to three days. Make sure to separate layers with parchment paper to keep them from sticking. If you have extra toppings, store them separately to maintain freshness.
Reheating Tips
To reheat, use a toaster oven or skillet. A toaster oven warms the bread evenly and keeps it crispy. If using a skillet, heat it on low. Place the French toast in the skillet for about 2-3 minutes on each side, or until warm. Avoid the microwave, as it can make the toast soggy.
Freezing Options
You can freeze this French toast for later. After cooking, let it cool completely. Wrap each piece in plastic wrap, then place them in a freezer bag. They can last up to three months in the freezer. When ready to eat, thaw in the fridge overnight, then follow the reheating tips mentioned above. Enjoy your meal anytime!
FAQs
Can I make this recipe gluten-free?
Yes, you can! Just use gluten-free bread. Many brands offer great options. Look for bread made from rice or almond flour. This way, you keep the taste and texture nice.
How to make peanut butter and jelly French toast without eggs?
You can use a banana or flaxseed meal. For a banana, mash it in a bowl. Mix it with 1/4 cup of milk and a pinch of cinnamon. For flaxseed, mix 1 tablespoon of flaxseed with 2.5 tablespoons of water. Let it sit for a few minutes. Both options work well for binding the toast.
What sides pair well with this French toast?
Fresh fruit makes a great side. Try strawberries, bananas, or blueberries. You can also serve it with yogurt or a drizzle of honey. A glass of milk or a smoothie can round out the meal.
This blog post covered how to make easy peanut butter and jelly French toast. We discussed the ingredients, including possible substitutions, and the best bread types. I shared step-by-step instructions to help you along the way.
Remember, practice makes perfect. Avoid common mistakes and try different flavors to keep things fun. You can store leftovers or freeze them for later. Enjoy this tasty treat with your favorite sides. Now go ahead and make your own delicious version!
