![The key to making no-bake peanut butter bars is using simple ingredients you might already have. Here’s what you need to gather: - 1 cup creamy peanut butter - 1/2 cup honey or maple syrup - 1 cup rolled oats - 1/2 cup coconut flour - 1/4 cup chocolate chips - 1 tsp vanilla extract - A pinch of salt These ingredients work together to create a sweet, nutty, and satisfying treat. The peanut butter adds creaminess, while the oats give it structure. You can choose between honey or maple syrup for sweetness. Coconut flour adds a nice texture, and chocolate chips provide a delightful touch. The vanilla extract and salt enhance all these flavors. Make sure to use quality ingredients for the best taste. Fresh peanut butter, pure vanilla, and good chocolate chips can really elevate your bars. If you want to learn how to combine these ingredients into a delicious treat, check out the Full Recipe. Start by mixing the peanut butter and honey in a medium saucepan. Heat this on low. It’s key to stir continuously. This keeps the mix smooth and prevents burning. Once it blends well, remove it from the heat. Add the vanilla extract and a pinch of salt. This adds flavor and depth. Next, in a large bowl, mix rolled oats and coconut flour. Pour the warm peanut butter mixture over the dry ingredients. Stir well until they blend. You want a nice, even mixture. Now, it’s time to fold in the chocolate chips. Use a spatula to gently combine them without breaking them. This step is vital for even chocolate distribution. Prepare an 8x8 inch baking dish by lining it with parchment paper. Leave some paper hanging over the edges. This helps with easy removal later. Transfer the mixture into the dish. Press it down firmly and evenly. This forms a solid layer, ensuring the bars hold together. Place the baking dish in the refrigerator. Let it chill for at least 1-2 hours. The bars need to set completely. You’ll know they are ready when they feel firm to the touch. Once set, lift the bars out using the parchment paper. Cut them into squares or rectangles. Enjoy your tasty, no-bake peanut butter bars! For the complete recipe, check out the [Full Recipe]. To get the right texture, you can adjust your ingredients. If you want thicker bars, add more coconut flour or oats. For chewier bars, use less coconut flour. You can even play with the peanut butter amount. More peanut butter makes the bars richer and softer. Adding spices or extracts boosts flavor. Try cinnamon for warmth or a dash of nutmeg for depth. If you want a twist, swap chocolate chips for dried fruit or nuts. This change makes the bars even more fun. For serving, cut the bars into squares or rectangles. You can sprinkle some sea salt on top for a fancy touch. If you are gifting, package them in cute boxes or wrap them in parchment. Tie them with a ribbon for a personal touch. These small details make your bars stand out. For a full recipe of these delightful treats, check out the [Full Recipe]. {{image_2}} If you want a nut-free treat, you can swap peanut butter for sun butter or soy nut butter. Both options give a tasty flavor without nuts. For sweetening, try agave nectar or brown rice syrup. These options add a nice twist and keep the bars sweet. To make these bars gluten-free, choose certified gluten-free oats. This step ensures you avoid any cross-contamination. You can also add nuts or seeds like pumpkin or sunflower seeds. These add crunch and more flavor to each bite. For a vegan twist, use maple syrup instead of honey. This keeps it plant-based and sweet. To maintain a good texture, make sure to use coconut oil along with the peanut butter. This addition helps bind the bars without milk or cream. These variations let you enjoy no-bake peanut butter bars in many ways. Don't hesitate to get creative with the flavors and ingredients! For the full recipe, check the earlier section. To keep your no-bake peanut butter bars fresh, store them in an airtight container. This will help prevent them from drying out. Place a piece of parchment paper between layers to avoid sticking. Keeping them in the fridge is best. The cold will help maintain their shape and flavor. If you follow these steps, your bars can last up to a week. You can freeze these bars for later. First, cut them into squares or rectangles. Then, wrap each piece tightly in plastic wrap. Place them in a freezer-safe bag or container. When you want to enjoy a bar, take it out and let it thaw at room temperature for about 30 minutes. You can also thaw them in the fridge overnight for a tasty treat when you’re ready. These bars can stay good at room temperature for about two days. After that, it’s best to store them in the fridge. Look for any signs that the bars have gone bad. If they smell off or have a change in color, it’s time to toss them. Keeping an eye on freshness will ensure you enjoy every bite. No-bake peanut butter bars last about a week when stored in the fridge. To keep them fresh, use an airtight container. Make sure to check for any signs of spoilage, like a change in smell or texture. Yes, you can substitute peanut butter with almond or cashew butter. These alternatives can change the taste and texture slightly. Almond butter offers a nuttier flavor, while cashew butter is creamier and milder. Both options still work well in this recipe. You can use maple syrup or agave nectar instead of honey. Both are great vegan options. If you want a low-sugar choice, consider using stevia or erythritol. Just remember, these may affect the bars' taste and texture differently. You learned how to make tasty no-bake peanut butter bars. We covered the ingredients, step-by-step preparation, tips for texture, and fun variations. Each part helps you create a perfect treat that fits your needs. With the right techniques, you can tailor these bars to your taste. Save them in a cool spot or freeze extras for later. Enjoy your yummy bars and impress your friends with your skills!](https://toastedrecipes.com/wp-content/uploads/2025/05/620f0719-0c38-4170-b778-f45290b461d5.webp)
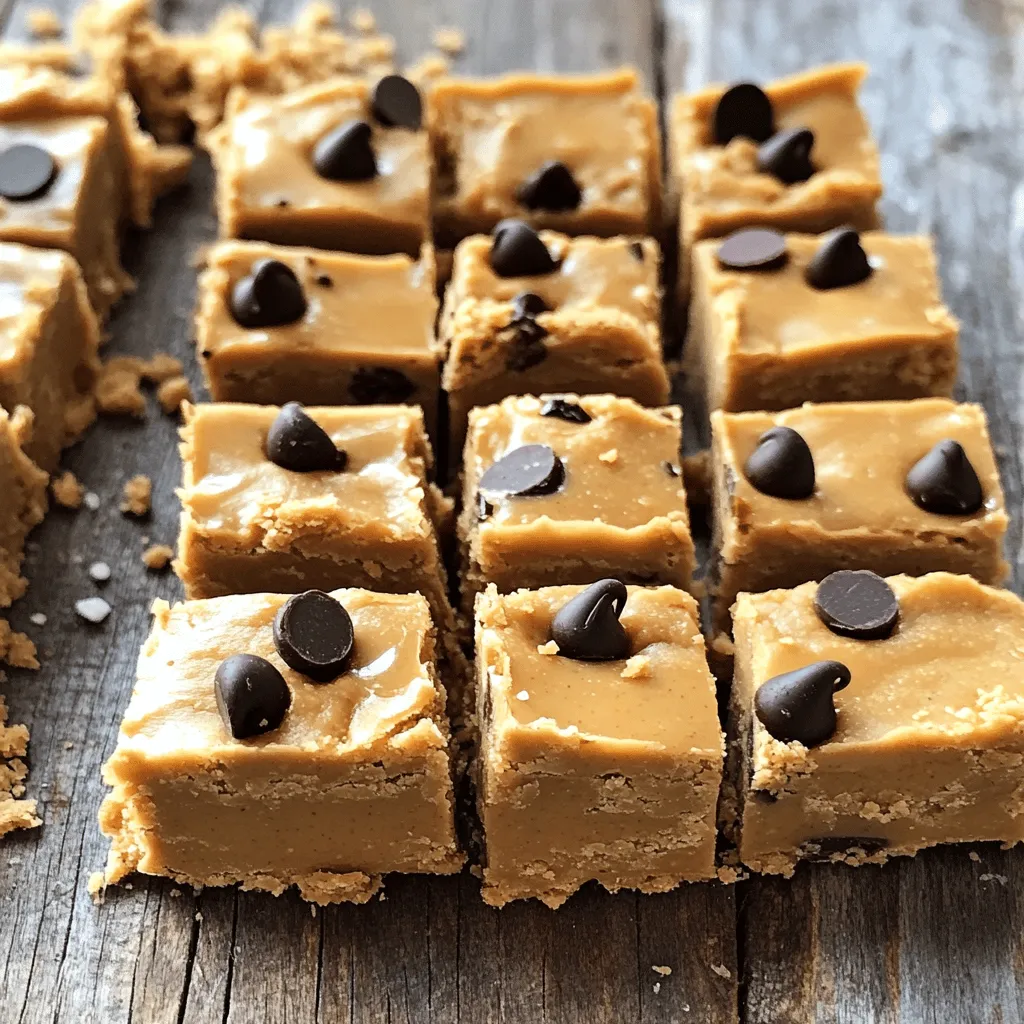
Craving a sweet and easy snack? Look no further! My No-Bake Peanut Butter Bars are a simple treat you can whip up in no time. With just a handful of ingredients, you’ll enjoy a delicious combination of creamy peanut butter and rich chocolate. These bars are perfect for a quick dessert or a boost of energy. Let’s dive into this easy recipe and satisfy that sweet tooth together!
Ingredients
The key to making no-bake peanut butter bars is using simple ingredients you might already have. Here’s what you need to gather:
– 1 cup creamy peanut butter
– 1/2 cup honey or maple syrup
– 1 cup rolled oats
– 1/2 cup coconut flour
– 1/4 cup chocolate chips
– 1 tsp vanilla extract
– A pinch of salt
These ingredients work together to create a sweet, nutty, and satisfying treat. The peanut butter adds creaminess, while the oats give it structure. You can choose between honey or maple syrup for sweetness. Coconut flour adds a nice texture, and chocolate chips provide a delightful touch. The vanilla extract and salt enhance all these flavors.
Make sure to use quality ingredients for the best taste. Fresh peanut butter, pure vanilla, and good chocolate chips can really elevate your bars. If you want to learn how to combine these ingredients into a delicious treat, check out the Full Recipe.
Step-by-Step Instructions
Preparation Overview
Start by mixing the peanut butter and honey in a medium saucepan. Heat this on low. It’s key to stir continuously. This keeps the mix smooth and prevents burning. Once it blends well, remove it from the heat. Add the vanilla extract and a pinch of salt. This adds flavor and depth.
Next, in a large bowl, mix rolled oats and coconut flour. Pour the warm peanut butter mixture over the dry ingredients. Stir well until they blend. You want a nice, even mixture.
Mixing and Setting
Now, it’s time to fold in the chocolate chips. Use a spatula to gently combine them without breaking them. This step is vital for even chocolate distribution.
Prepare an 8×8 inch baking dish by lining it with parchment paper. Leave some paper hanging over the edges. This helps with easy removal later. Transfer the mixture into the dish. Press it down firmly and evenly. This forms a solid layer, ensuring the bars hold together.
Refrigeration Process
Place the baking dish in the refrigerator. Let it chill for at least 1-2 hours. The bars need to set completely. You’ll know they are ready when they feel firm to the touch.
Once set, lift the bars out using the parchment paper. Cut them into squares or rectangles. Enjoy your tasty, no-bake peanut butter bars! For the complete recipe, check out the [Full Recipe].
Tips & Tricks
Perfecting the Texture
To get the right texture, you can adjust your ingredients. If you want thicker bars, add more coconut flour or oats. For chewier bars, use less coconut flour. You can even play with the peanut butter amount. More peanut butter makes the bars richer and softer.
Enhancing Flavor
Adding spices or extracts boosts flavor. Try cinnamon for warmth or a dash of nutmeg for depth. If you want a twist, swap chocolate chips for dried fruit or nuts. This change makes the bars even more fun.
Presentation Ideas
For serving, cut the bars into squares or rectangles. You can sprinkle some sea salt on top for a fancy touch. If you are gifting, package them in cute boxes or wrap them in parchment. Tie them with a ribbon for a personal touch. These small details make your bars stand out.
For a full recipe of these delightful treats, check out the [Full Recipe].
Variations
Nut-Free Option
If you want a nut-free treat, you can swap peanut butter for sun butter or soy nut butter. Both options give a tasty flavor without nuts. For sweetening, try agave nectar or brown rice syrup. These options add a nice twist and keep the bars sweet.
Gluten-Free Version
To make these bars gluten-free, choose certified gluten-free oats. This step ensures you avoid any cross-contamination. You can also add nuts or seeds like pumpkin or sunflower seeds. These add crunch and more flavor to each bite.
Vegan Adaptation
For a vegan twist, use maple syrup instead of honey. This keeps it plant-based and sweet. To maintain a good texture, make sure to use coconut oil along with the peanut butter. This addition helps bind the bars without milk or cream.
These variations let you enjoy no-bake peanut butter bars in many ways. Don’t hesitate to get creative with the flavors and ingredients! For the full recipe, check the earlier section.
Storage Info
Storing Leftovers
To keep your no-bake peanut butter bars fresh, store them in an airtight container. This will help prevent them from drying out. Place a piece of parchment paper between layers to avoid sticking. Keeping them in the fridge is best. The cold will help maintain their shape and flavor. If you follow these steps, your bars can last up to a week.
Freezing for Later Use
You can freeze these bars for later. First, cut them into squares or rectangles. Then, wrap each piece tightly in plastic wrap. Place them in a freezer-safe bag or container. When you want to enjoy a bar, take it out and let it thaw at room temperature for about 30 minutes. You can also thaw them in the fridge overnight for a tasty treat when you’re ready.
Shelf Life
These bars can stay good at room temperature for about two days. After that, it’s best to store them in the fridge. Look for any signs that the bars have gone bad. If they smell off or have a change in color, it’s time to toss them. Keeping an eye on freshness will ensure you enjoy every bite.
FAQs
How long do No-Bake Peanut Butter Bars last?
No-bake peanut butter bars last about a week when stored in the fridge. To keep them fresh, use an airtight container. Make sure to check for any signs of spoilage, like a change in smell or texture.
Can I substitute the peanut butter?
Yes, you can substitute peanut butter with almond or cashew butter. These alternatives can change the taste and texture slightly. Almond butter offers a nuttier flavor, while cashew butter is creamier and milder. Both options still work well in this recipe.
What can I use instead of honey?
You can use maple syrup or agave nectar instead of honey. Both are great vegan options. If you want a low-sugar choice, consider using stevia or erythritol. Just remember, these may affect the bars’ taste and texture differently.
You learned how to make tasty no-bake peanut butter bars. We covered the ingredients, step-by-step preparation, tips for texture, and fun variations. Each part helps you create a perfect treat that fits your needs. With the right techniques, you can tailor these bars to your taste. Save them in a cool spot or freeze extras for later. Enjoy your yummy bars and impress your friends with your skills!
![The key to making no-bake peanut butter bars is using simple ingredients you might already have. Here’s what you need to gather: - 1 cup creamy peanut butter - 1/2 cup honey or maple syrup - 1 cup rolled oats - 1/2 cup coconut flour - 1/4 cup chocolate chips - 1 tsp vanilla extract - A pinch of salt These ingredients work together to create a sweet, nutty, and satisfying treat. The peanut butter adds creaminess, while the oats give it structure. You can choose between honey or maple syrup for sweetness. Coconut flour adds a nice texture, and chocolate chips provide a delightful touch. The vanilla extract and salt enhance all these flavors. Make sure to use quality ingredients for the best taste. Fresh peanut butter, pure vanilla, and good chocolate chips can really elevate your bars. If you want to learn how to combine these ingredients into a delicious treat, check out the Full Recipe. Start by mixing the peanut butter and honey in a medium saucepan. Heat this on low. It’s key to stir continuously. This keeps the mix smooth and prevents burning. Once it blends well, remove it from the heat. Add the vanilla extract and a pinch of salt. This adds flavor and depth. Next, in a large bowl, mix rolled oats and coconut flour. Pour the warm peanut butter mixture over the dry ingredients. Stir well until they blend. You want a nice, even mixture. Now, it’s time to fold in the chocolate chips. Use a spatula to gently combine them without breaking them. This step is vital for even chocolate distribution. Prepare an 8x8 inch baking dish by lining it with parchment paper. Leave some paper hanging over the edges. This helps with easy removal later. Transfer the mixture into the dish. Press it down firmly and evenly. This forms a solid layer, ensuring the bars hold together. Place the baking dish in the refrigerator. Let it chill for at least 1-2 hours. The bars need to set completely. You’ll know they are ready when they feel firm to the touch. Once set, lift the bars out using the parchment paper. Cut them into squares or rectangles. Enjoy your tasty, no-bake peanut butter bars! For the complete recipe, check out the [Full Recipe]. To get the right texture, you can adjust your ingredients. If you want thicker bars, add more coconut flour or oats. For chewier bars, use less coconut flour. You can even play with the peanut butter amount. More peanut butter makes the bars richer and softer. Adding spices or extracts boosts flavor. Try cinnamon for warmth or a dash of nutmeg for depth. If you want a twist, swap chocolate chips for dried fruit or nuts. This change makes the bars even more fun. For serving, cut the bars into squares or rectangles. You can sprinkle some sea salt on top for a fancy touch. If you are gifting, package them in cute boxes or wrap them in parchment. Tie them with a ribbon for a personal touch. These small details make your bars stand out. For a full recipe of these delightful treats, check out the [Full Recipe]. {{image_2}} If you want a nut-free treat, you can swap peanut butter for sun butter or soy nut butter. Both options give a tasty flavor without nuts. For sweetening, try agave nectar or brown rice syrup. These options add a nice twist and keep the bars sweet. To make these bars gluten-free, choose certified gluten-free oats. This step ensures you avoid any cross-contamination. You can also add nuts or seeds like pumpkin or sunflower seeds. These add crunch and more flavor to each bite. For a vegan twist, use maple syrup instead of honey. This keeps it plant-based and sweet. To maintain a good texture, make sure to use coconut oil along with the peanut butter. This addition helps bind the bars without milk or cream. These variations let you enjoy no-bake peanut butter bars in many ways. Don't hesitate to get creative with the flavors and ingredients! For the full recipe, check the earlier section. To keep your no-bake peanut butter bars fresh, store them in an airtight container. This will help prevent them from drying out. Place a piece of parchment paper between layers to avoid sticking. Keeping them in the fridge is best. The cold will help maintain their shape and flavor. If you follow these steps, your bars can last up to a week. You can freeze these bars for later. First, cut them into squares or rectangles. Then, wrap each piece tightly in plastic wrap. Place them in a freezer-safe bag or container. When you want to enjoy a bar, take it out and let it thaw at room temperature for about 30 minutes. You can also thaw them in the fridge overnight for a tasty treat when you’re ready. These bars can stay good at room temperature for about two days. After that, it’s best to store them in the fridge. Look for any signs that the bars have gone bad. If they smell off or have a change in color, it’s time to toss them. Keeping an eye on freshness will ensure you enjoy every bite. No-bake peanut butter bars last about a week when stored in the fridge. To keep them fresh, use an airtight container. Make sure to check for any signs of spoilage, like a change in smell or texture. Yes, you can substitute peanut butter with almond or cashew butter. These alternatives can change the taste and texture slightly. Almond butter offers a nuttier flavor, while cashew butter is creamier and milder. Both options still work well in this recipe. You can use maple syrup or agave nectar instead of honey. Both are great vegan options. If you want a low-sugar choice, consider using stevia or erythritol. Just remember, these may affect the bars' taste and texture differently. You learned how to make tasty no-bake peanut butter bars. We covered the ingredients, step-by-step preparation, tips for texture, and fun variations. Each part helps you create a perfect treat that fits your needs. With the right techniques, you can tailor these bars to your taste. Save them in a cool spot or freeze extras for later. Enjoy your yummy bars and impress your friends with your skills!](https://toastedrecipes.com/wp-content/uploads/2025/05/620f0719-0c38-4170-b778-f45290b461d5-300x300.webp)